Makings of a Tarsoly belt bag from Birka Grave BJ 904 - Fittings
Posted on 2024-12-13Since a few years, I’ve been meaning to make a reproduction of the Tarsoly belt bag found in the Birka grave BJ 904. The fittings of this bag is one of the main reasons why I want to make this bag in particular. My name is RefR, the Old Norse word for “fox”, and there are fox-head shaped fittings on this bag. Clearly, it’s meant to be.
In my previous post on this topic, I discussed the bag in general, and talked briefly about my plans for its design. In this post, I will discuss the fittings themselves and the challenges that acquiring them pose in more depth.
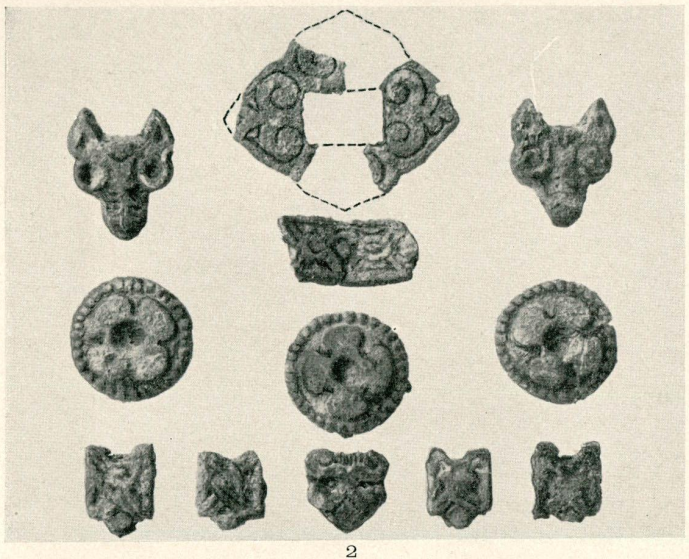
The main challenge in acquiring the fittings for this bag is quite simple: to the best of my knowledge, they are not manufactured and sold by anyone, as far as I can tell. I’ve done my best to search for them, but most are simply not available for purchase. The exceptions are the animal heads, but the versions I have found are not to scale, but slightly larger than the originals. All in all, this means that to make the bag of my dreams, I need to cast the fittings in bronze myself. Having never done any form of metal casting before, all I can say is “challenge accepted”.
The fittings are discussed in Birka I - Die Gräben - Text (Arbman, 1943), where Arbman states the following:
Bronzebeschläge eines Ledergegenstandes (Riemens?) (303: 4), Taf. 91:2, nämlich: ein grosser vierseitiger Beschlag mit rechteckigem Mittelloch und Palmetten in den Ecken, Breite etwa 3,2 cm, 2 tierkopfförmige Beschläge, Länge 1,8 cm, 3 runde mit nierenförmigen Blättern, Durchm. 1,8 cm, ein fast herzförmiger, unten in der Mitte, mit einer Palmette, Länge 1,2 cm, 6 kleine vierseitige Beschläge, davon 2 durch Grünspan zusammengehalten, Taf. 91:2 zweite Reihe von oben, mit einfachem Bandgeflecht, Länge 1,2 cm, alle Beschläge auf der Rückseite mit gegossenen Stiften, die durch das Leder getrieben und deren Spitzen umgebogen waren; zusammen mit den Beschlägen lagen wollene Stoffreste, siehe Birka III, S.70;
Bronze fittings of a leather object (strap?) (303: 4), plate 91:2, namely: a large four-sided fitting with a rectangular central hole and palmettes in the corners, width about 3.2 cm, 2 animal head-shaped fittings, length 1.8 cm, 3 round with kidney-shaped leaves, diam. 1.8 cm, an almost heart-shaped one, at the bottom in the middle, with a palmette, length 1.2 cm, 6 small four-sided fittings, 2 of which are held together by verdigris, plate 91:2 second row from the top, with simple ribbon braid, length 1.2 cm, all fittings on the back with cast pins driven through the leather and the tips of which were bent over; There were scraps of woolen fabric along with the fittings, see Birka III, p.70;
This tells us that the grave contains three animal heads1, six four-sided fittings with a ribbon pattern, three roundels, and one large fitting with a hole in the middle. The report only talks about the length (or diameter) of each fitting, unfortunately. The fittings are very clearly documented in Birka I - Die Gräben - Tafeln (Arbman, 1940), however, so the missing measurements can be extrapolated from this figure.
To do so, I took a screenshot of the figure from the report and marked each known size. I then checked how many pixels each known size was, and used this to calculate the average number of pixels/millimeter. This seemed to be quite consistent with the individual measurements of each piece, telling me that the fittings in the figure are to scale, relative to each other. From this, I used the average pixels/millimeter-value to extrapolate the width of each fitting as well. The results are shown in the table below, with original measurements in bold.
| Item | Width (px) | Length (px) | Width (mm) | Length (mm) |
|---|---|---|---|---|
| Fox head L | 156 | 193 | 15 | 18 |
| Fox head R | 155 | 189 | 15 | 18 |
| Bear head | 143 | 122 | 14 | 12 |
| Squares | 95 | 119 | 9 | 12 |
| Roundels | N/A | 182 | N/A | 18 |
| Hole cover | 346 | 294 | 32 | 28 |
With the sizes of all fittings known, the next step was to make the originals that will be used for casting. The originals was made from wax, and originally I had planned to do it in beeswax. However, since I planned to sand cast the fittings, I was advised by my laurel Master John Smith of Silverstone to not use beeswax, as it is too soft and will likely get squished when packing the sand. Luckily, I had blue carving wax at home (as one does), and so I used that.
The blue carving wax was quite a bit tricker to work with at first, mostly because I had to do subtractive sculpting. In other words, I had to shape the wax originals by removing material, rather than by adding it. I’m not really used to working this way, but I got the hang of it after a while, and managed to put together the wax originals I needed. I used a selection different tools to carve the fittings, including wax carving tools, the cheapest needle files I could find, and very narrow and sharp pokey-things that I think may be dental cleaning tools. A small “blow torch” was also quite indispensable, as it allowed me to “erase” mistakes and smooth out the surface of the was quite efficiently.
I tried to make the wax originals as close to the original size as possible, but since the fittings are from the 10th century and they didn’t have vernier calipers back then, I did my best to put my perfectionism aside if the size was off by a few 10ths of a millimeter. I also made an active decision to not measure the features of the fittings or do any kind of tracing, but do it freehand. It probably took longer than necessary for that reason, but it feels more “authentic” and the wax originals turned out really well regardless.
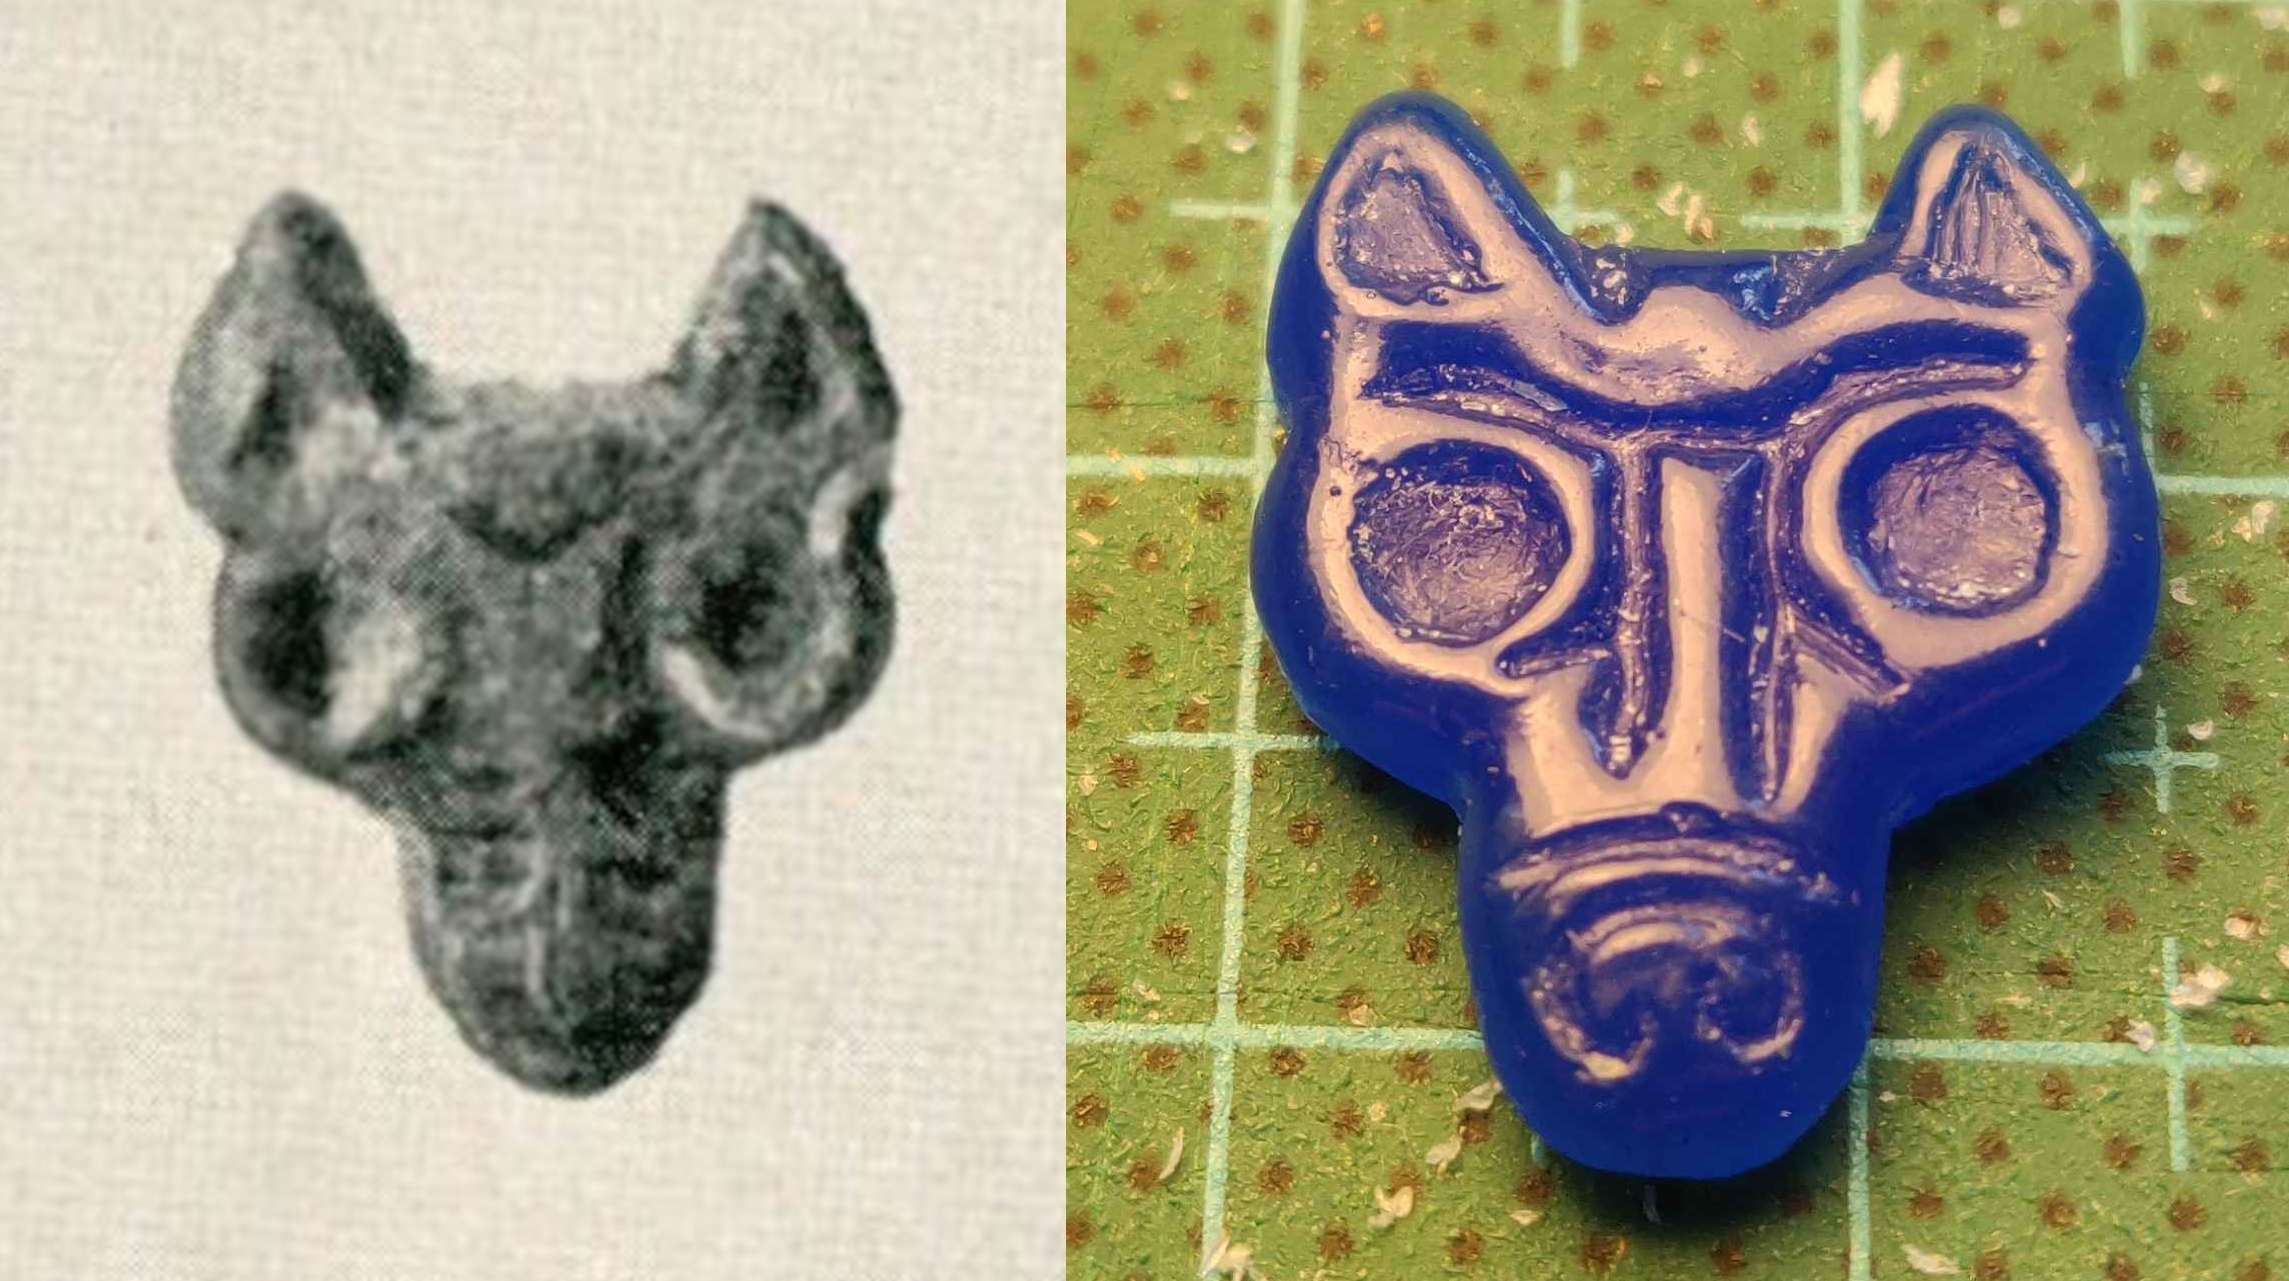
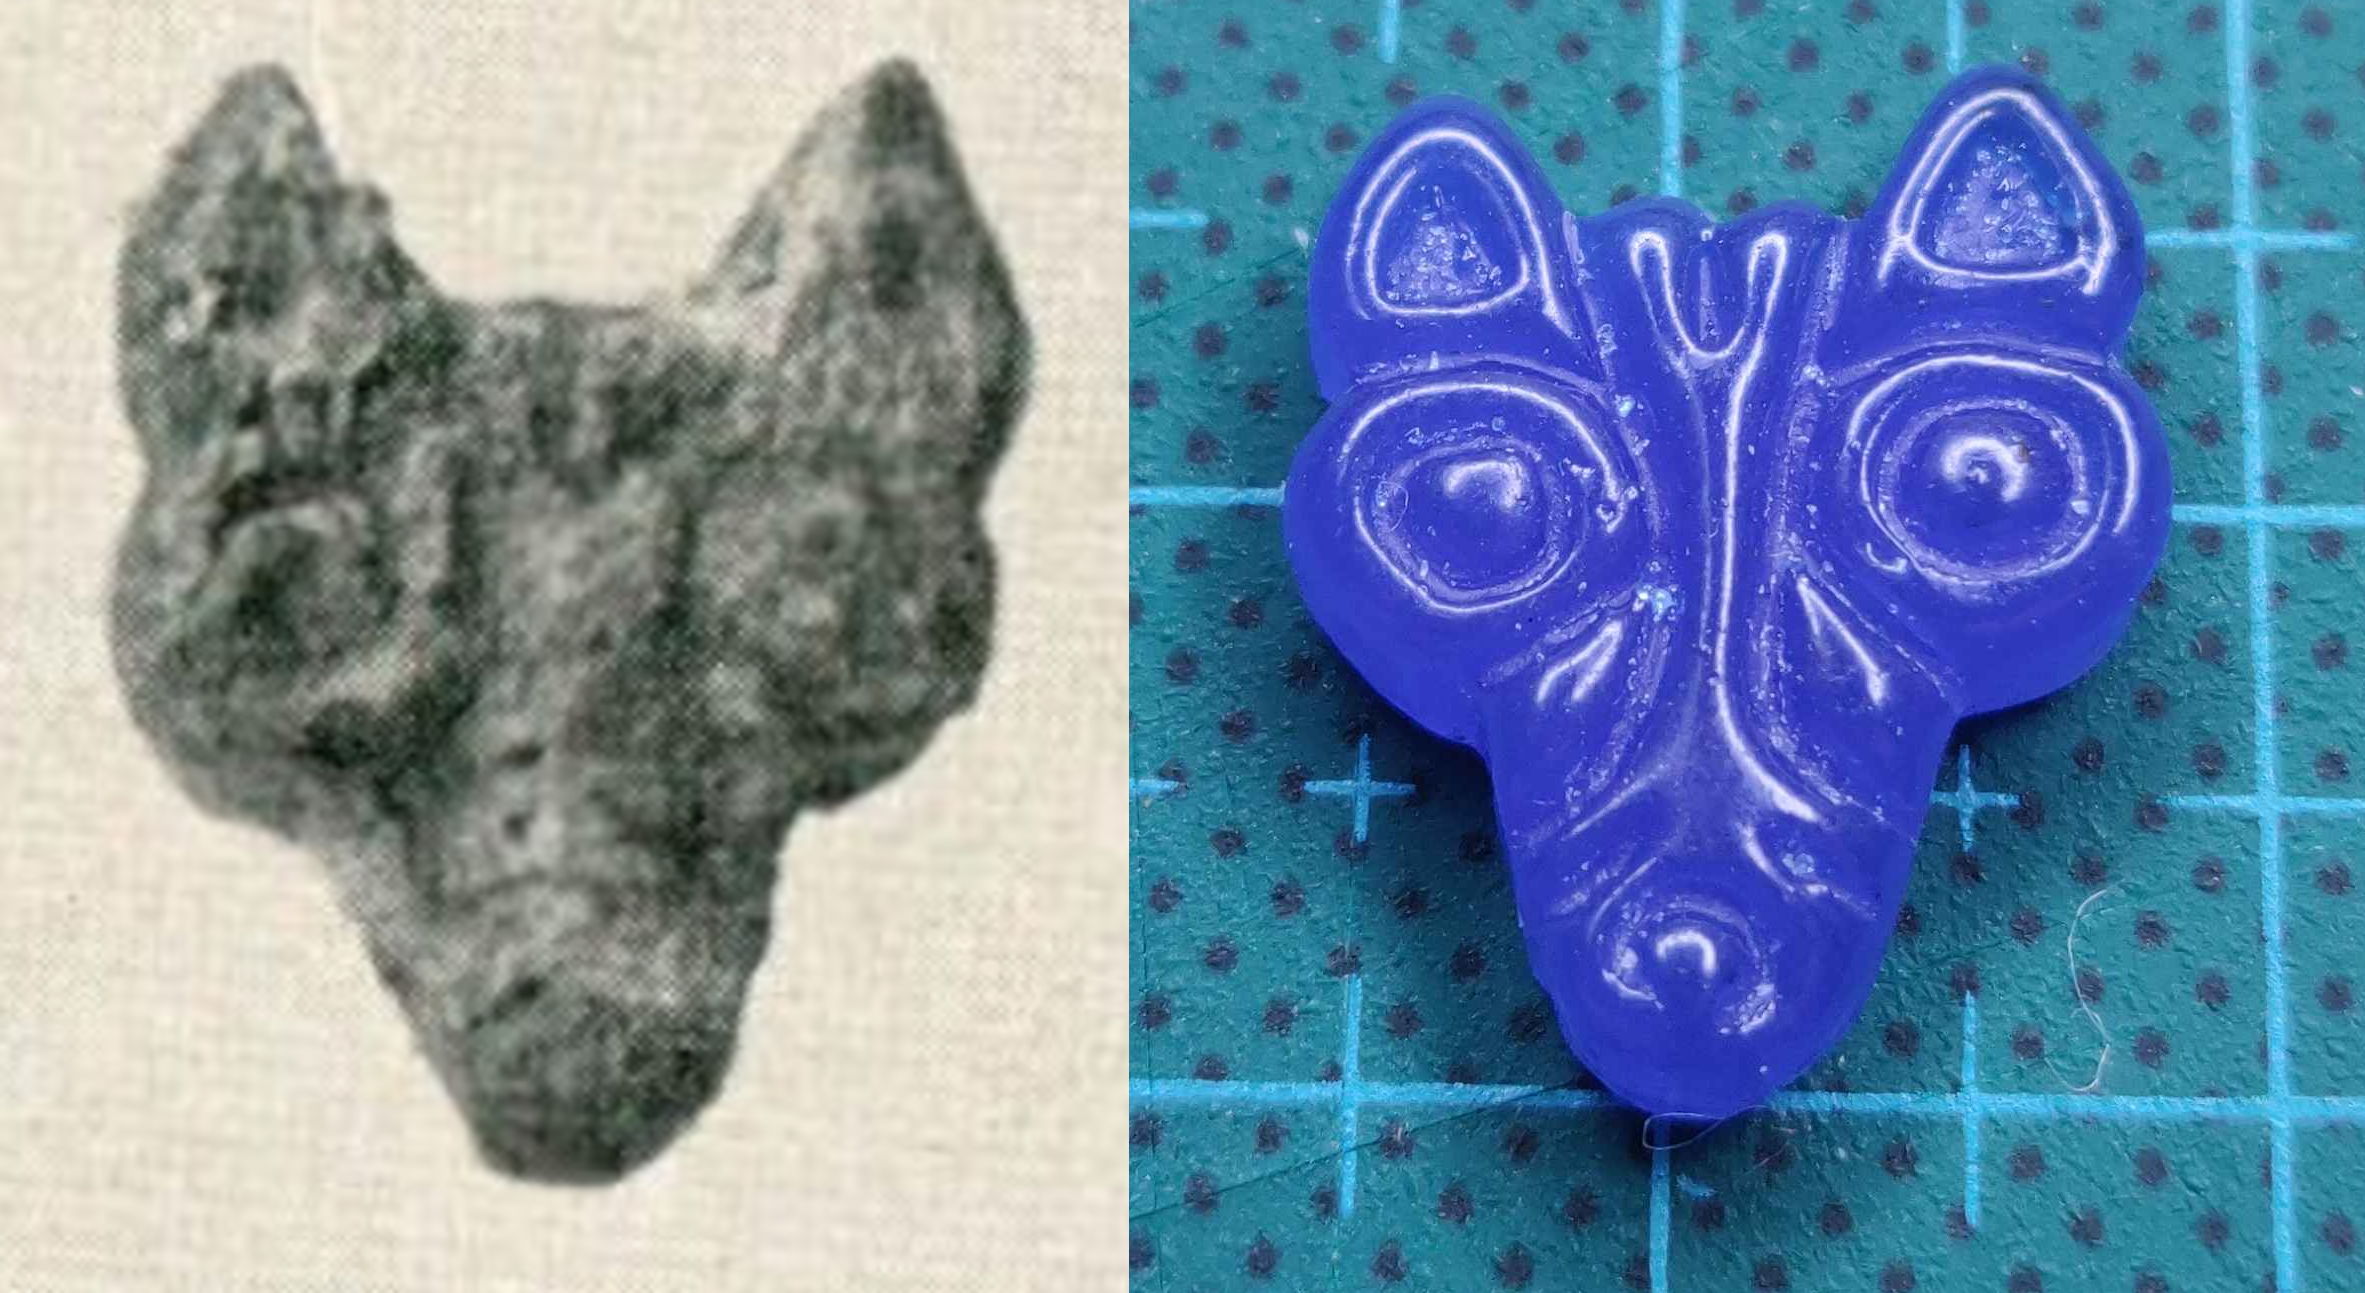
Below are the wax originals made for the two fox heads, compared to the figure shown in Birka I - Die Gräbern - Tafeln. (Yes, I know the lighting in the photos are very different).
I actually ended up making one piece that was not found in the grave - a strap end, matching the square strap fittings. Originally I didn’t intend to do so, but the strap fittings being “puzzle pieces”, I felt that it would likely feel a bit abrupt and “unfinished” if I didn’t have a strap end. It may well be that a strap end did exist, but that it is lost to time and corrosion, especially considering that bags with similar strap fittings (such as the Röstahammar bag) do have strap ends.
Making the fittings took quite a long time. I started some time in the spring of 2024, and had them all finished by the middle of September, as the original plan was that me and Master John were to cast them then. Unfortunately, the casting had to be postponed until the early December instead.
Which brings us to earlier this week. This past weekend I attended the Styringheim Lucia feast, and after that I stayed in Styringheim for a few days extra to cast some bronze. Before actually getting to the casting, there was one more thing that needed to be sorted out though: what actually is bronze?
In general, “what is bronze?” is a pretty straight forward question to answer: it is an alloy of copper and mostly tin, where the tin content is usually around 12% by weight. However, earlier this year, after imbibing a glass or three at an event earlier this year, me and Master John got talking about the origin of the blast furnace, metallurgy, and historical iron mining, as one does. During this discussion, Master John mentioned that the “bronze” that was used in iron age Scandinavia was mostly what we’d call “brass” today, in large part because we don’t have a natural source of tin up here in the north. We do have zinc though, which is what is mixed with copper to make brass. He sent me the paper that discussed the topic, and lo and behold - very few of the surveyed objects were made from bronze2 (Nord, Ullén, & Tronner, 2020). I did some analysis of the results presented by Nord et al., and found that the objects that I considered most relevant to my project seemed to average out at about a copper to zinc ratio of about 85:15. This is also the alloy that we ended up casting the fittings in.
The Castening
Now, finally, everything was in place - the wax originals were made, the alloy to use was decided, me and Master John were in the same place so he could make sure I didn’t accidentally turn myself into Viserys.
Following the principle of “monkey see, monkey do”, Master John started off showing the ropes and I tried to follow.
When sand casting, a frame (called a flask) is used to hold oil-bound sand, into which an impression of the original is made. The flask is split in two, one upper and one lower half, with the impression and any furniture (i.e., canals for the molten metal and gasses) being located at the intersection of the two halves. We filled the flasks in a way that put the wax originals flush with the sand of the bottom half, as this helps force the metal into the mould and since the seam is then located right at the bottom of the object, rather than in the middle.
To fill the flasks, the bottom half of the flask was placed upside down with the wax originals placed face up within it. Casting sand was then sifted onto the originals to get rid of clumps, and then compressed. To avoid disturbing the originals and ensuring that the impression became as sharp as possible, the sand was compressed lightly at first, then progressively harder until it couldn’t be compressed further. After the first layer, the bottom half was filled with sand to act as support for the first layer. The bottom half of the flask was then flipped right side up, dusted with chalk to ensure the flask could be split again, and then the second half was placed on top and filled with sand in the same way as the first half.
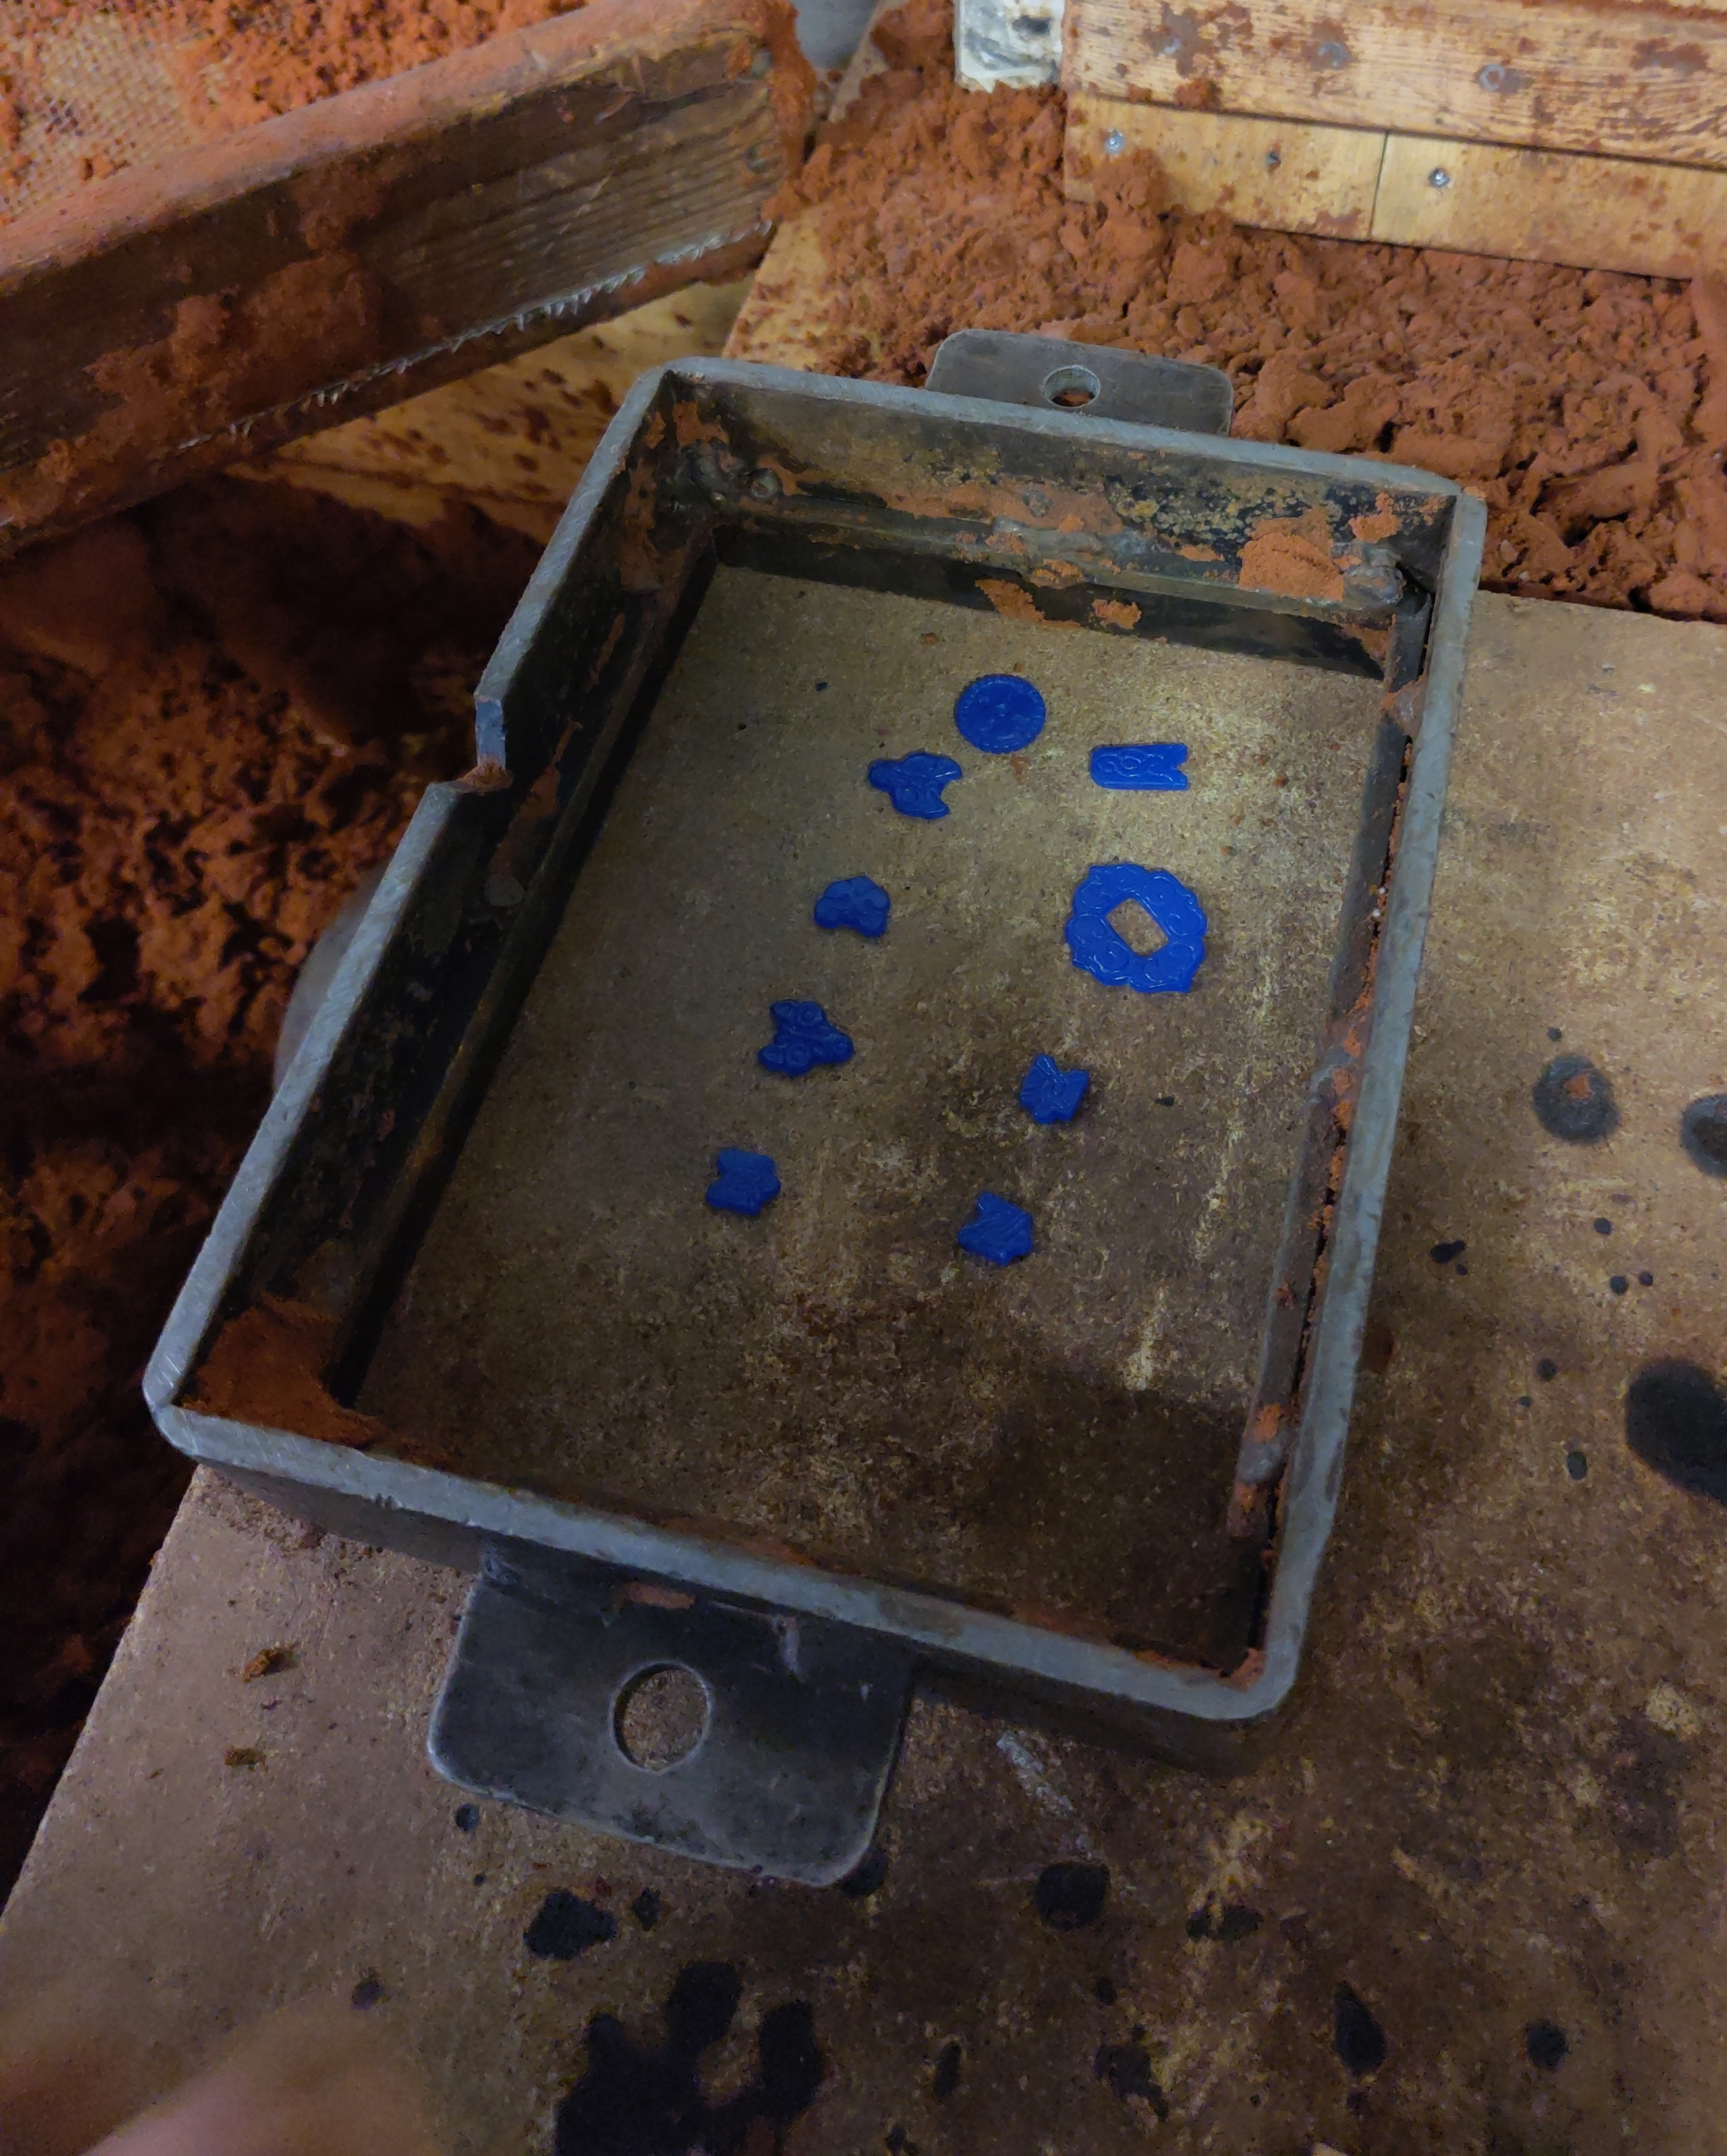
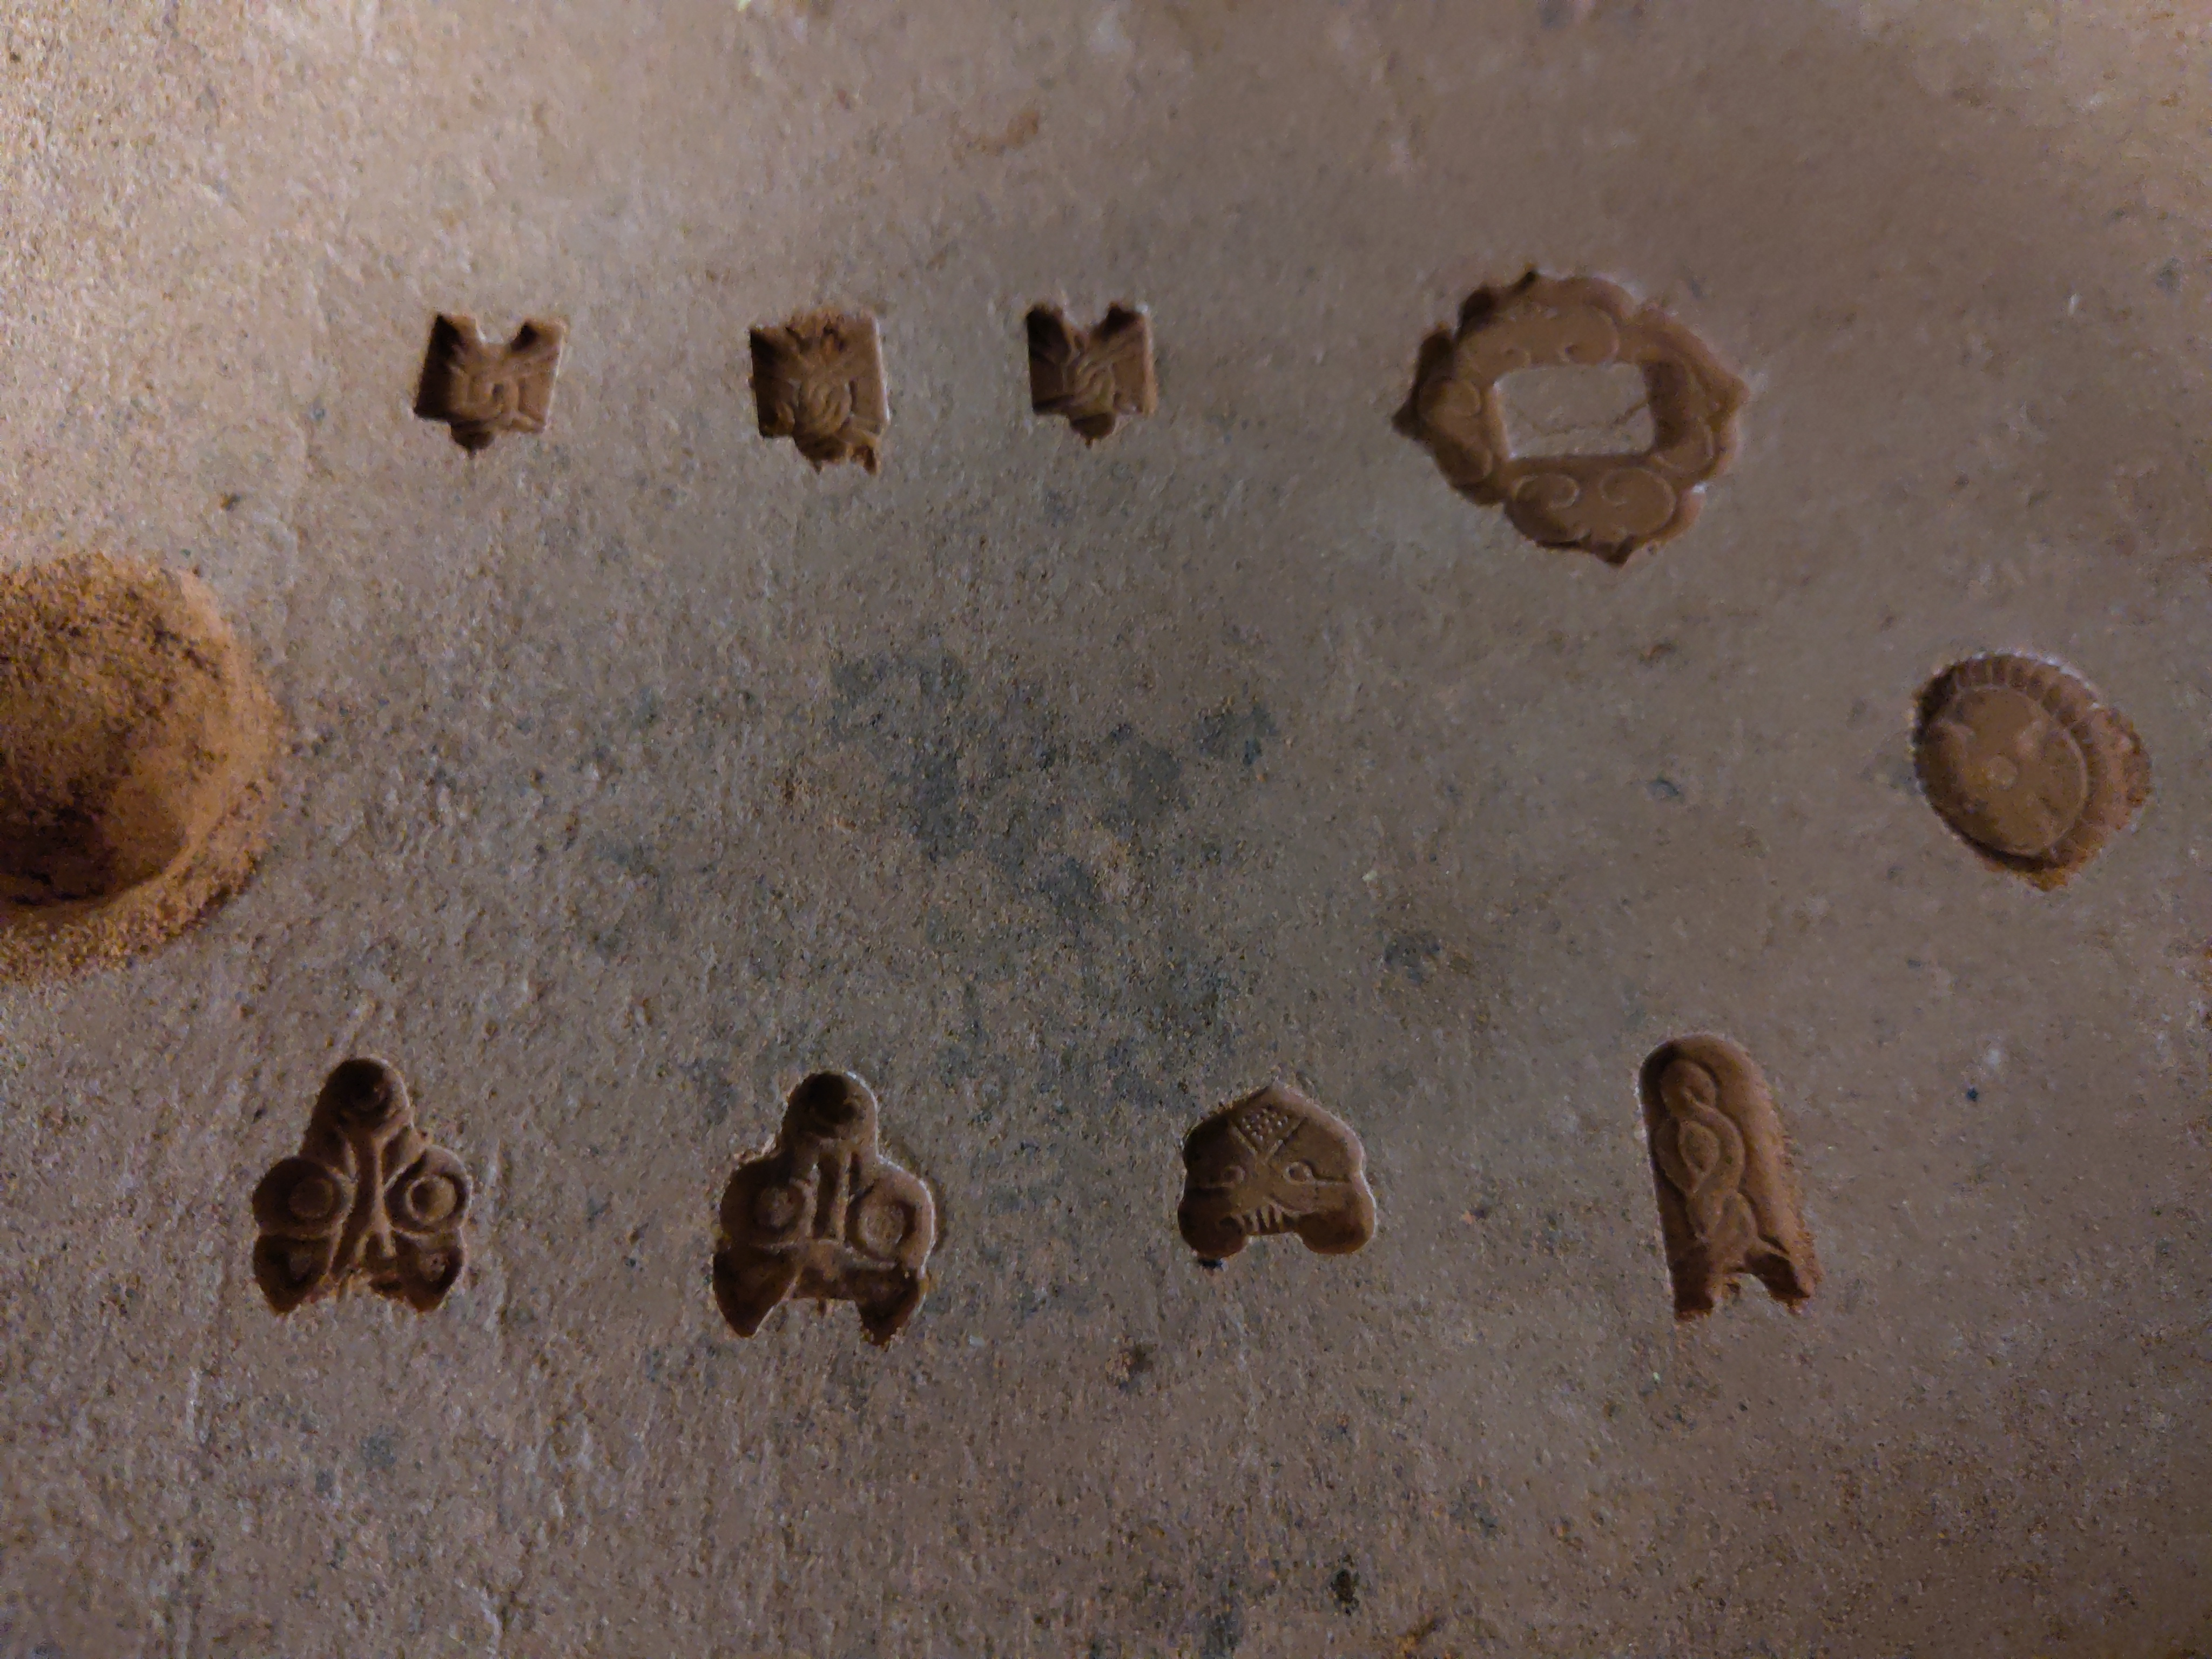
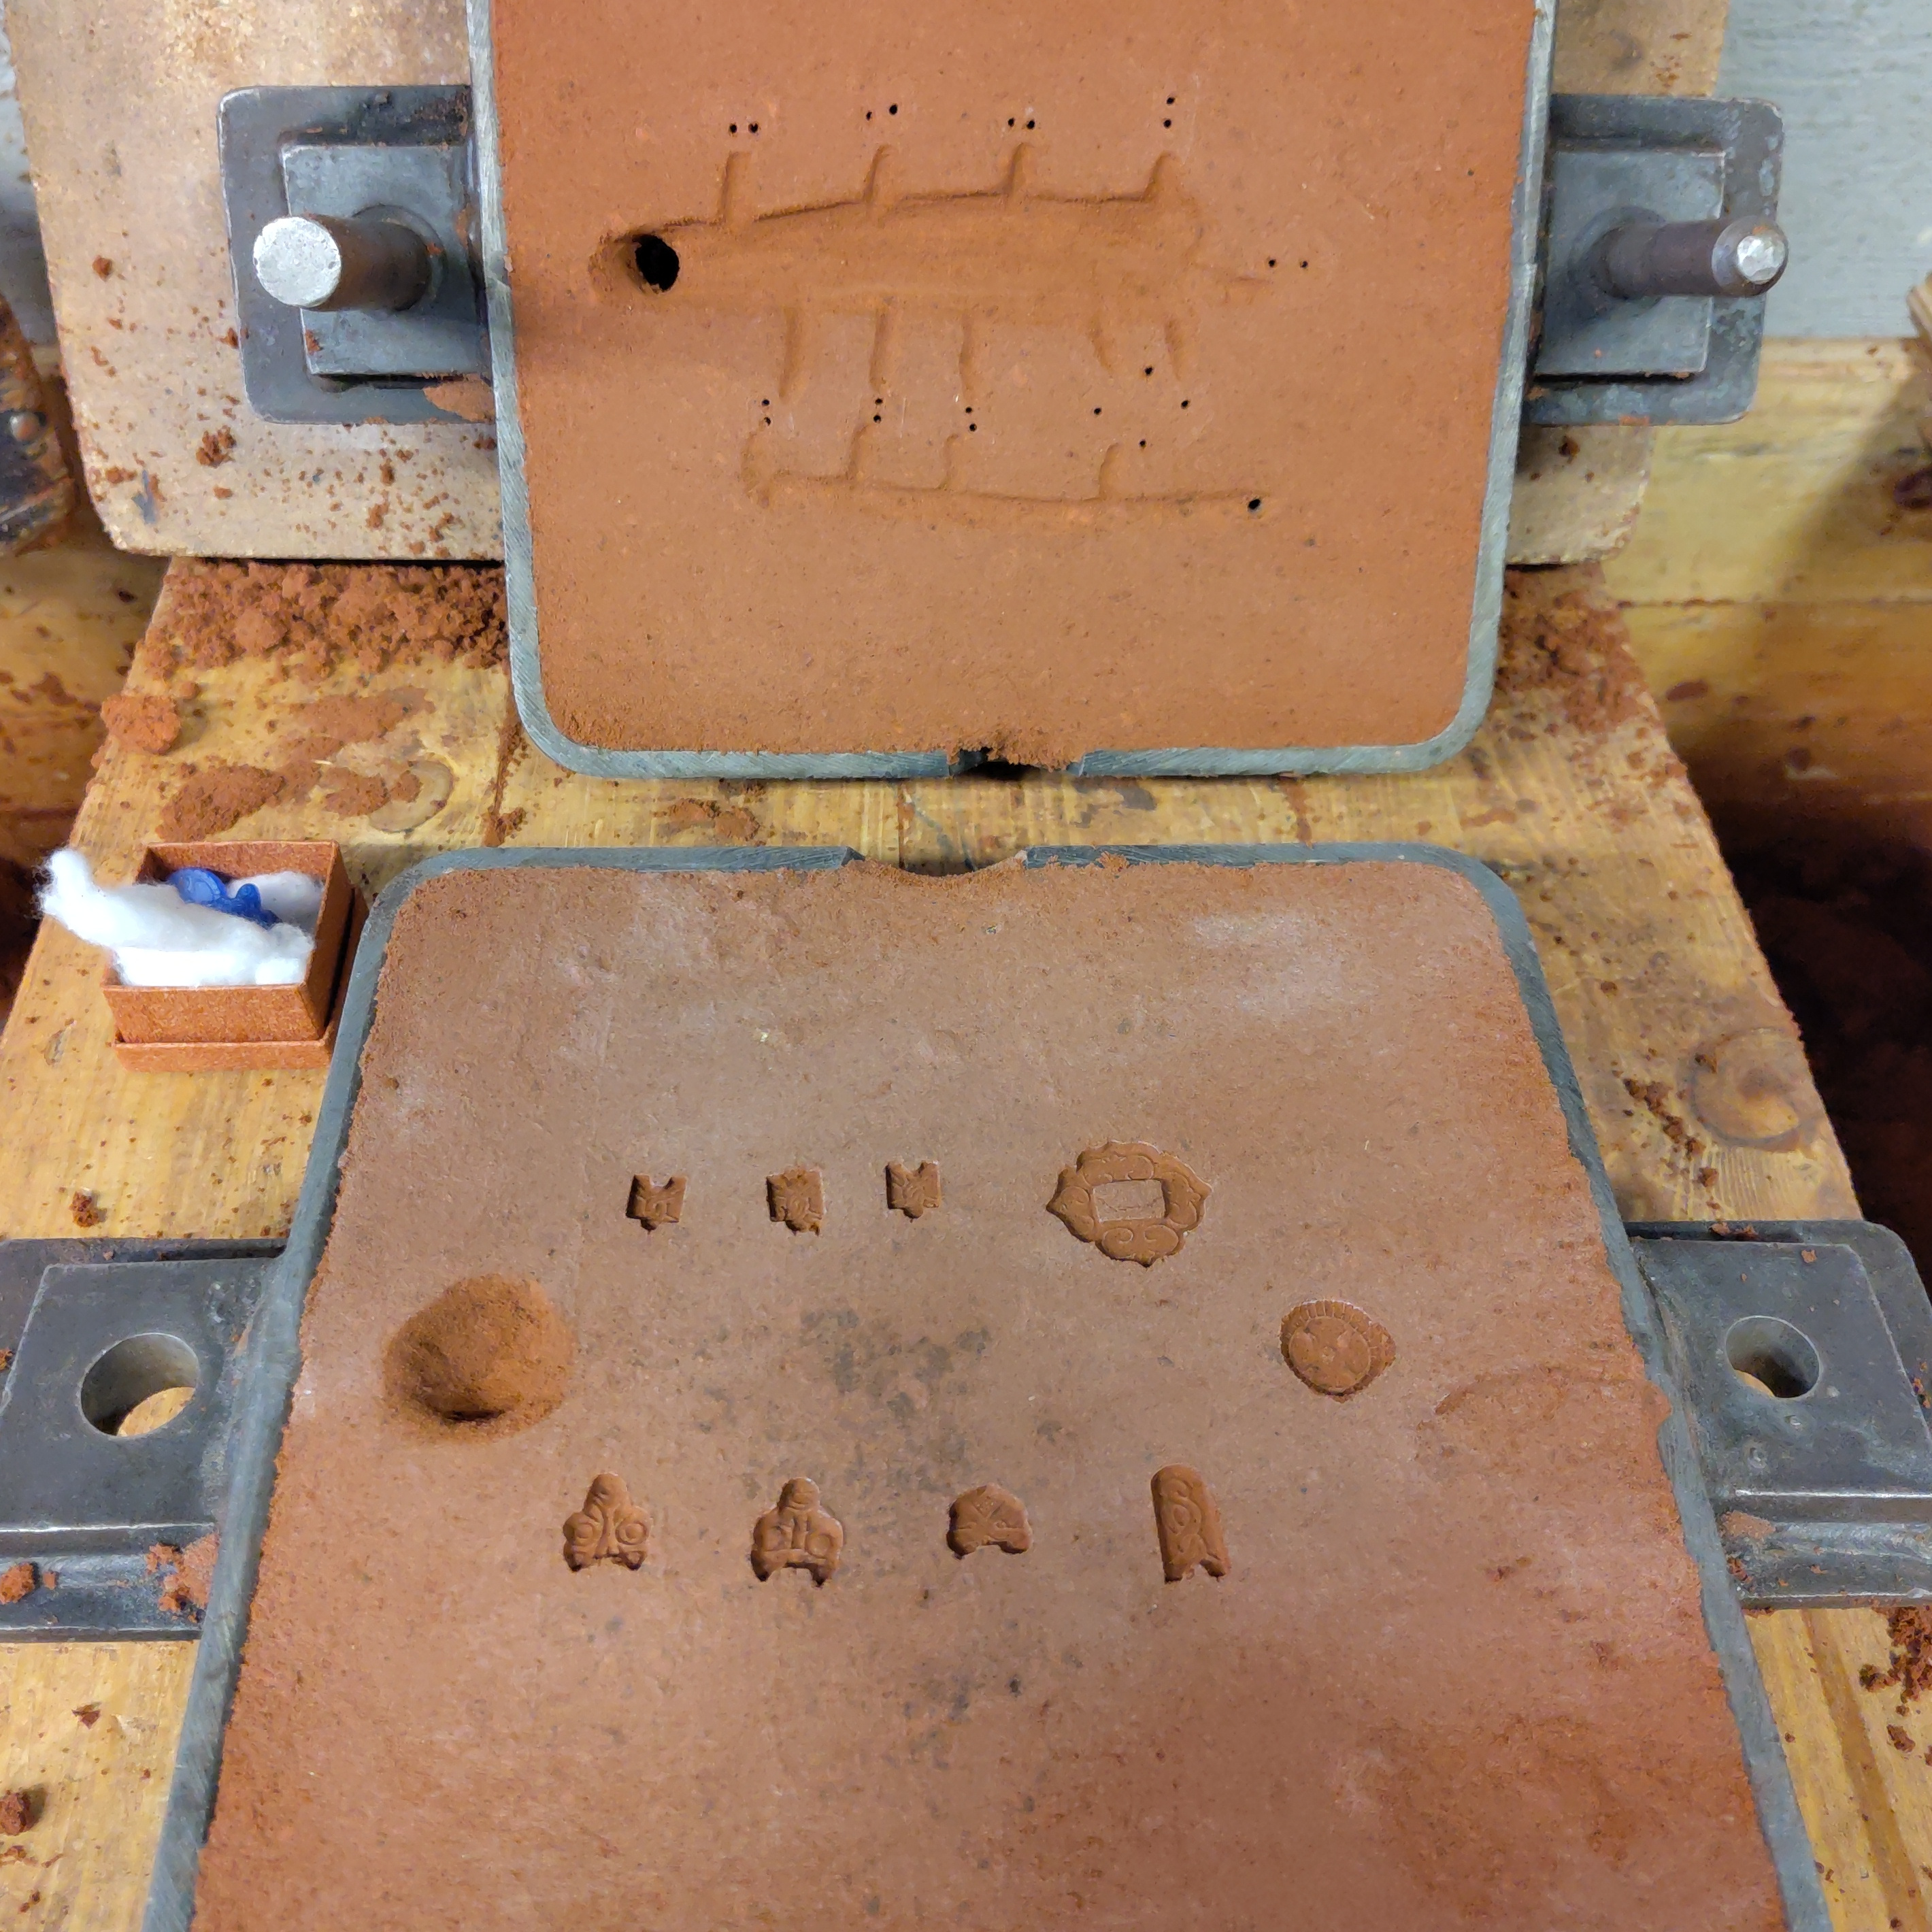
Once done, the halves were separated again, and the wax originals were carefully pulled out from the sand. The furniture, including a metal inlet and gas outlets, were added to the top half of the flask by simply carving it from the compacted sand. We also added a “pit” in the sand of the bottom half right below the inlet, to give any turbulence a place to stay and hopefully avoiding turbulence in the rest of the mould. All in all, we made four flasks, casting two at a time. Once done, the halves were put together, and the brass was melted.
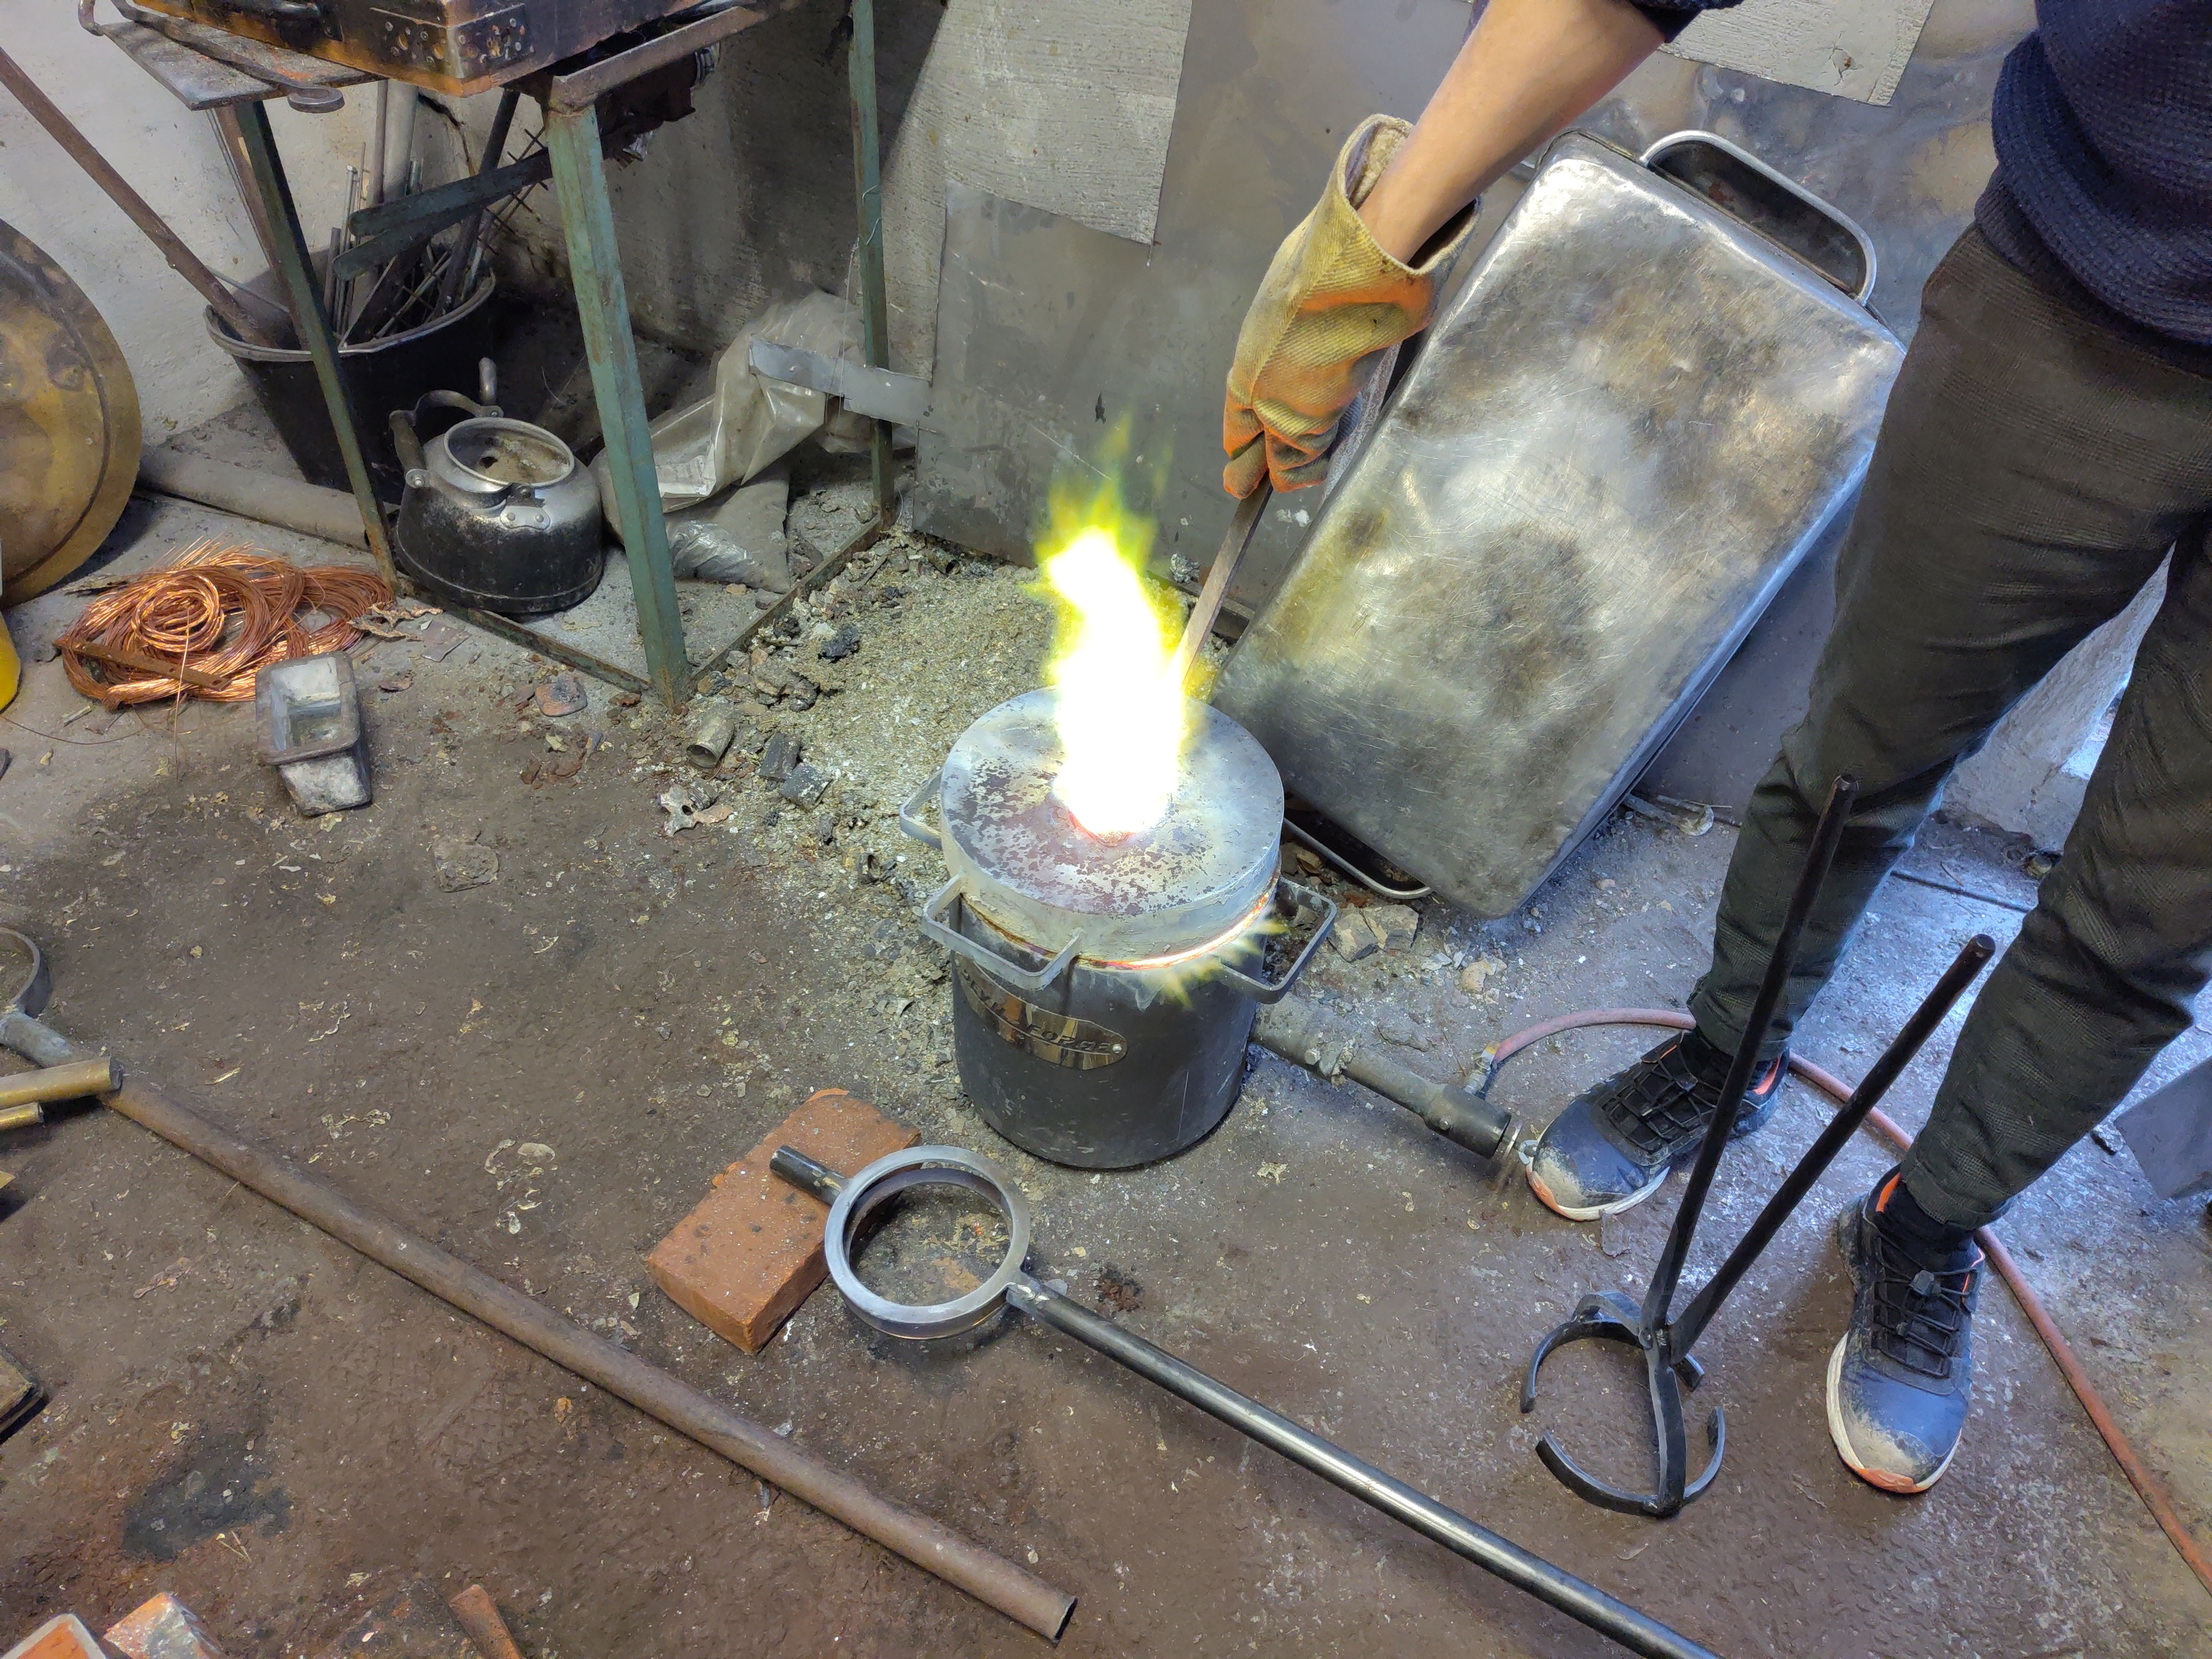
The metal was added to a crucible and placed into a liquid petroleum gas (LPG) fuelled furnace, where it was left to get toasty for 30ish minutes. Once the metal was completely molten, some slag binder was added to the crucible, and the slag was removed. The crucible was then lifted out of the furnace, and the molten metal poured into the moulds. With that, all we could do was wait for the metal to cool down and hope that the casts turned out fine..
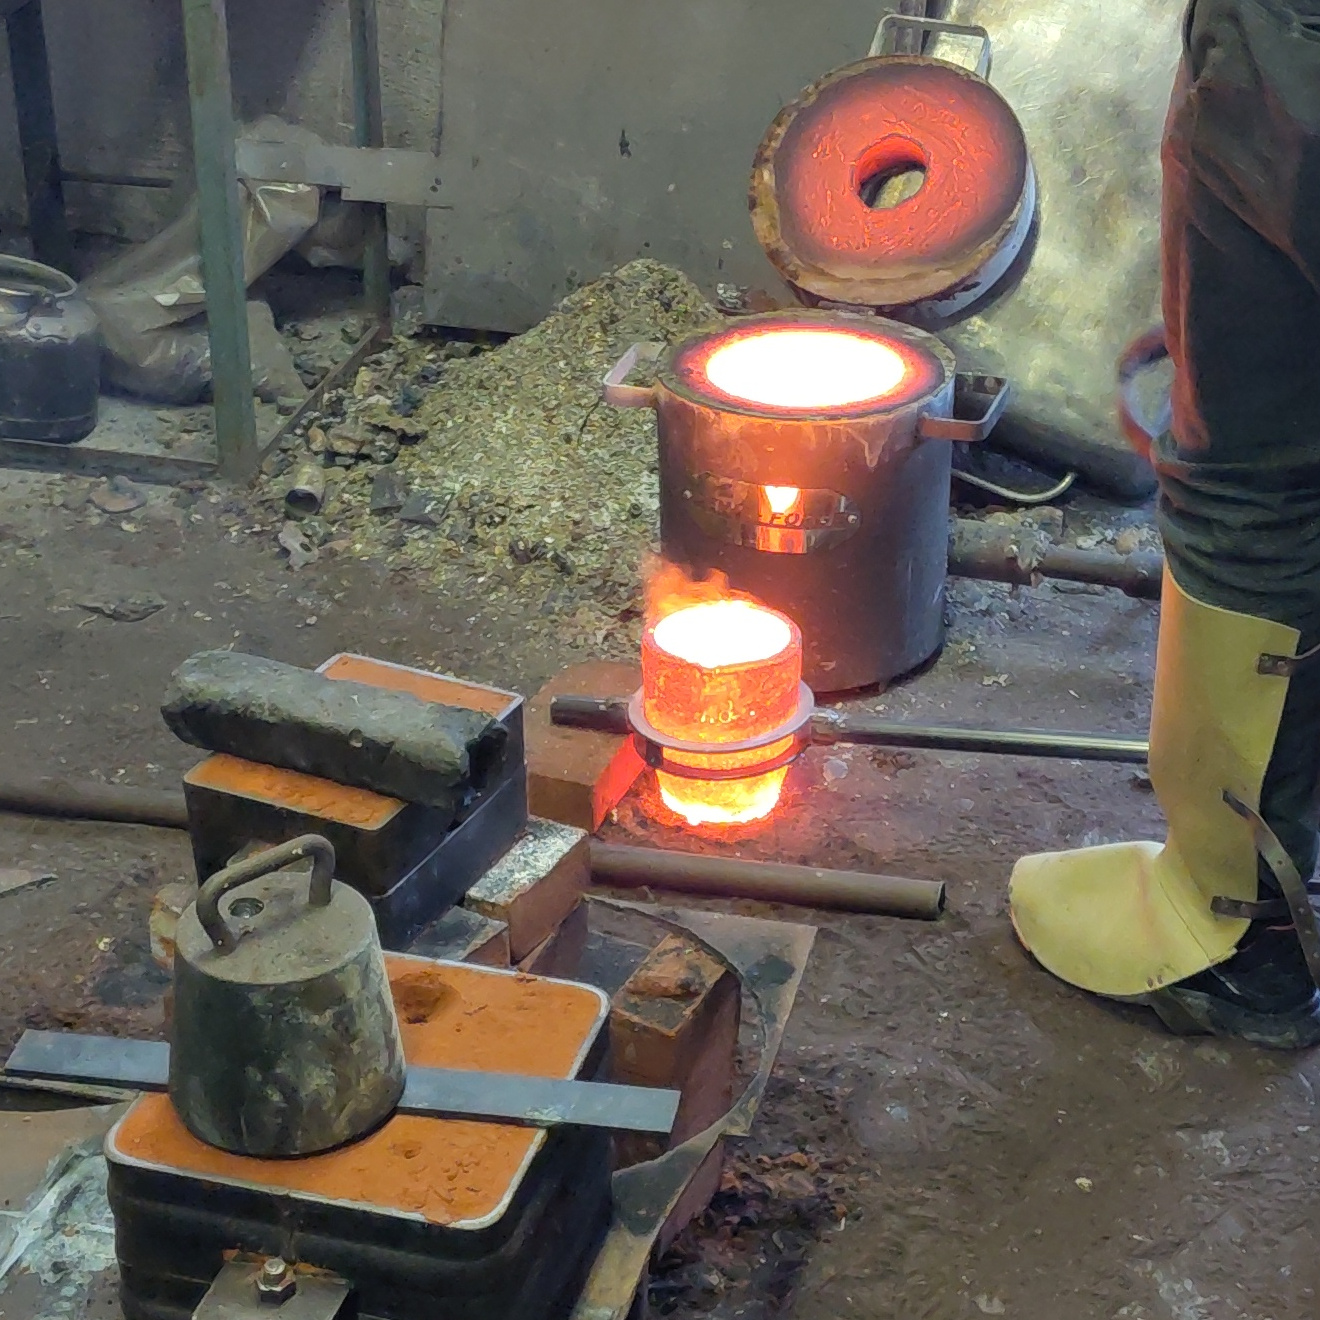
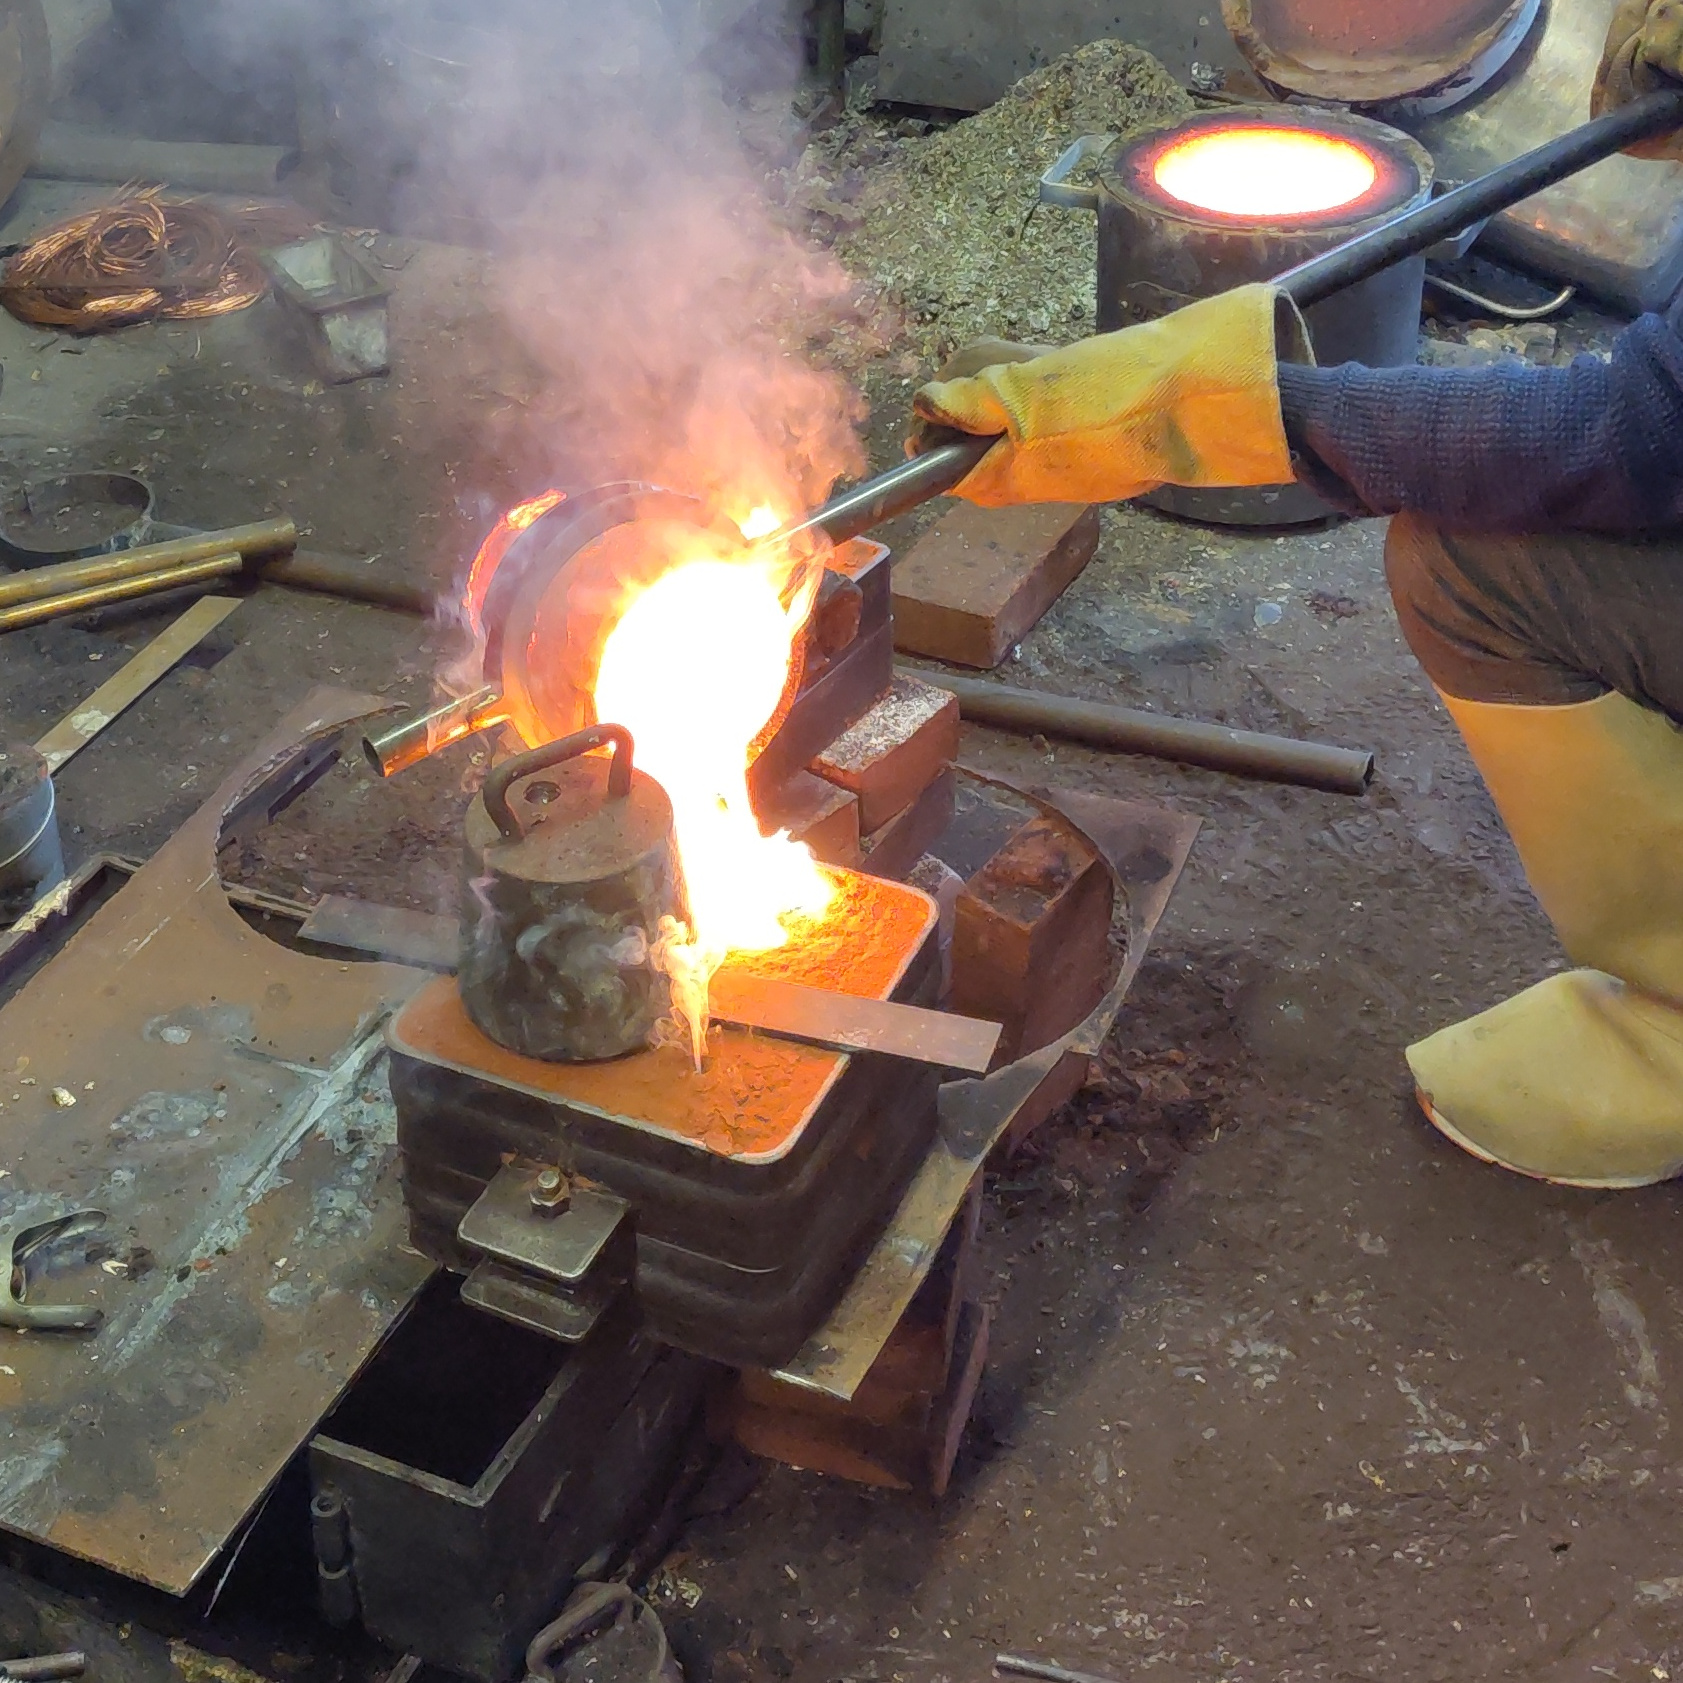
Which they did! Some better than others, but in general I personally think it went very well! I have all the pieces I need, and spares for several of the fittings, which is fantastic! The one exception is the strap fittings, which I don’t have quite enough of, mostly because I need quite a few.
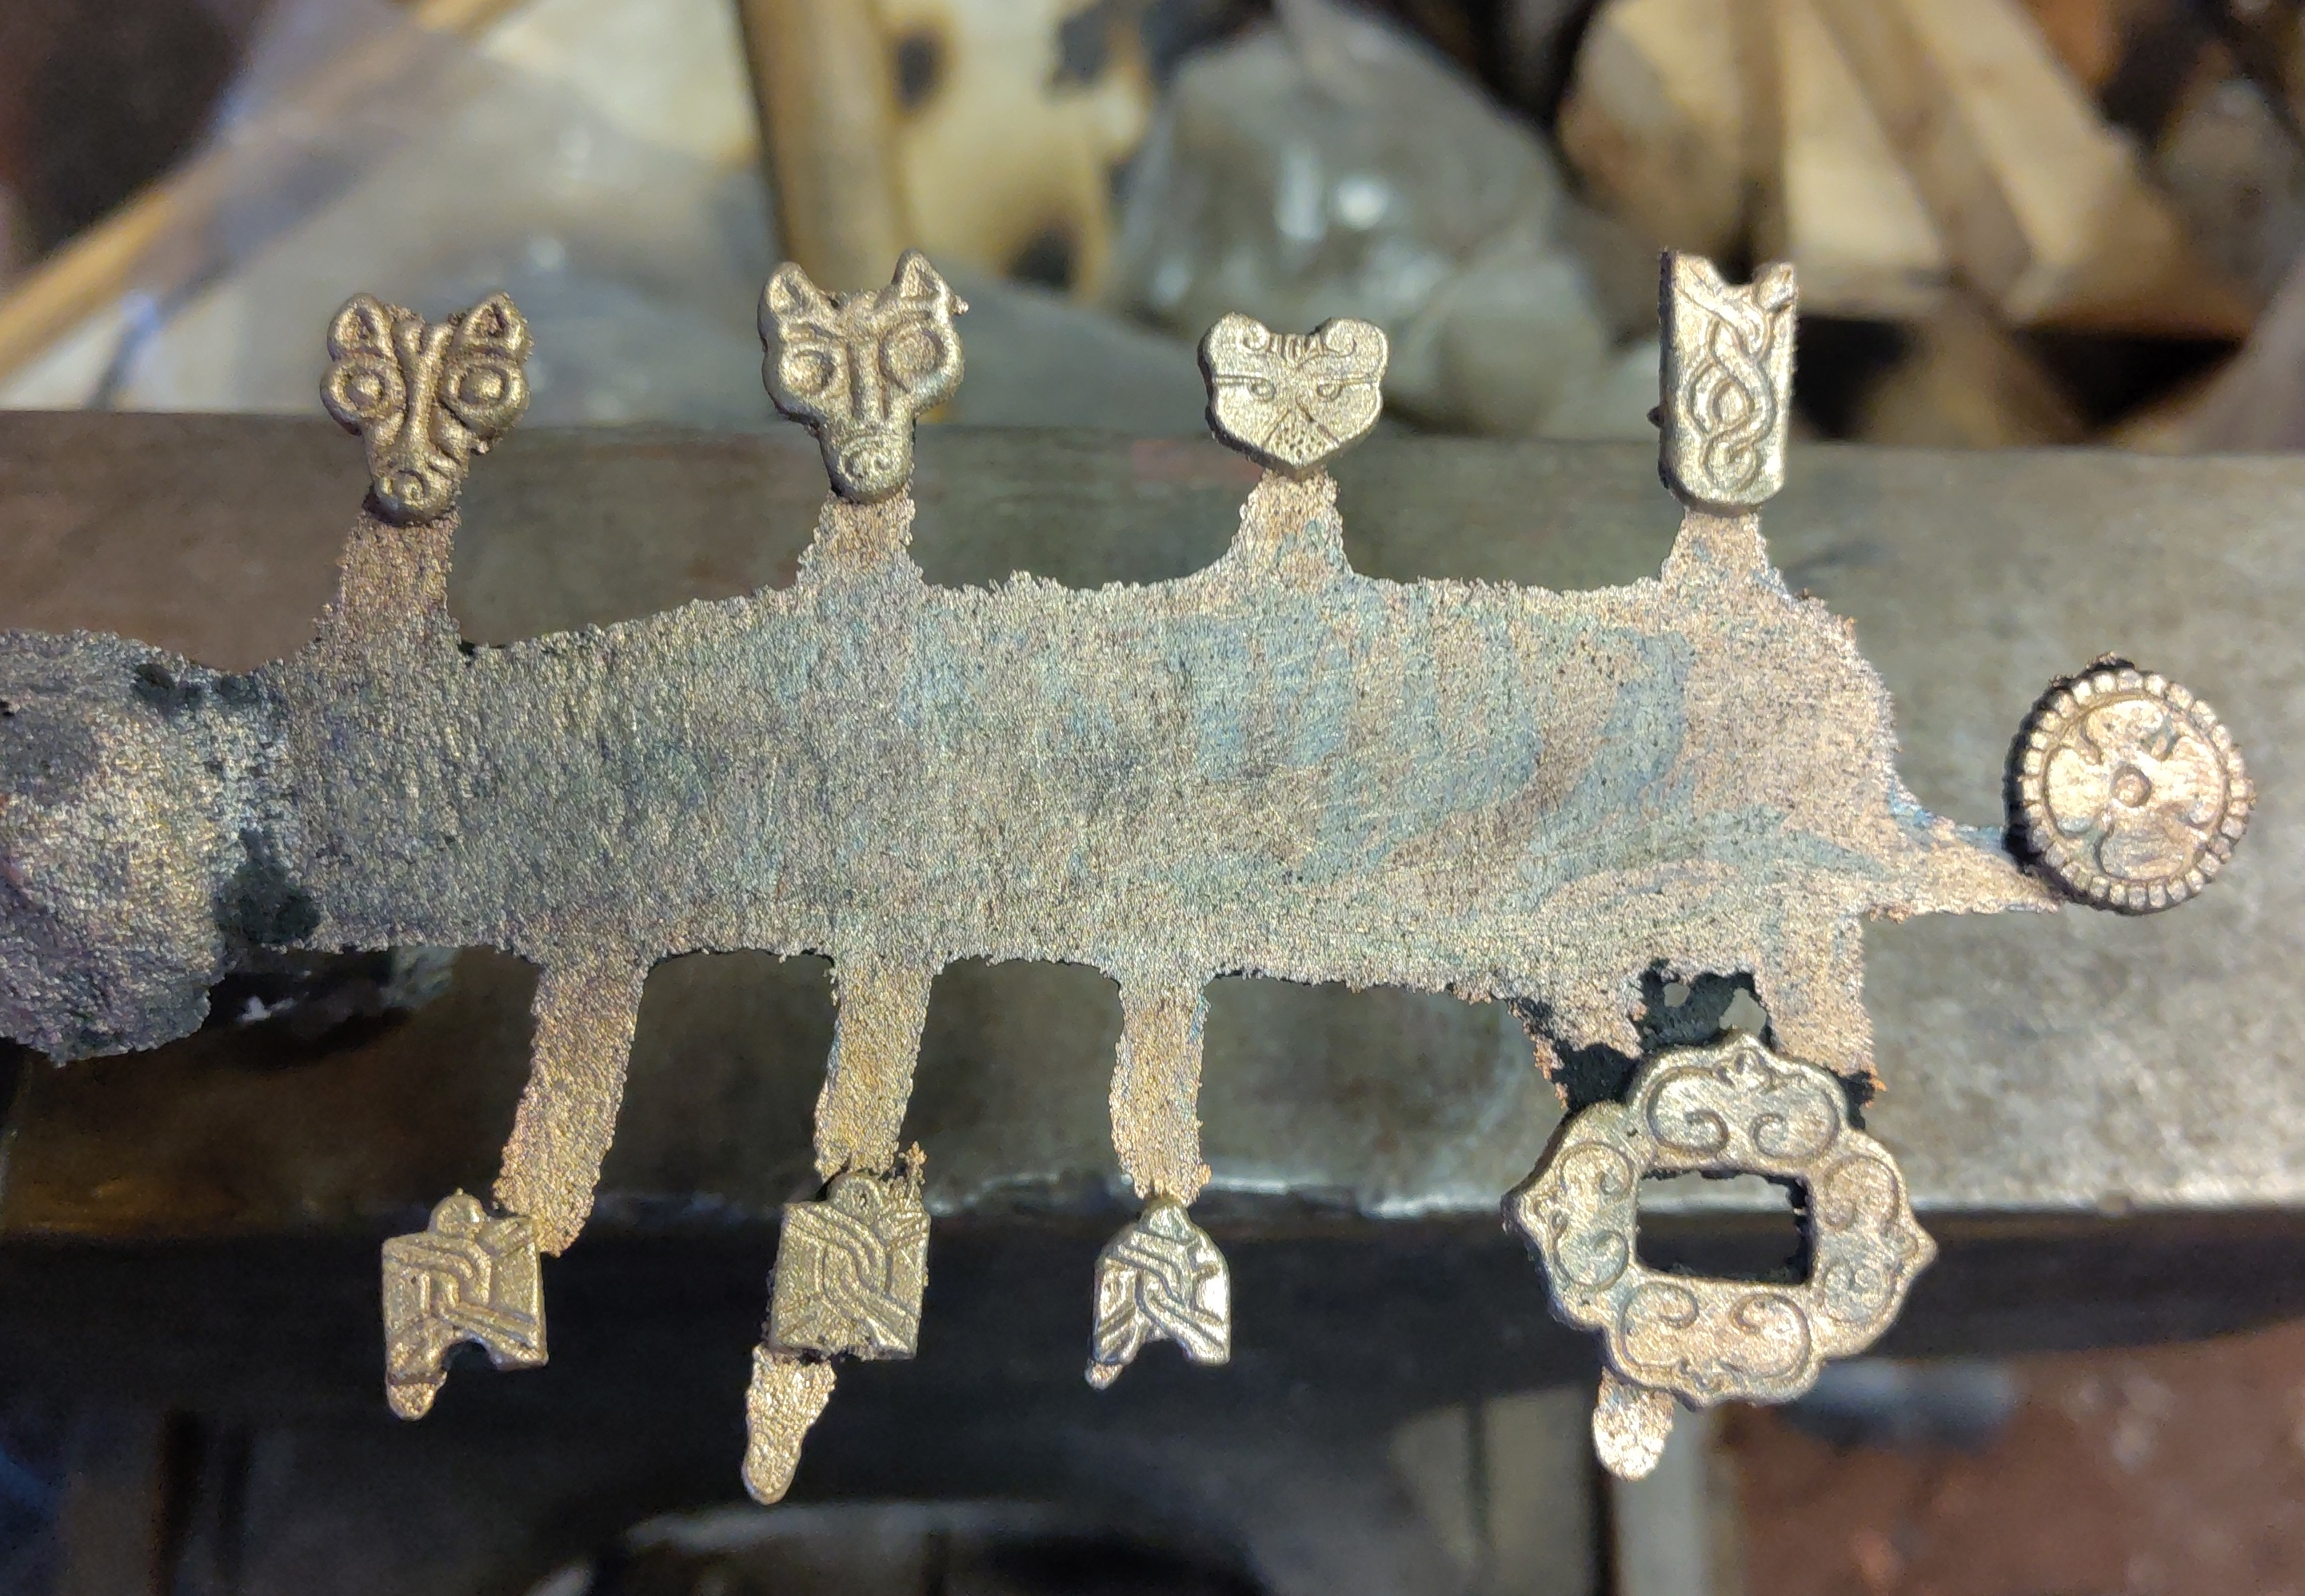
So, now that the fittings are all done, it’s time to put them on the bag! Except they’re not all done - the casts still need to be cleaned up and polished. As this is yet another skill I’ll need to learn to get this project done, I actually think it’s good that some of the cast fittings aren’t usable for the bag. It gives me something to practice on that isn’t just a random chunk of metal, and it’ll allow me to figure out how I want the fittings polished.
That said, this post is already getting quite lengthy, and it’ll likely take me a few weeks to get the fittings polished up, so I’ll leave that to another post.
So long, and thanks for all the brass
So, that details the makening of the fittings, mostly. It’s taken quite some time and I’ve had to learn quite a few new skills to get them done, and I’m not even done yet. 10/10 toasters.
I realize that this is essentially just dipping the toes into the crucible, so to speak, but this has definitely fuelled the furnace of my interest in metal working. I may have a lot of irons in the fire already, but that’s never stopped me before, and I already have some plans for future casting adventures (perhaps fittings for a certain bridle found on a certain longboat in Norway). I really need to find a proper workshop, and get myself a furnace.
And, of course, a big thank you to Master John Smith of Silverstone, for all the instructions and practical help, for all the advice, and for enabling my crazy!
Bai!
References
Arbman, H. (1940). Birka: Untersuchungen und studien. 1, die gräber: Tafeln. Vitterhets-, historie-och antikvitetsakad.
Arbman, H. (1943). Birka: Untersuchungen und studien. 1, die gräber: Text. Vitterhets-, historie-och antikvitetsakad.
Nord, A. G., Ullén, I., & Tronner, K. (2020). Analysis of copper-alloy artefacts from the viking age. J Nord Archaeol Sci, 19.
Arbman described one of the animal heads as “heart shaped”, but it is very similar to bag fittings in the shape of a bear head found elsewhere, so I will treat it as such↩︎
An interesting aside is that none of the surveyed objects that were silver or gold plated were made from alloys, they were all just straight copper. Makes sense when you think about it - why waste resources on making an alloy that you’re just going to cover up anyway?↩︎


![Validate my RSS feed [Valid RSS]](/assets/common/valid-rss-rogers.png)