
Talharpa - My Intro to Lutherie
Posted on 2024-05-13(Post started in June of 2022)
At the viking week at Foteviken’s museum in 2021, I spent some time playing tunes on my dear old violin. It was much appreciated, but I felt that my violin from the early 1900’s didn’t really fit the setting. I decided then to do something I’d been mulling over for a while, and build myself a talharpa.
What is a talharpa?
A talharpa, also known as a tagelharpa or bowed lyre, is a bowed instrument which is roughly shaped like a lyre. It’s a Scandinavian folk instrument, which has been depicted as a stone figurine in the Trondheim Cathedral as early as the 13th century. It has since lost it’s popularity, and is now most commonly played in Estonia.
The name “tagelharpa” literally means “horse hair harp”, named so due to the strings being made from horse hair. They’re commonly don three or four strings, mounted on a flat bridge. This makes it a drone instrument, as the flat bridge means all strings are bowed at the same time.
So, why a talharpa?
Given that the reason I started this project was to replace my modern violin with something more period for the viking age, this is a very good question. We know that lyres existed in the viking age, but there is no evidence to support bowed ones. So why go from one non-period instrument to another?
Well, I wanted to build one for a number of reasons. Firstly, I do enjoy the sound of a drone instrument, so I find the sound of the talharpa enjoyable. Secondly, it’s a bowed instrument, which is my jam. Thirdly, it is more period than my modern violin, and it looks “foreign” enough to most people to be passable in a viking setting (especially given that it has gotten the very erroneous nickname “the viking lyre”). And lastly, and perhaps most importantly, the construction is simple enough that I figured that even someone with very limited woodworking experience could do a decent job. Someone like me.
Alright, enough jibberjabber, get to the point!
To the workshop!!
Best laid plans of wood and horse hair
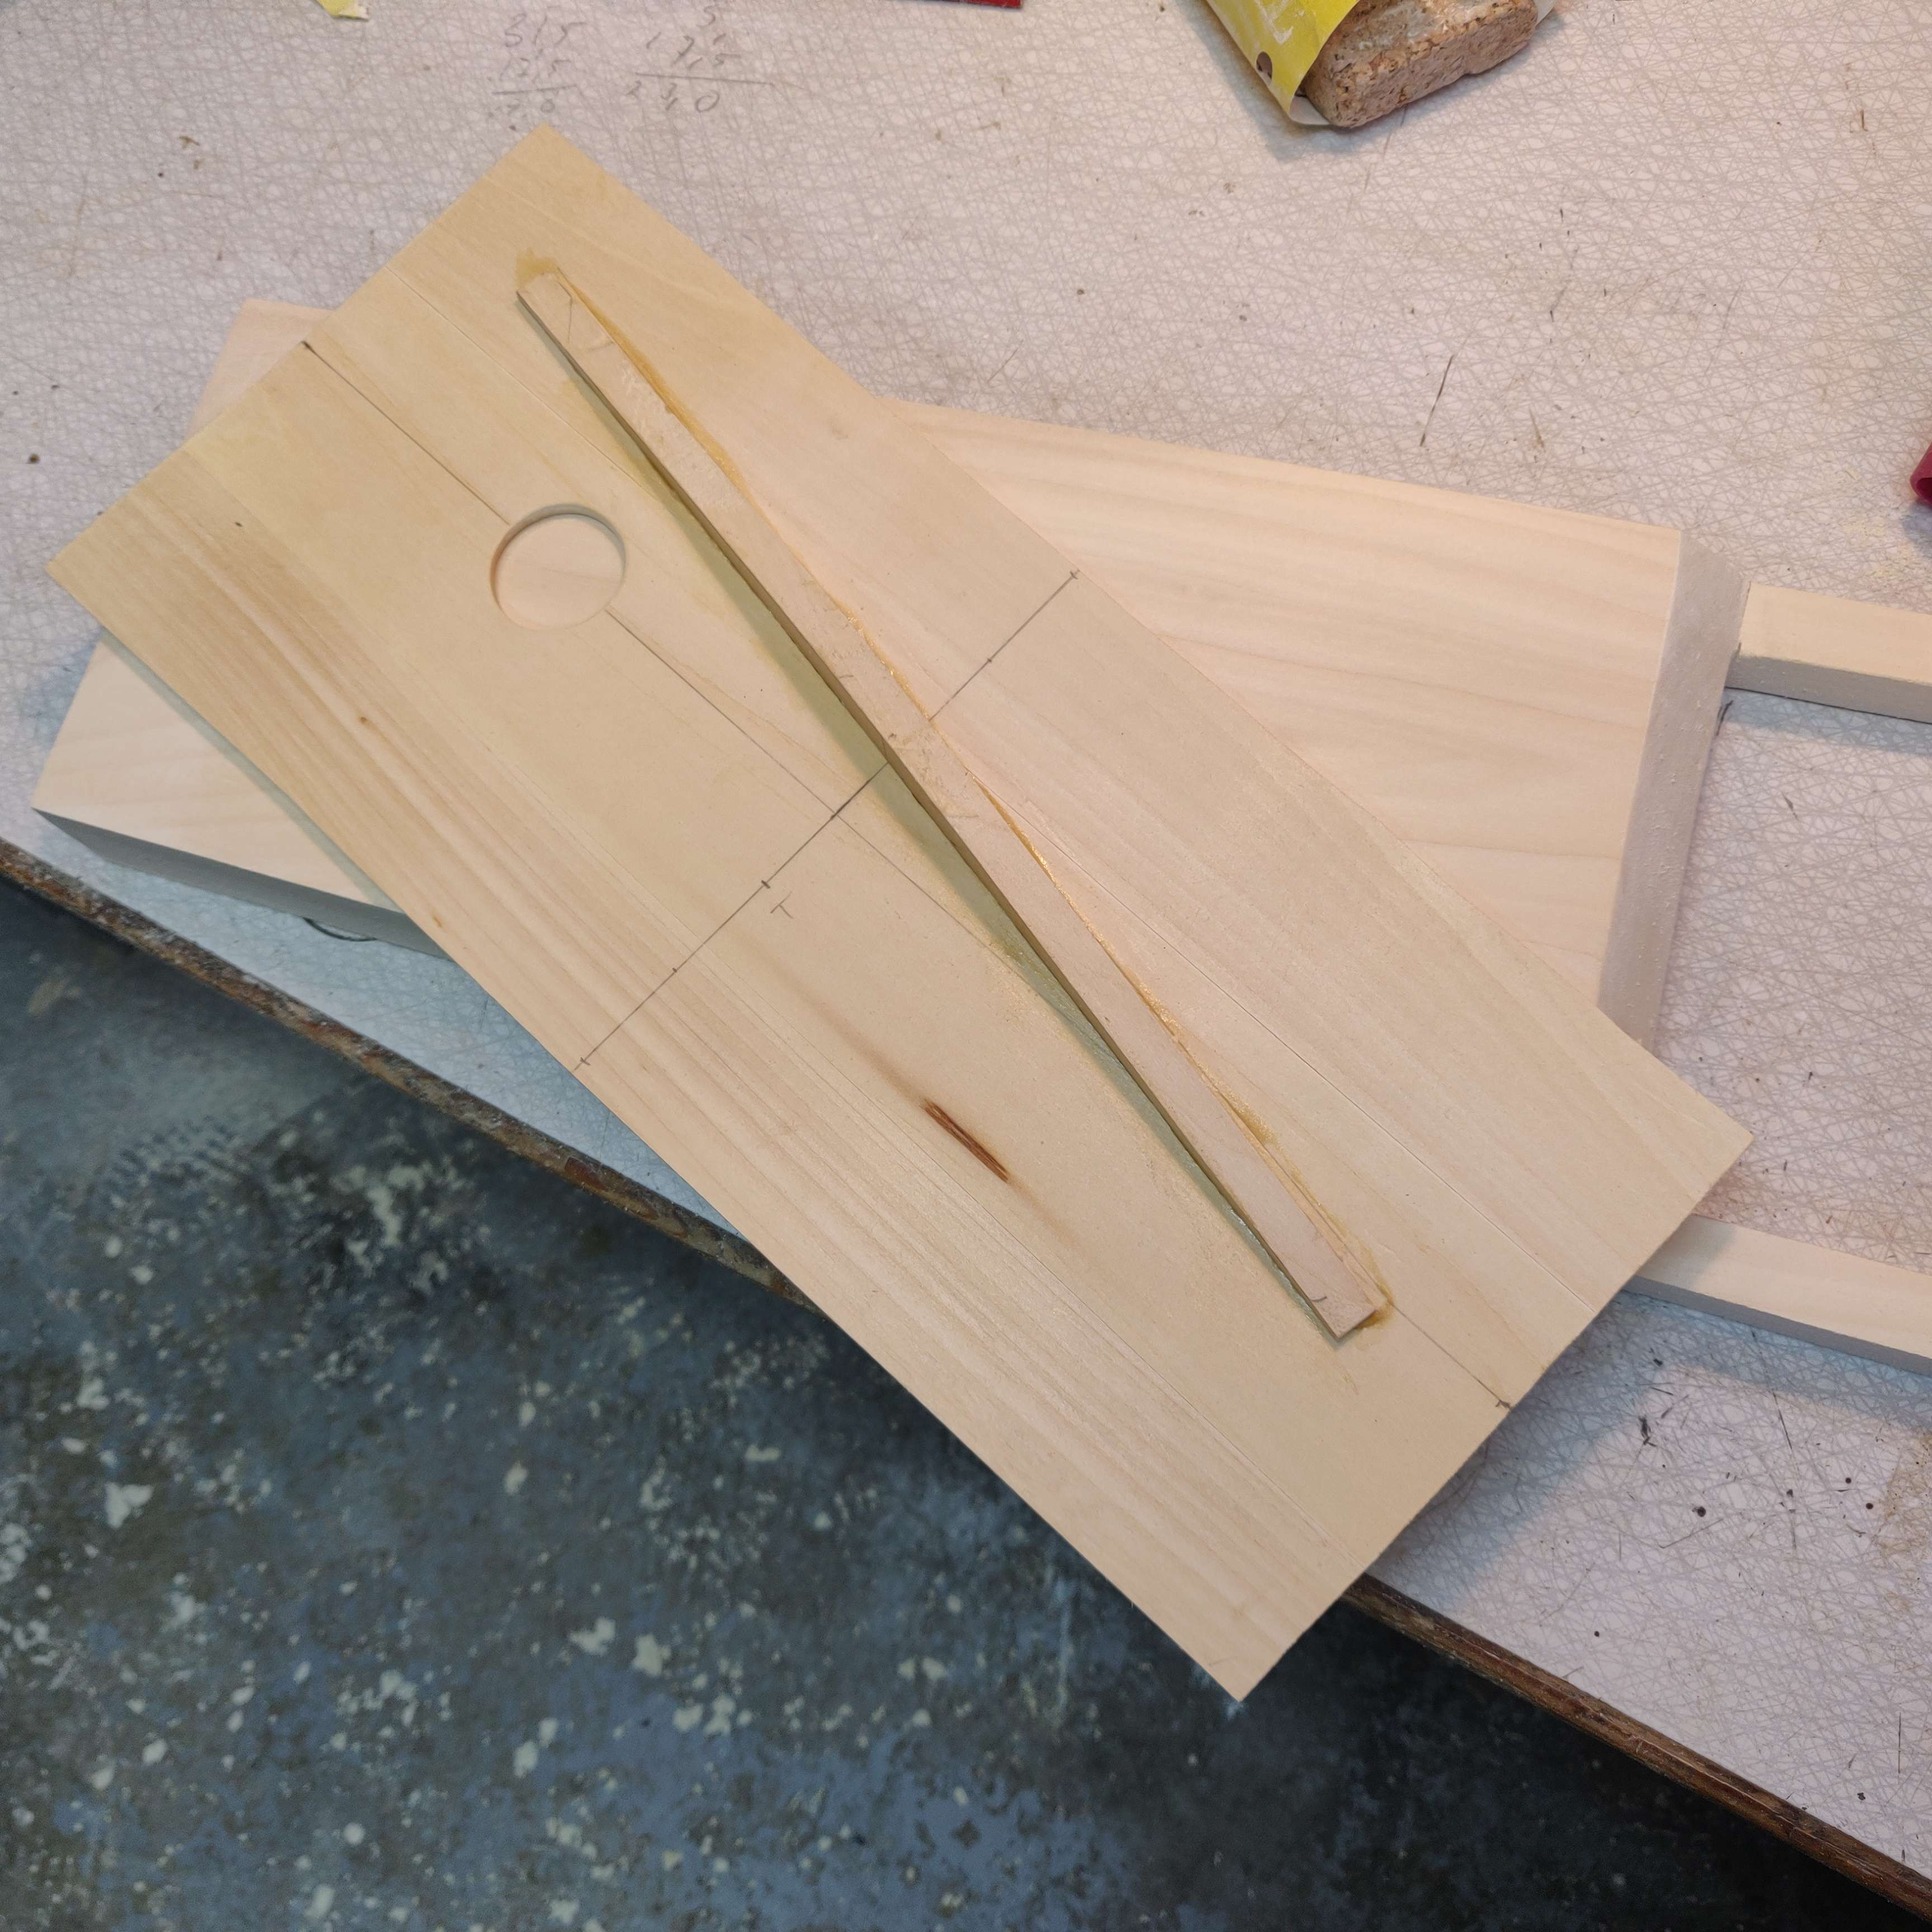
When setting out to do this, I really didn’t have any idea what I was doing. I knew that a talharpa was traditionally constructed by hollowing out a piece of wood and slapping a lid on it. I picked the dimensions mostly out of thin air, with light guidance from images and plans I found online. After quite some guestimation, I had the plans done.
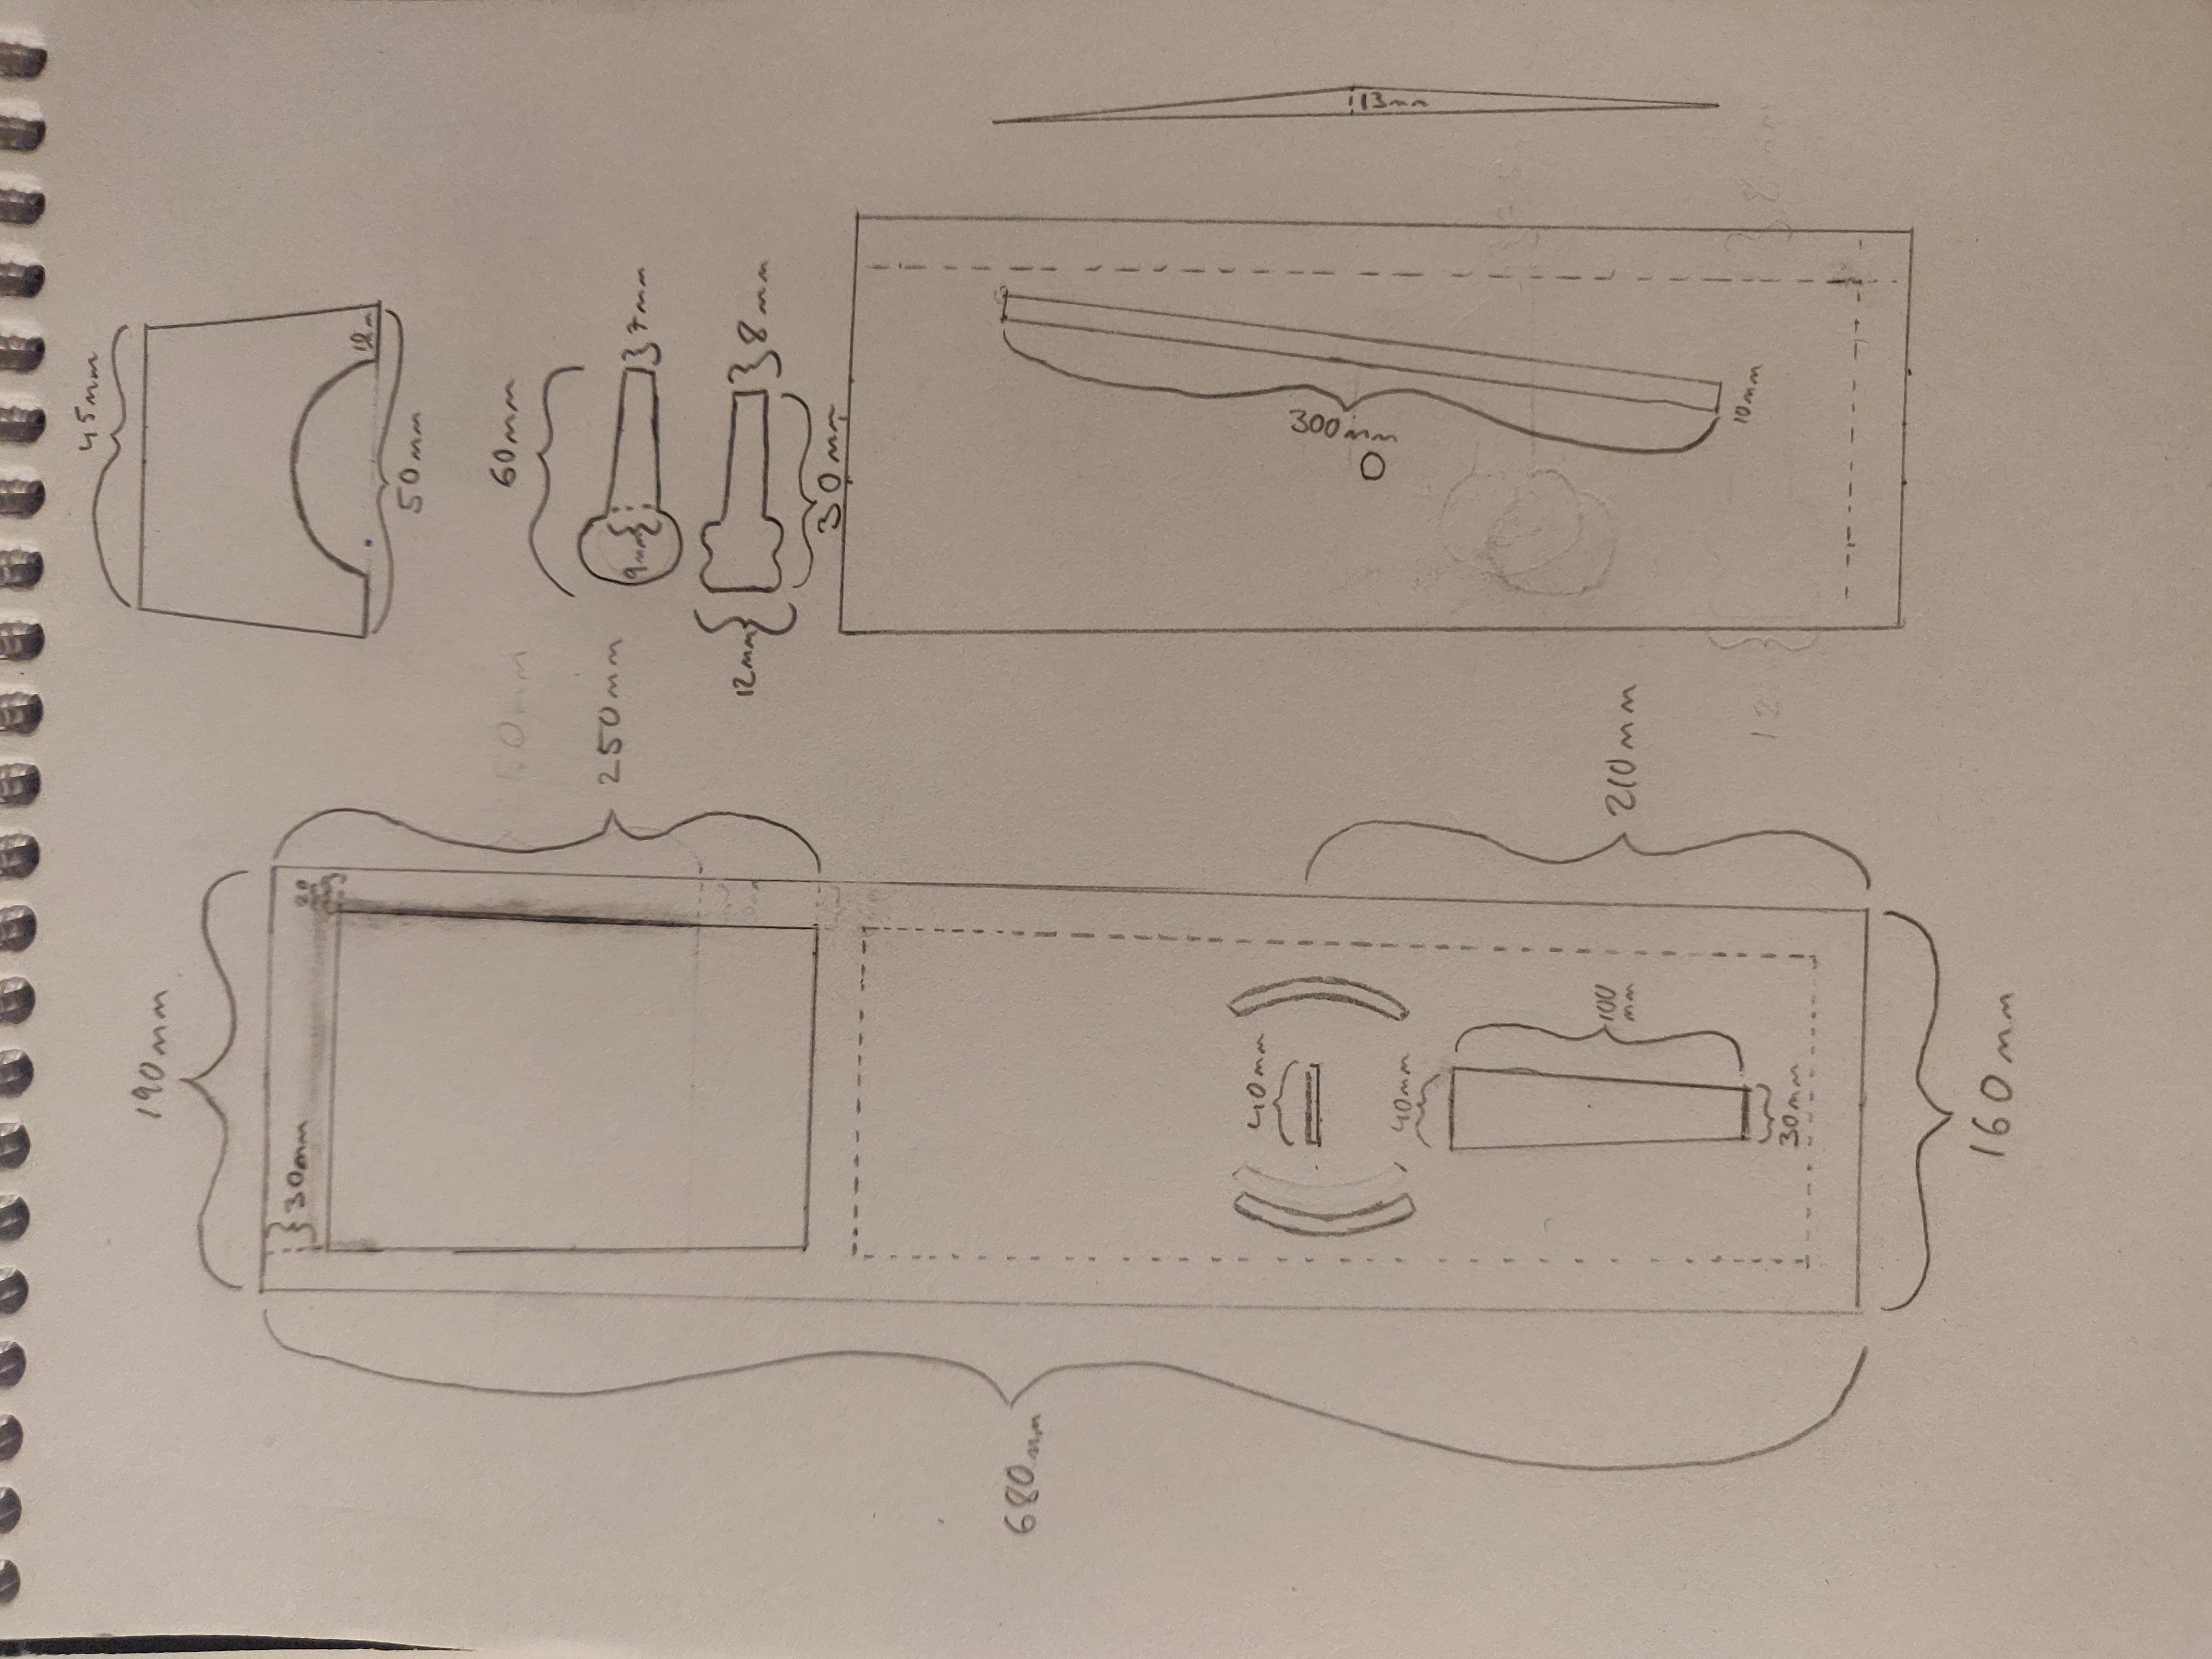
Super readable and not at all smudgy, I know! But, basically, I decided on constructing it in the traditional way, with the hollowing out and the slapping on a lid. I went with a slender, slightly tapered shape just shy of 70cm in length (y’all working in freedom units are gonna have to translate yourself, ain’t nobody got time for that) with a 22cm long “window” for access to the strings. The sides of the soundbox was going to be 20mm thick, and the bridge 45mm wide at the top. For some reason I decided that putting a bass bar and sound post in it (shown to the bottom left), because that is something that a first time luthier can just guestimate apparently. Regardless, the plans had been made and approved by my dear father, who also didn’t see anything wrong with trying to build and instrument from self-drafted plans with no prior experience, and had agreed to help.
With plans all done, it was time to actually start doing things, not just thinking about doing things.

I’m Woody! Howdy Howdy Howdy!
First up was selection of wood. Luckily, my dad has a piece of wood or two laying around in his workshop. Among this pile of wood was a maple log that he had felled himself some ten-ish years ago, and had been lying in the attic since, drying up, begging to become an instrument. No sense in not using such a prime piece of lumber, so we picked that for the body of the instrument. For the top, we chose glued spruce. Not quite as fancy, but we prioritized thickness and width over fancy here. The maple would also be used for the tuning pegs (mistake) and the end peg (not a mistake).

I’ve got a craving for carving
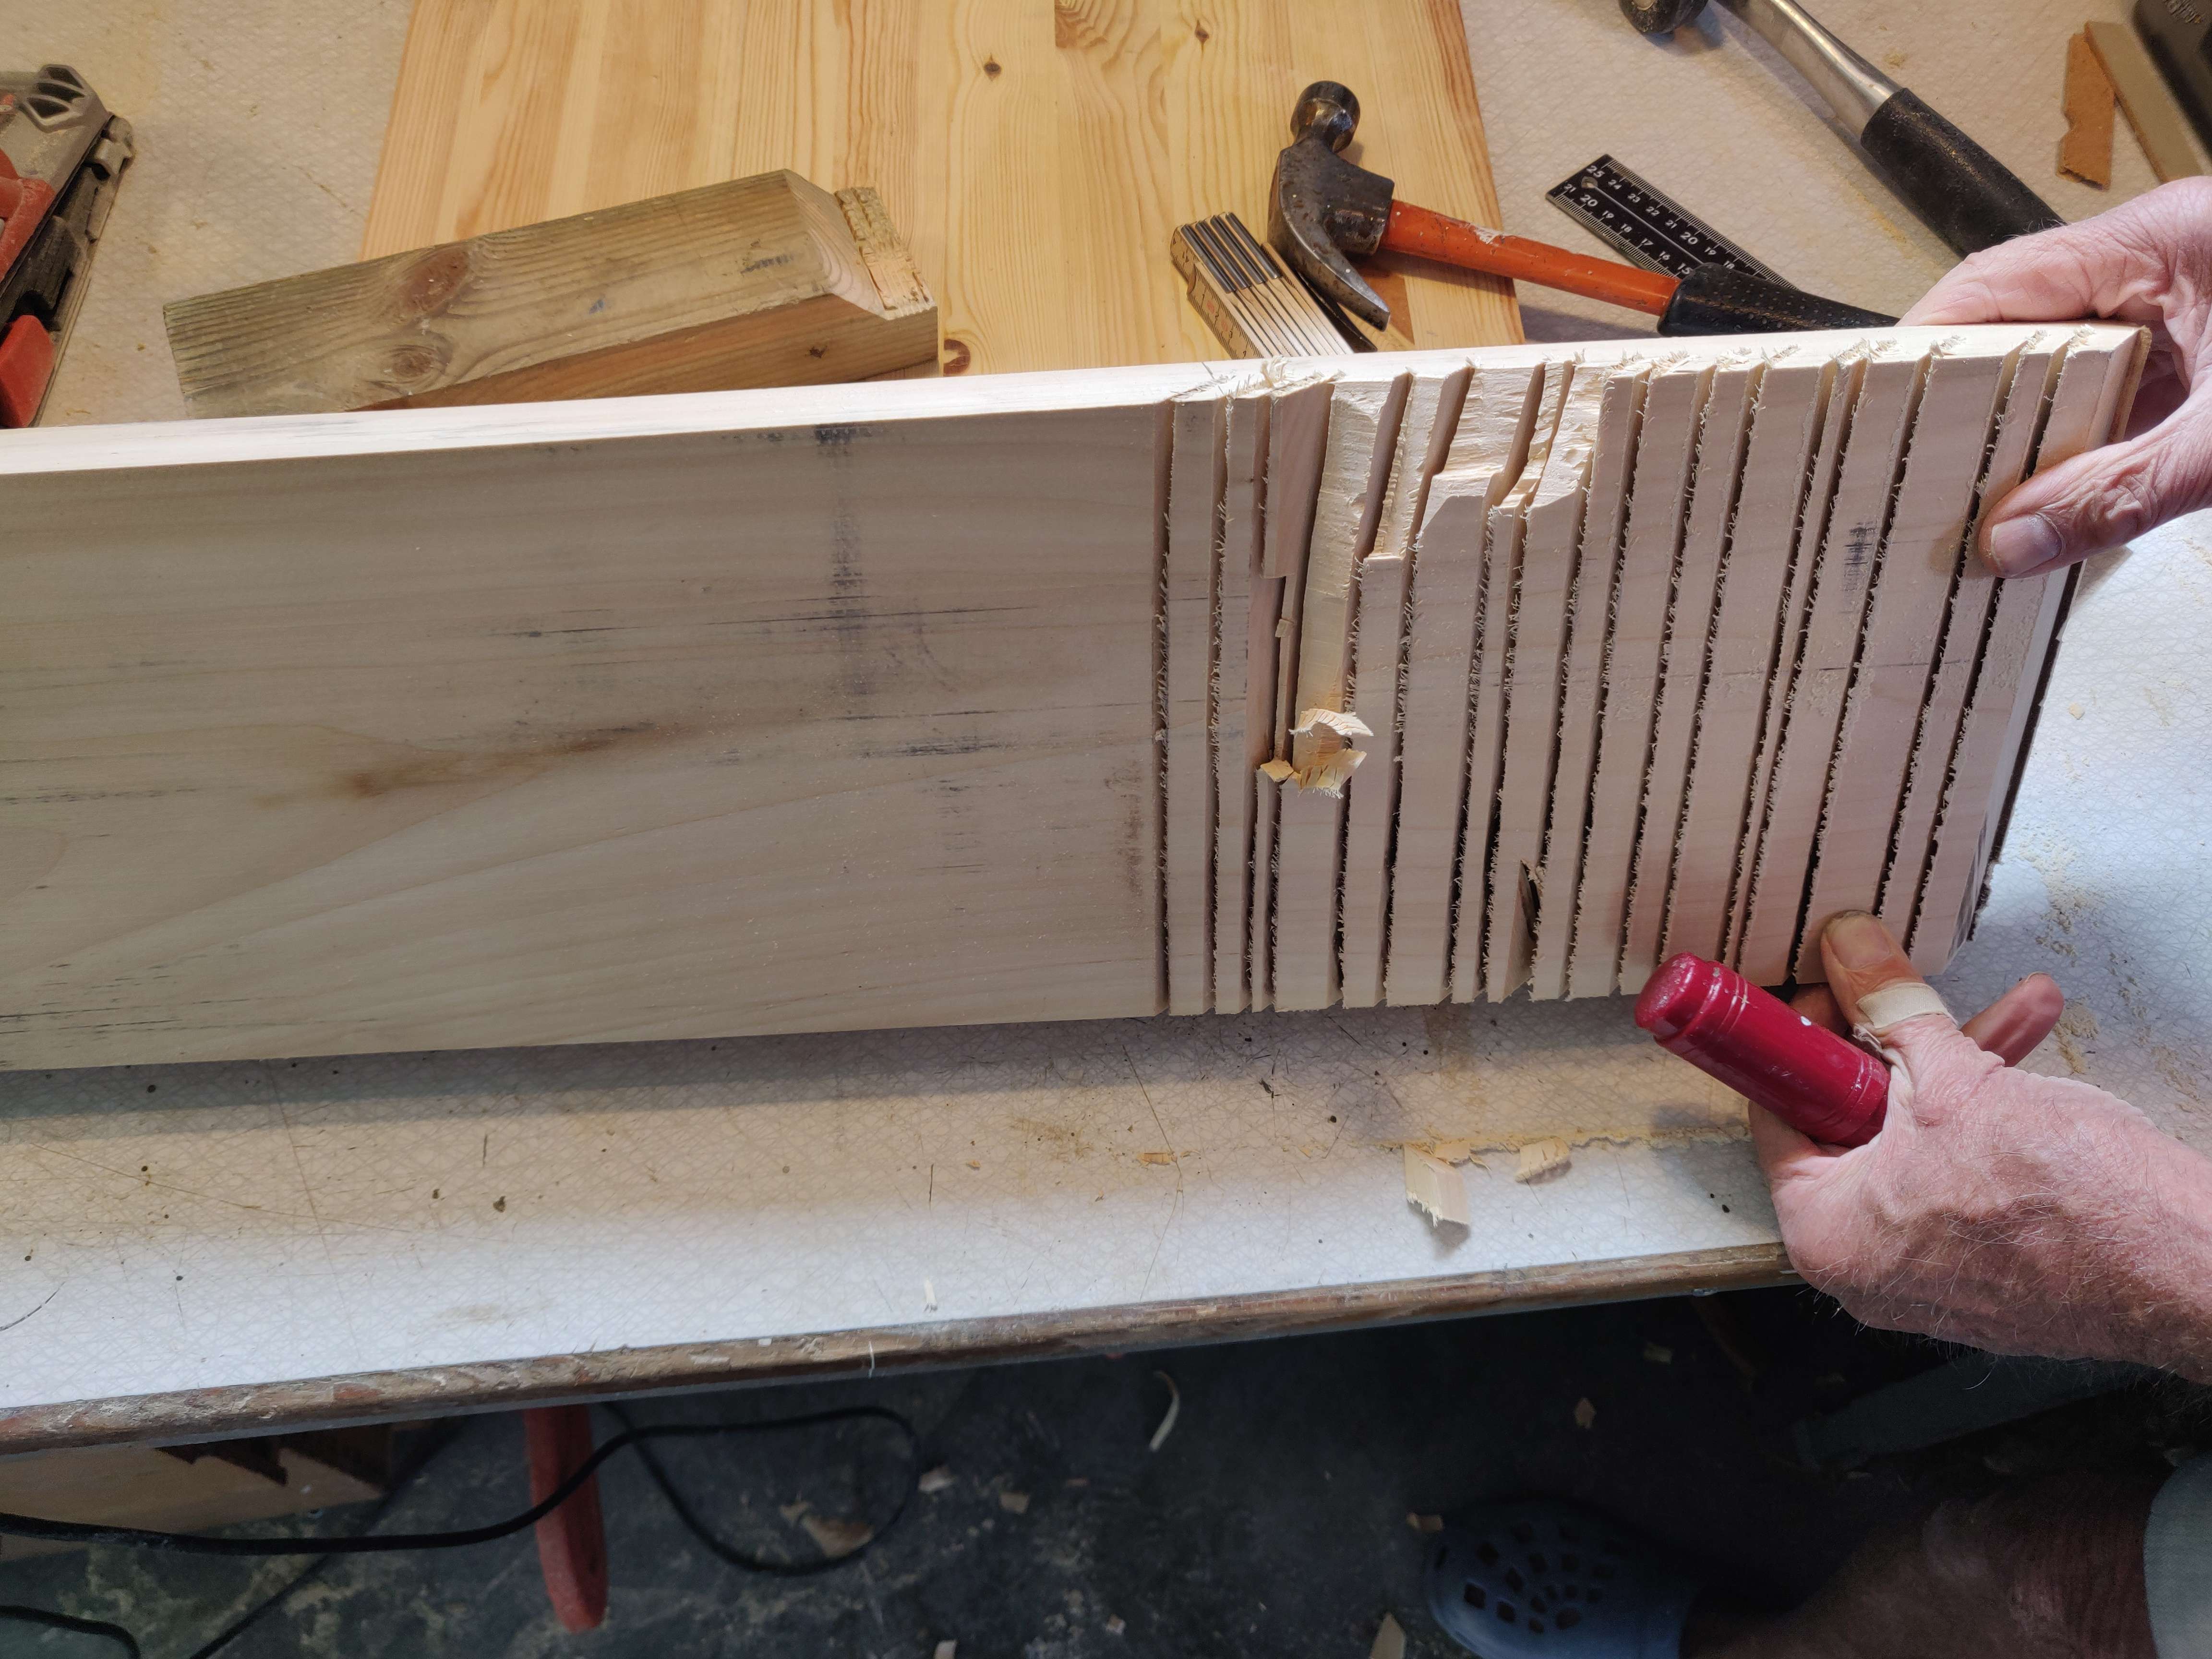
With the wood selected, it was time to start carving the body. The “handle”, for lack of a better word, is supposed to be thinner than the body. To avoid sharp angles that will act as weak points, we decided to add a taper as well. Thinning out the wood for the handle was simply done by making a large amount of cuts along the underside of the handle, and then using a chisel to remove the wood.
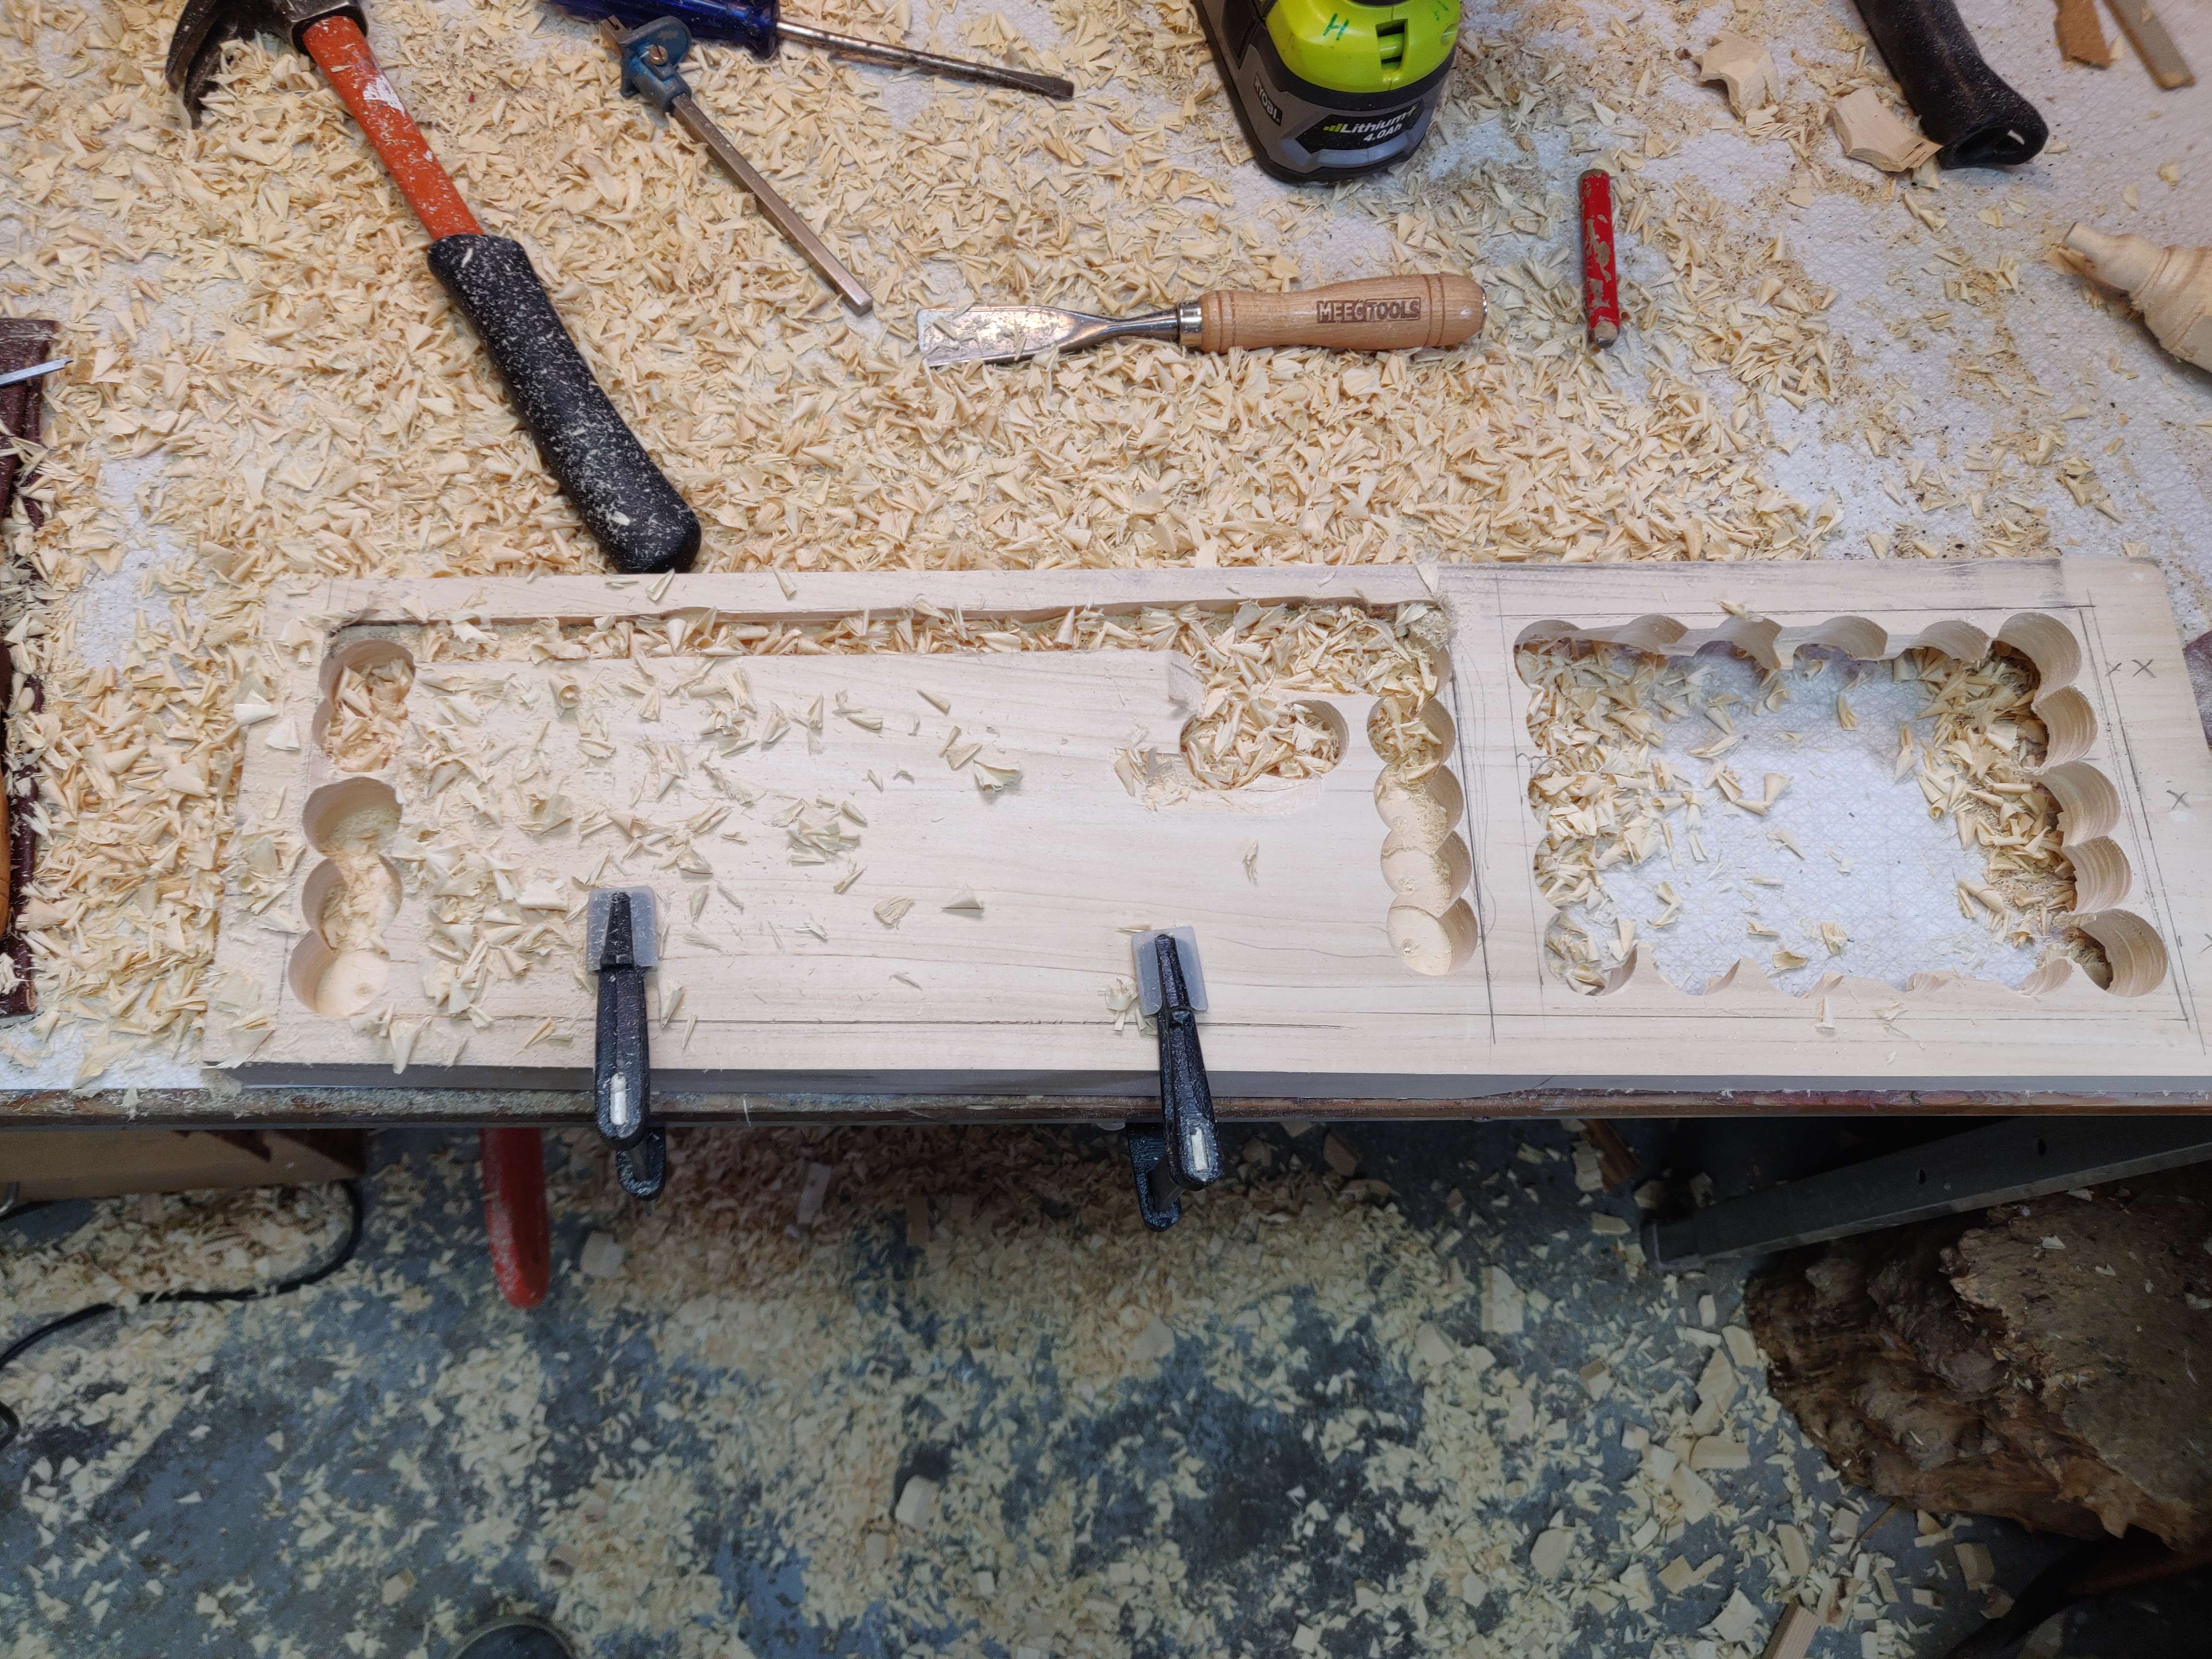
After this, the actual shape of the handle was next in line. The handle is essentially just an empty frame over which the strings are strung. The hole was created by drilling along the inside of the frame. The result is a bit rough, but that was cleaned up later using a saw.
Similarly, the body was hollowed out using mostly a drill. I did some work by hand to finish the inside with a chisel, but the final touches were made using a handheld router.
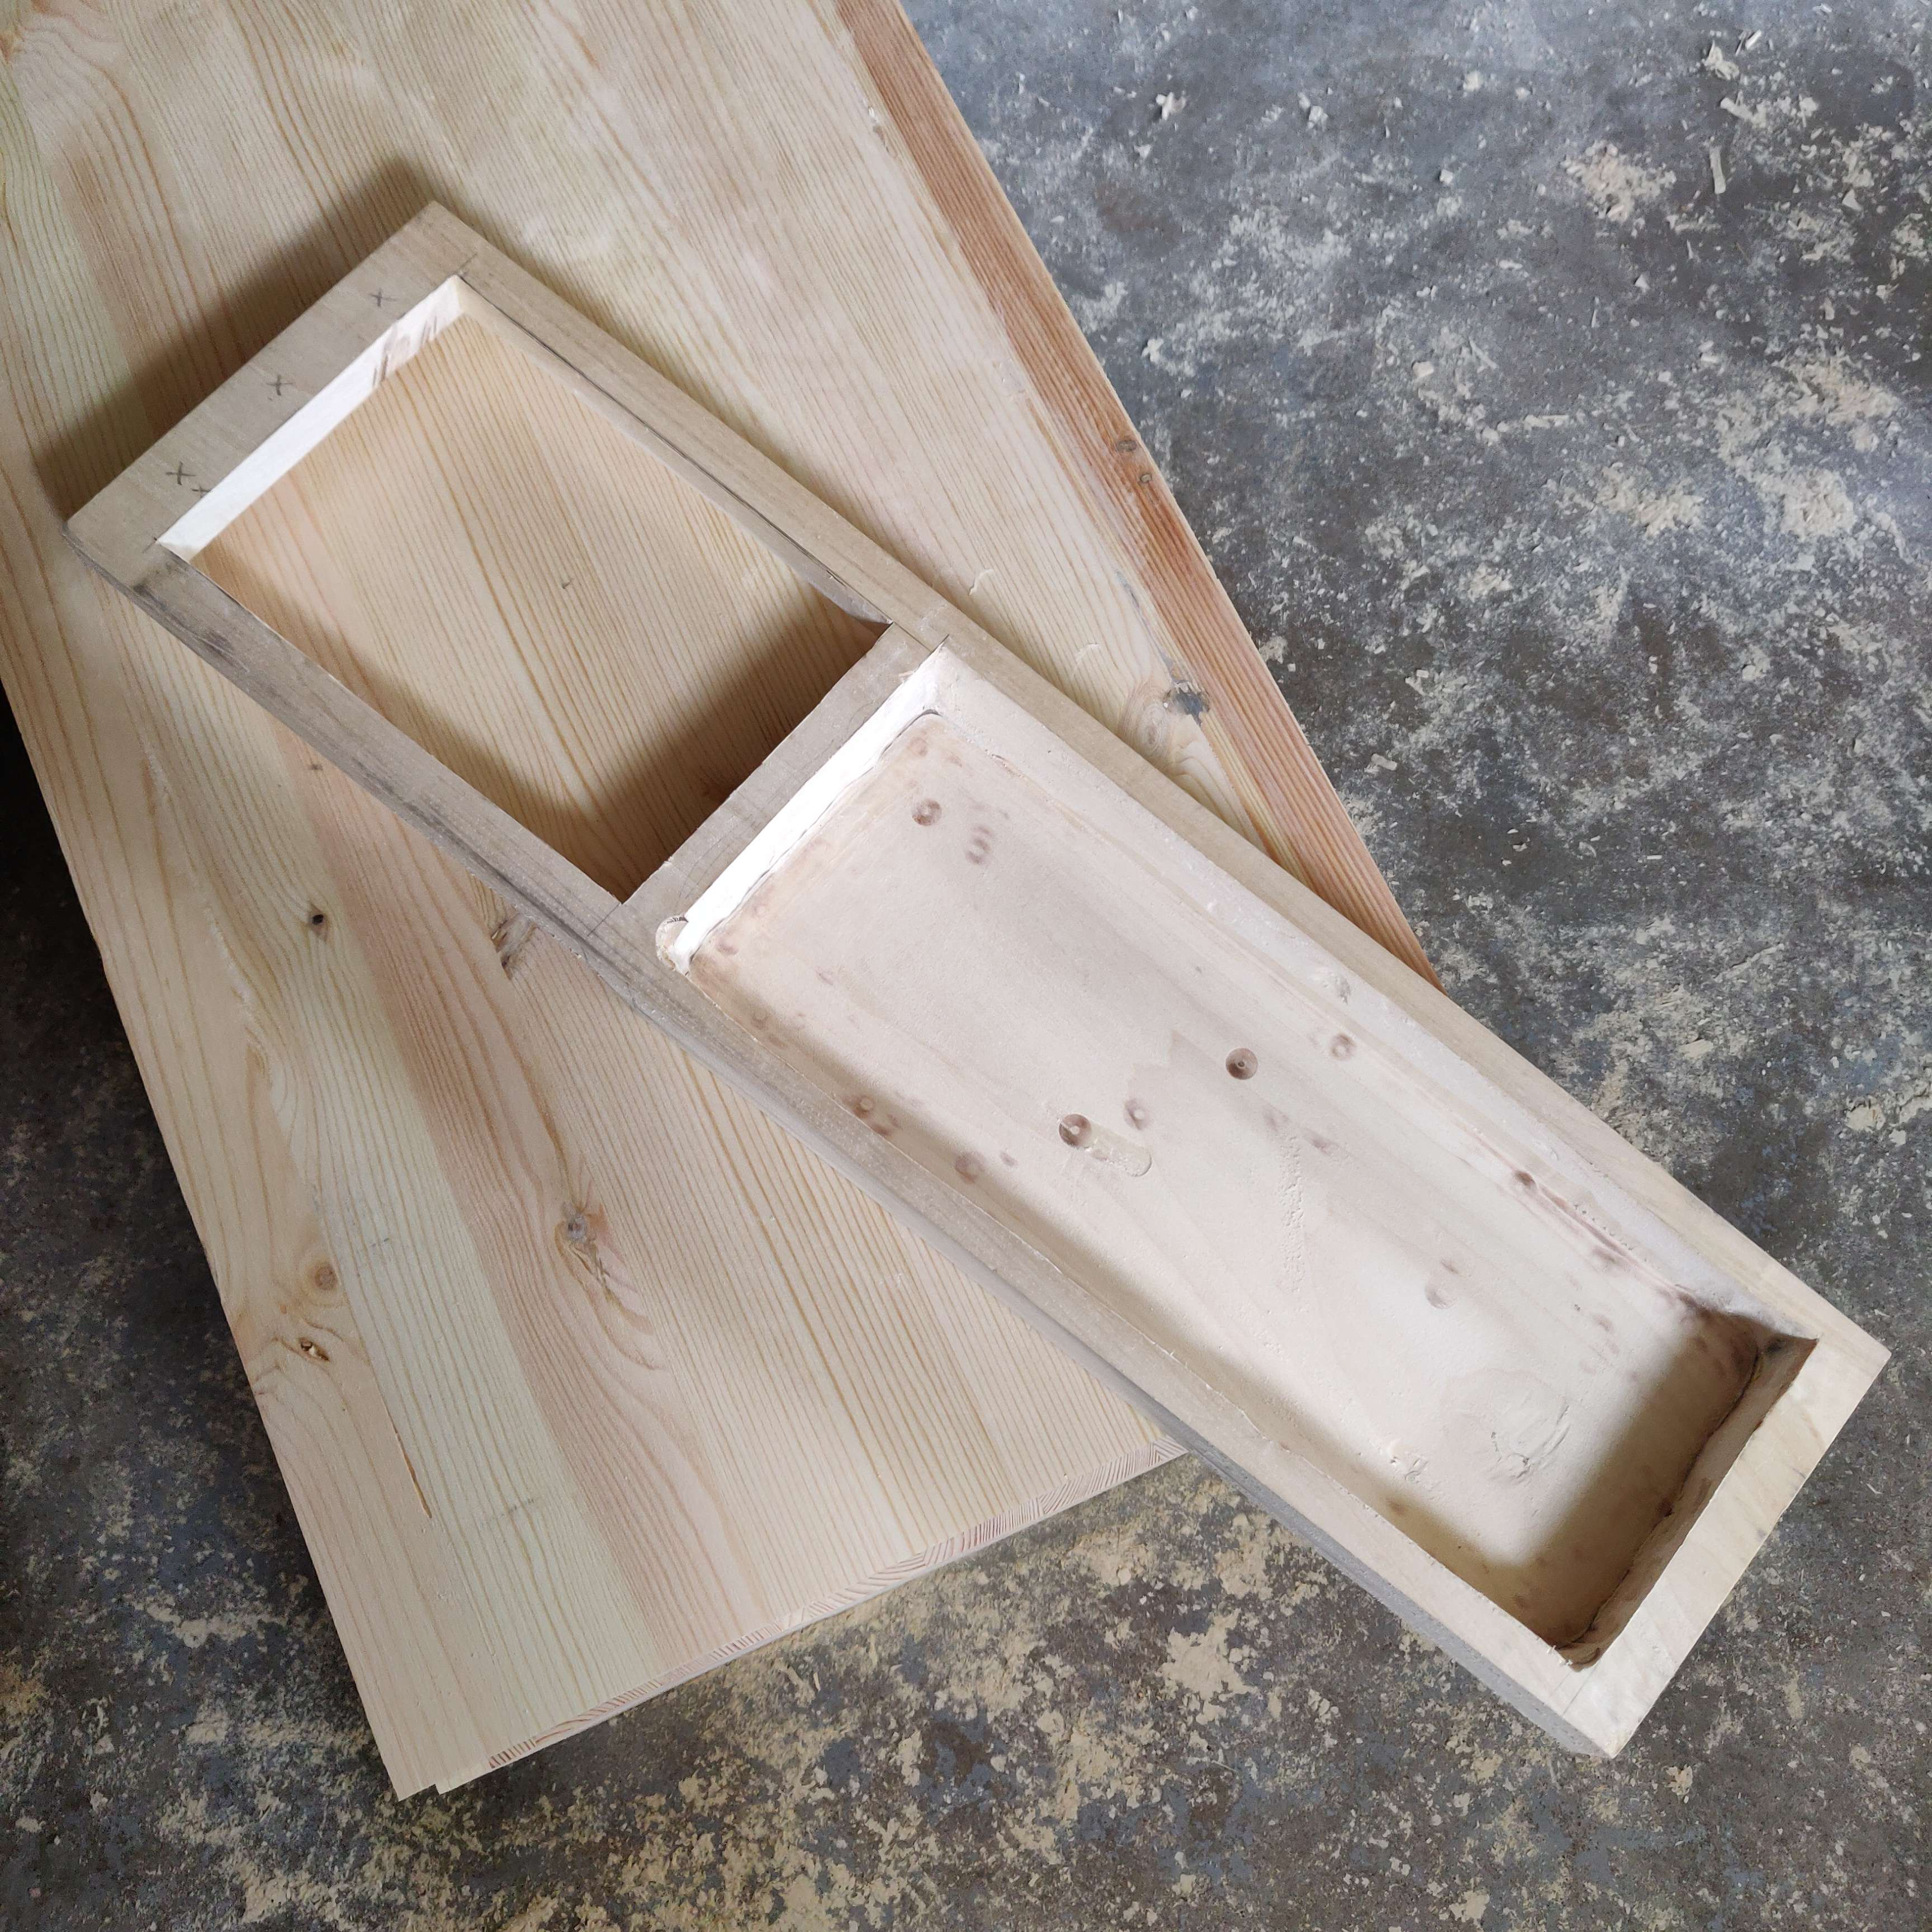
The final step to finishing the body was simply drilling three holes for the tuning pegs, and one hole for the endpin at the bottom of the sound box.
Put a lid on it
Once the body was done, the lid was fashioned. Constructing the lid was fairly simple – we took the body and traced it on the lid stock to ensure we got the taper of the body right, cut the lid to shape, and drilled a sound hole in it. Finally, we glued a bass bar into place with some hide glue. The bass bar is placed roughly under where the bridge foot under the bass strings will go. In this context it has two purposes:
- Help distribute the lower note register to increase volume and make the talharpa sound better
- Increase the structural integrity of the lid so that it doesn’t collapse under the string pressure
Once the bass bar was installed, the lid was glued to the body using hide glue. The reason hide glue is used for making instruments is that it dissolves when steamed, meaning that it is possible to take the instrument apart if it needs repairs. Most modern wood glues does not share this feature, and will result in an instrument that you cannot take apart without damaging it further.
Getting fit(tings)
To complete the wood part of the instrument, some fittings were required, all of which were made by the same maple as the body. The fittings in question were a bridge, a tail piece, an endpin and tuning pegs. The former two are quite uninteresting and simple - a short trapezoid with a roundish cut-out and a long trapezoid with holes drilled in the narrow end.
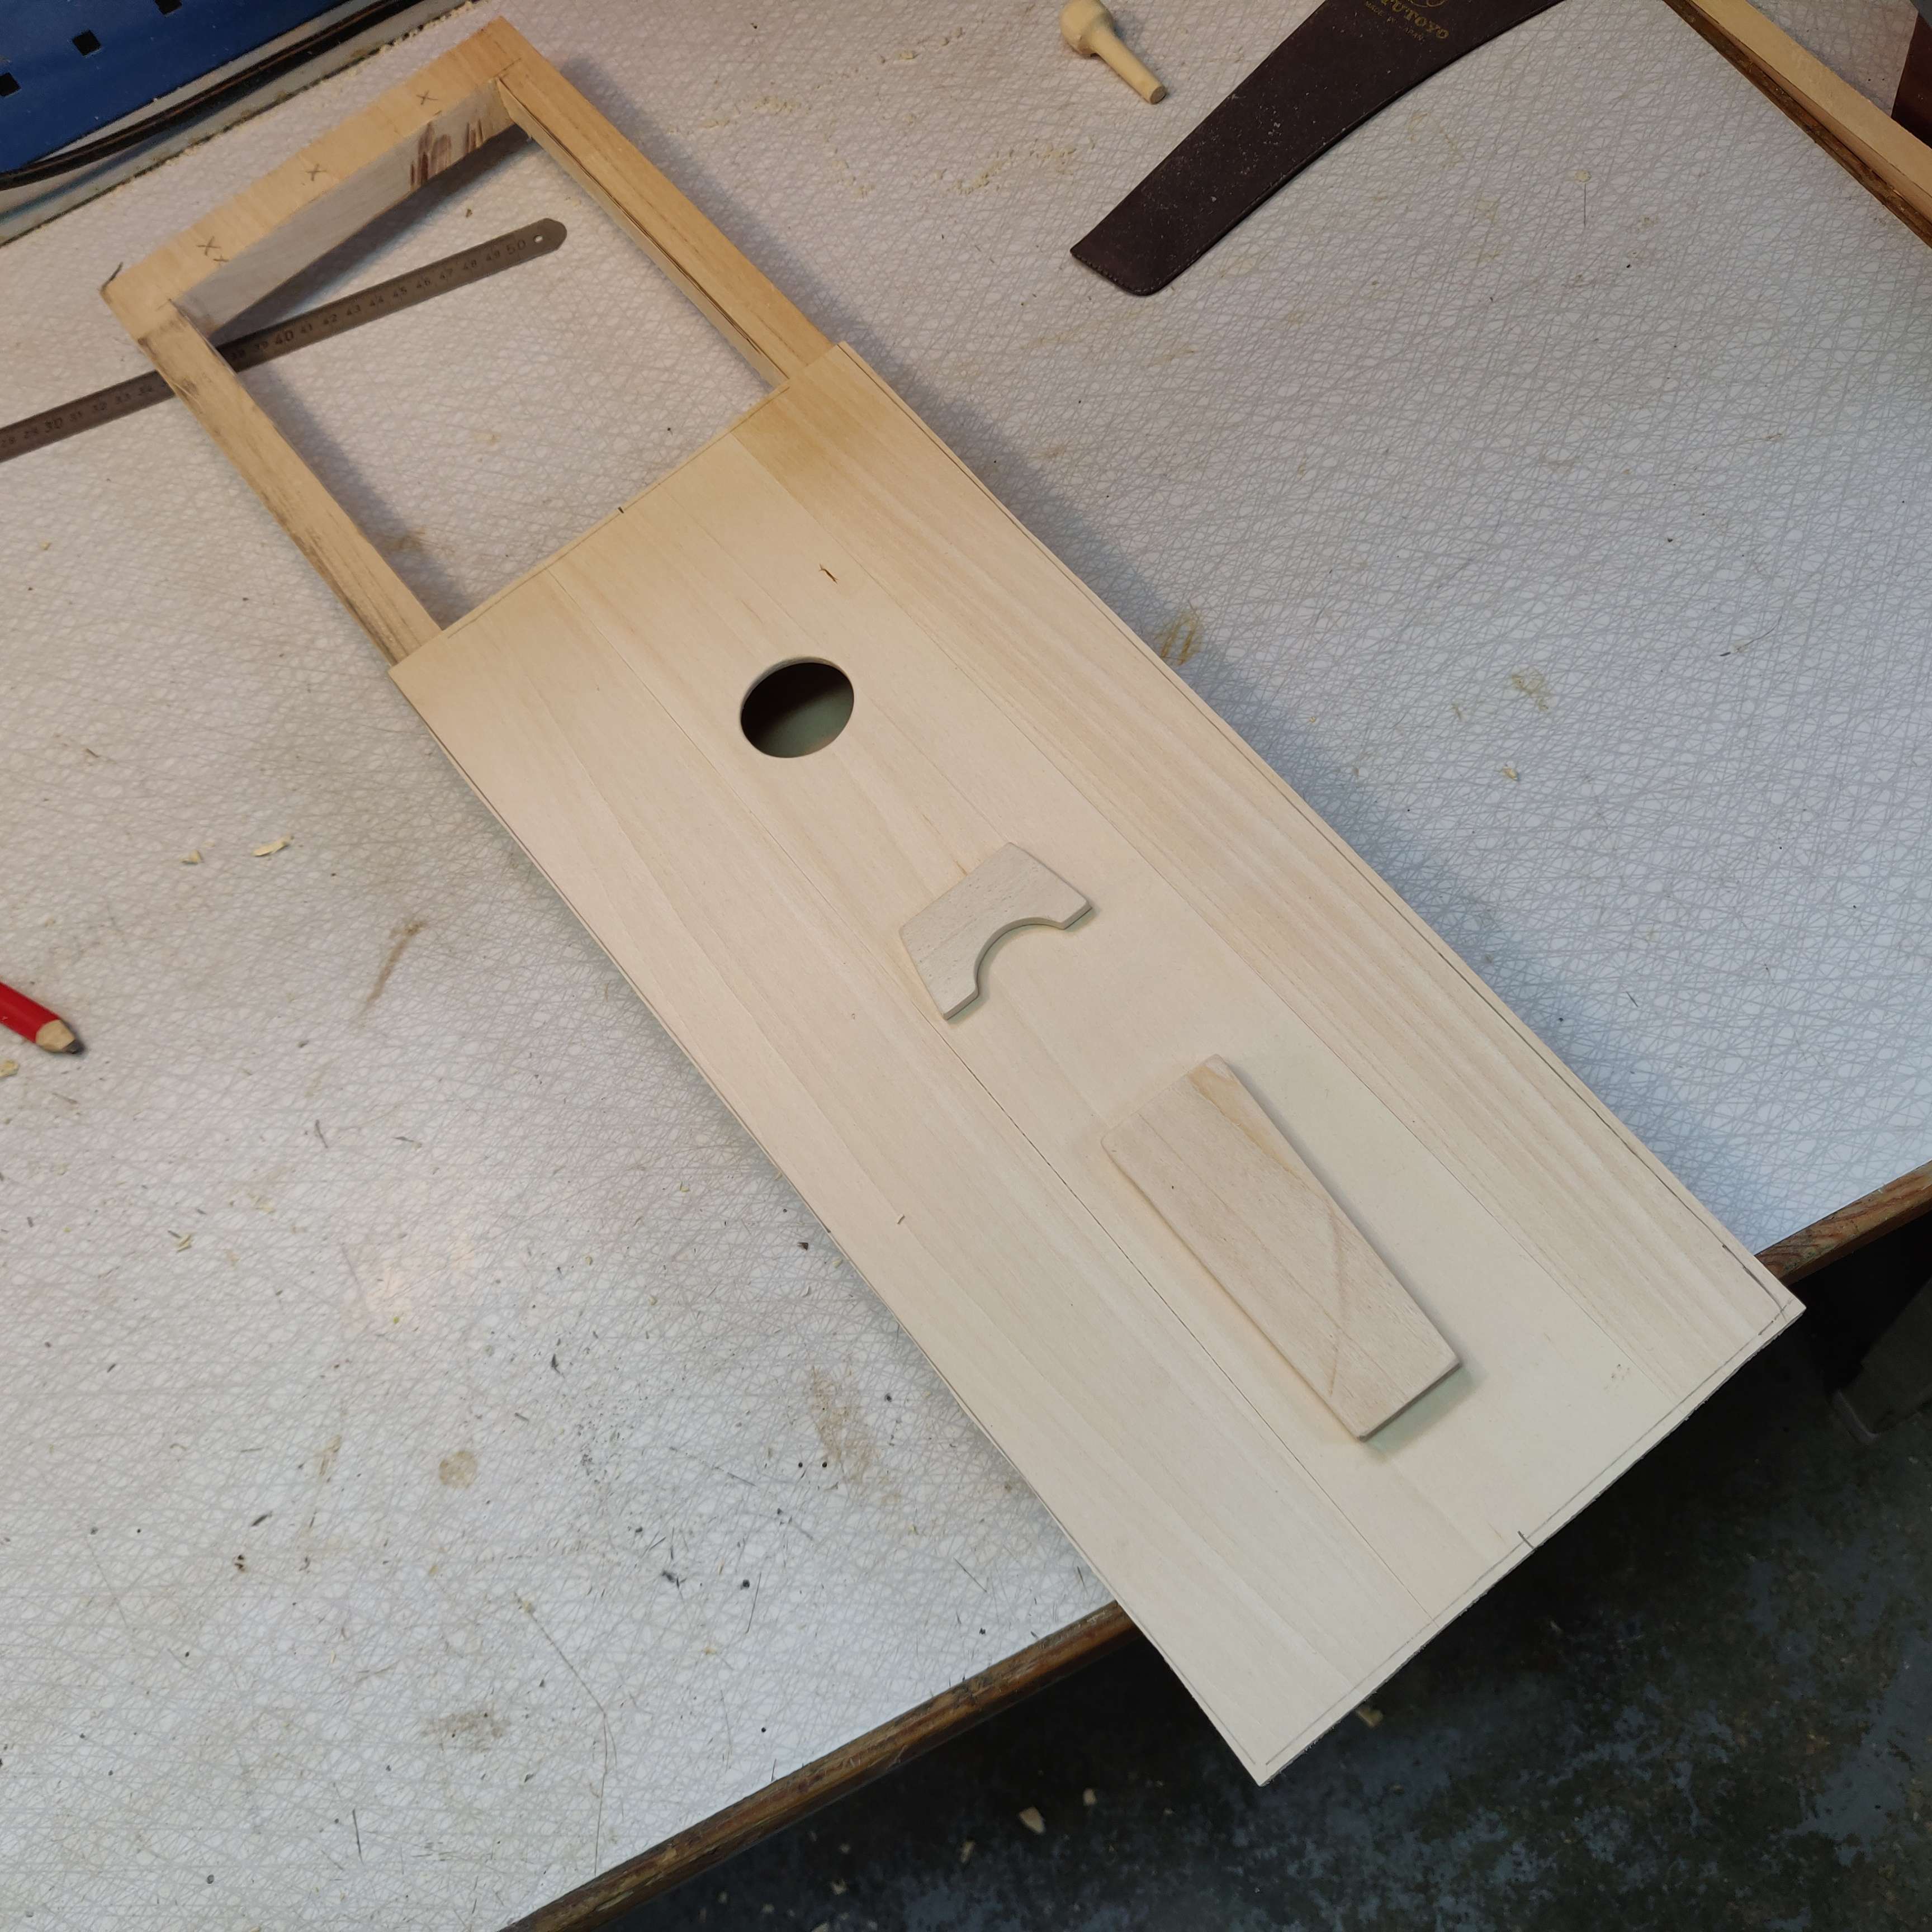
The pin and pegs were all turned on a lathe. It’s been a while since I last used a lathe, so they didn’t turn out very even, but I was decently satisfied anyway. The endpin in particular is really good, if I do say so myself. The purpose of the endpin is to serve as an anchor point for the tail piece.


Now, round tuning pegs is probably not very handy. Since you’re using them to adjust the tension of the strings, you need to be able to grab them in a way that they don’t slip in your hand. Therefore, the “balls” at the top were sanded down so that they were roughly flat. A slit was also cut in the peg-end of the pegs, so that I had something to slot the strings into.
String theory
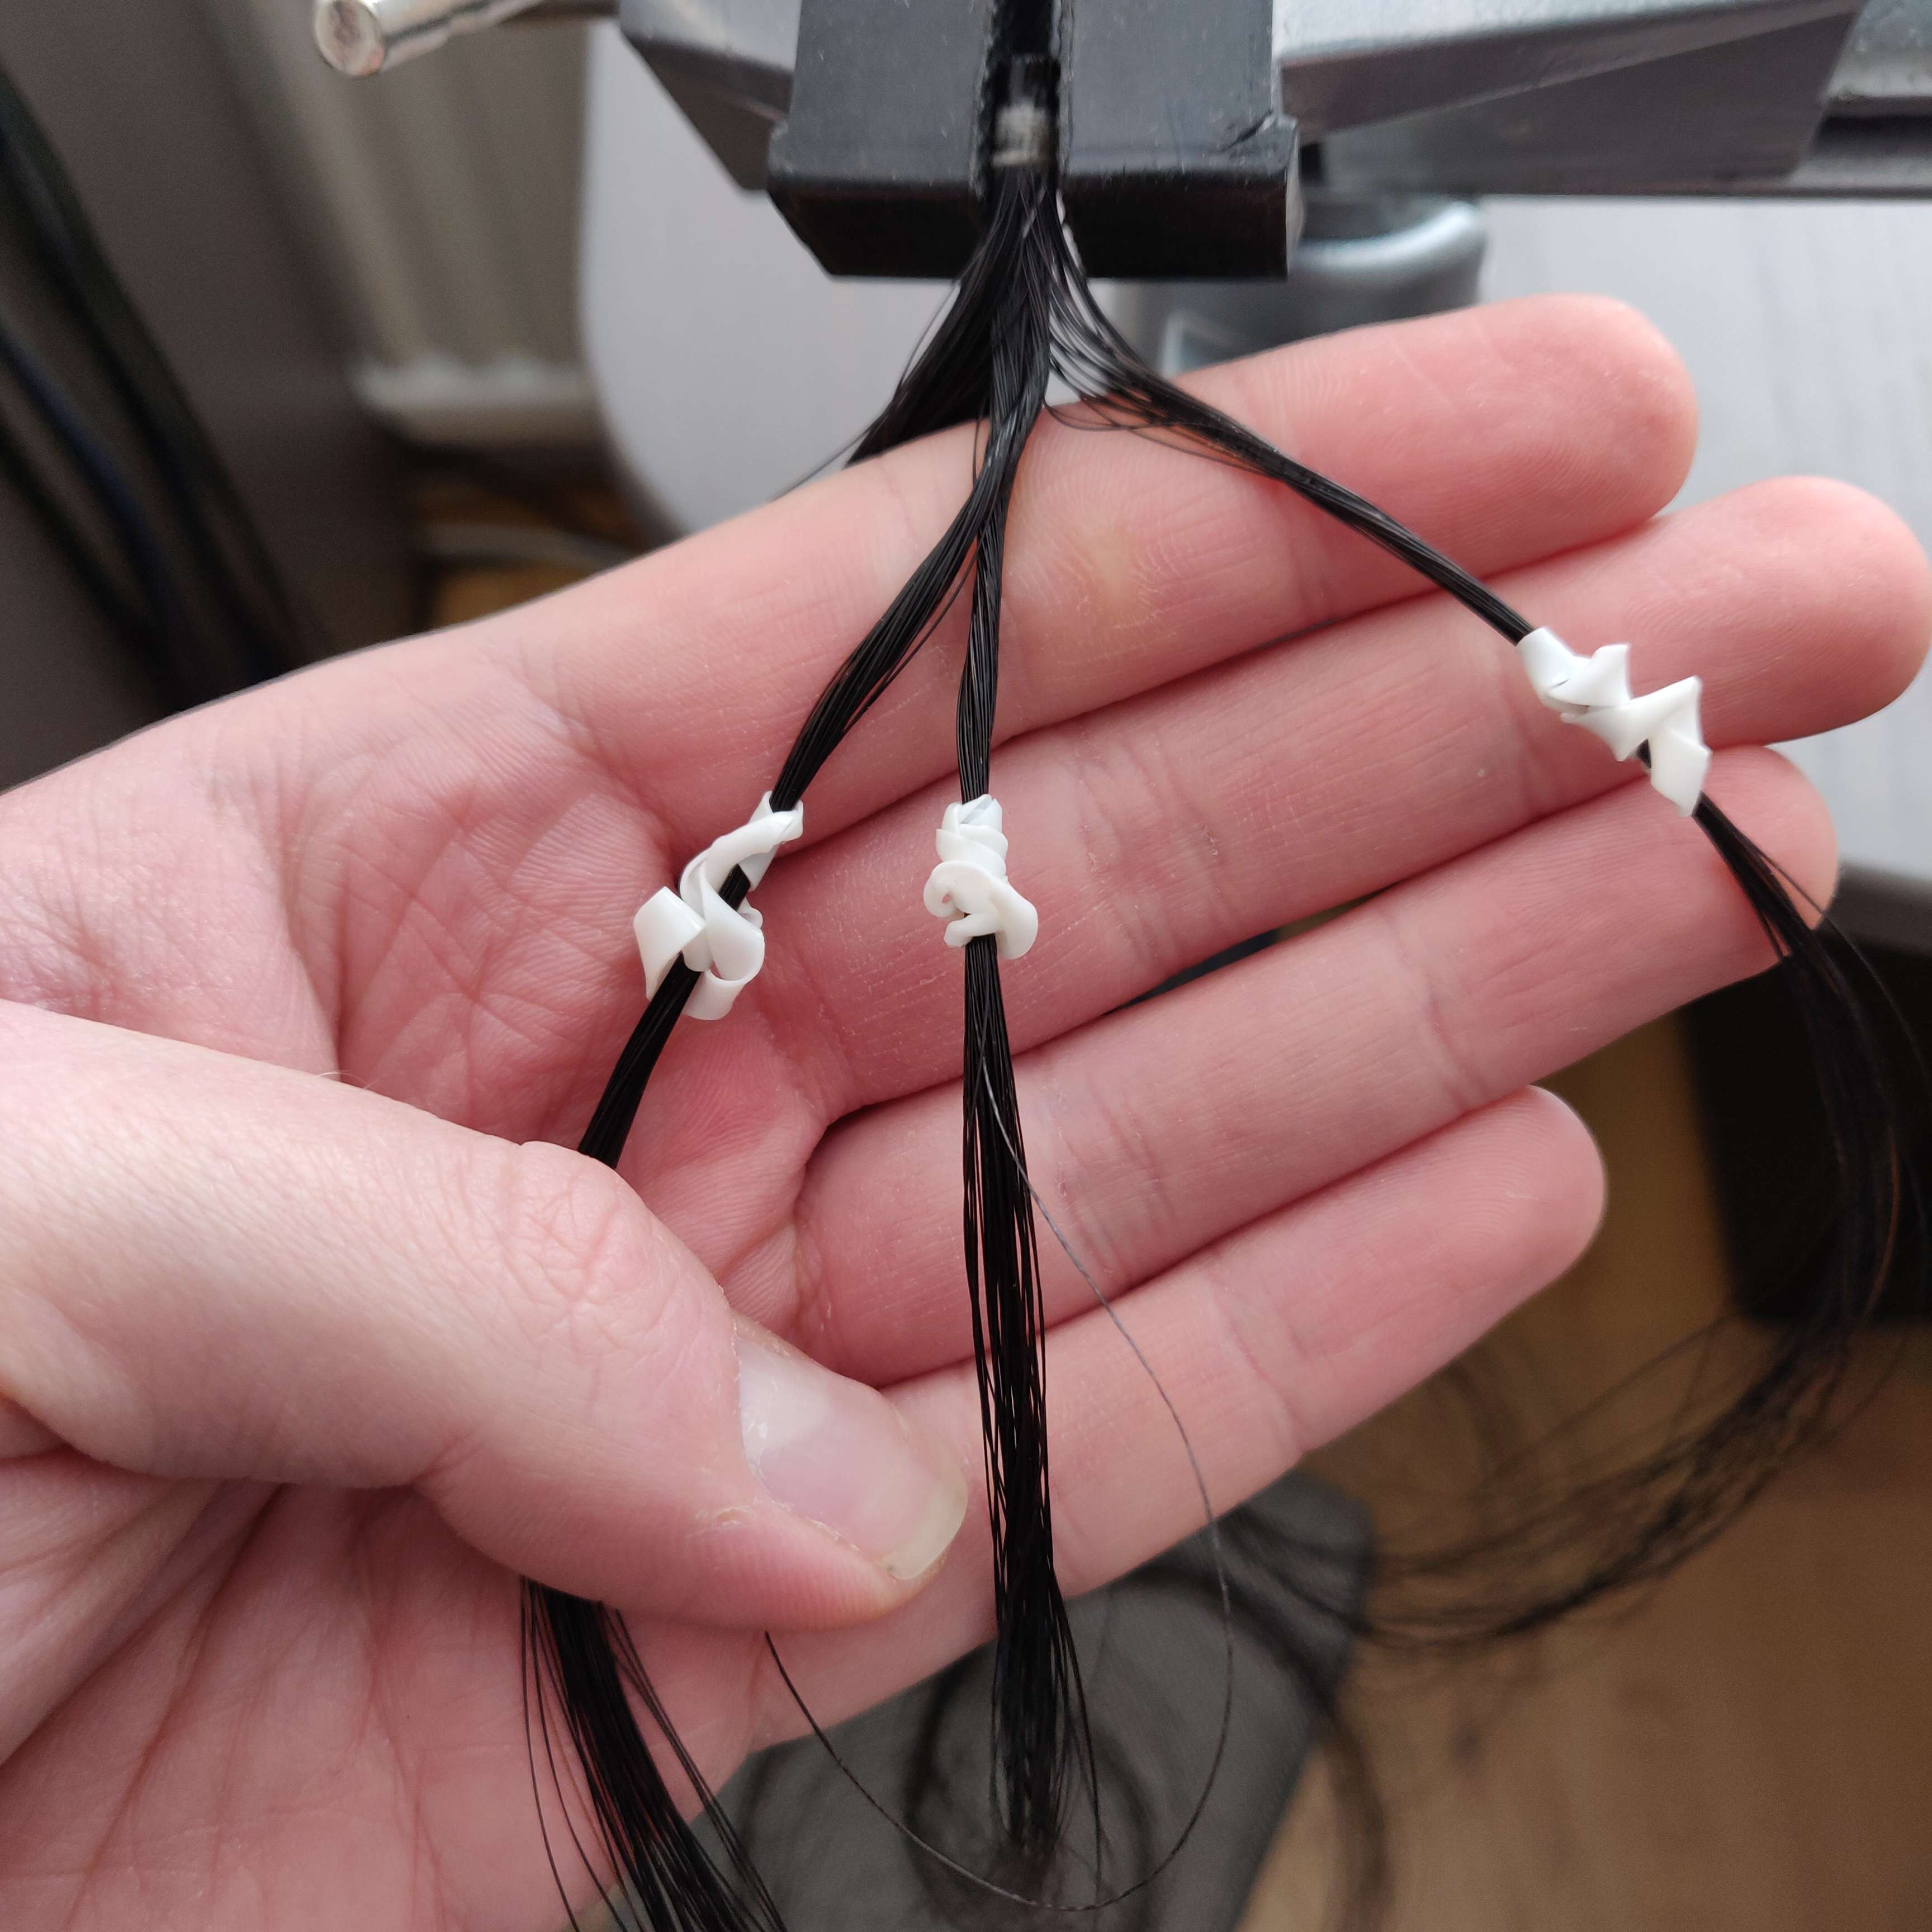
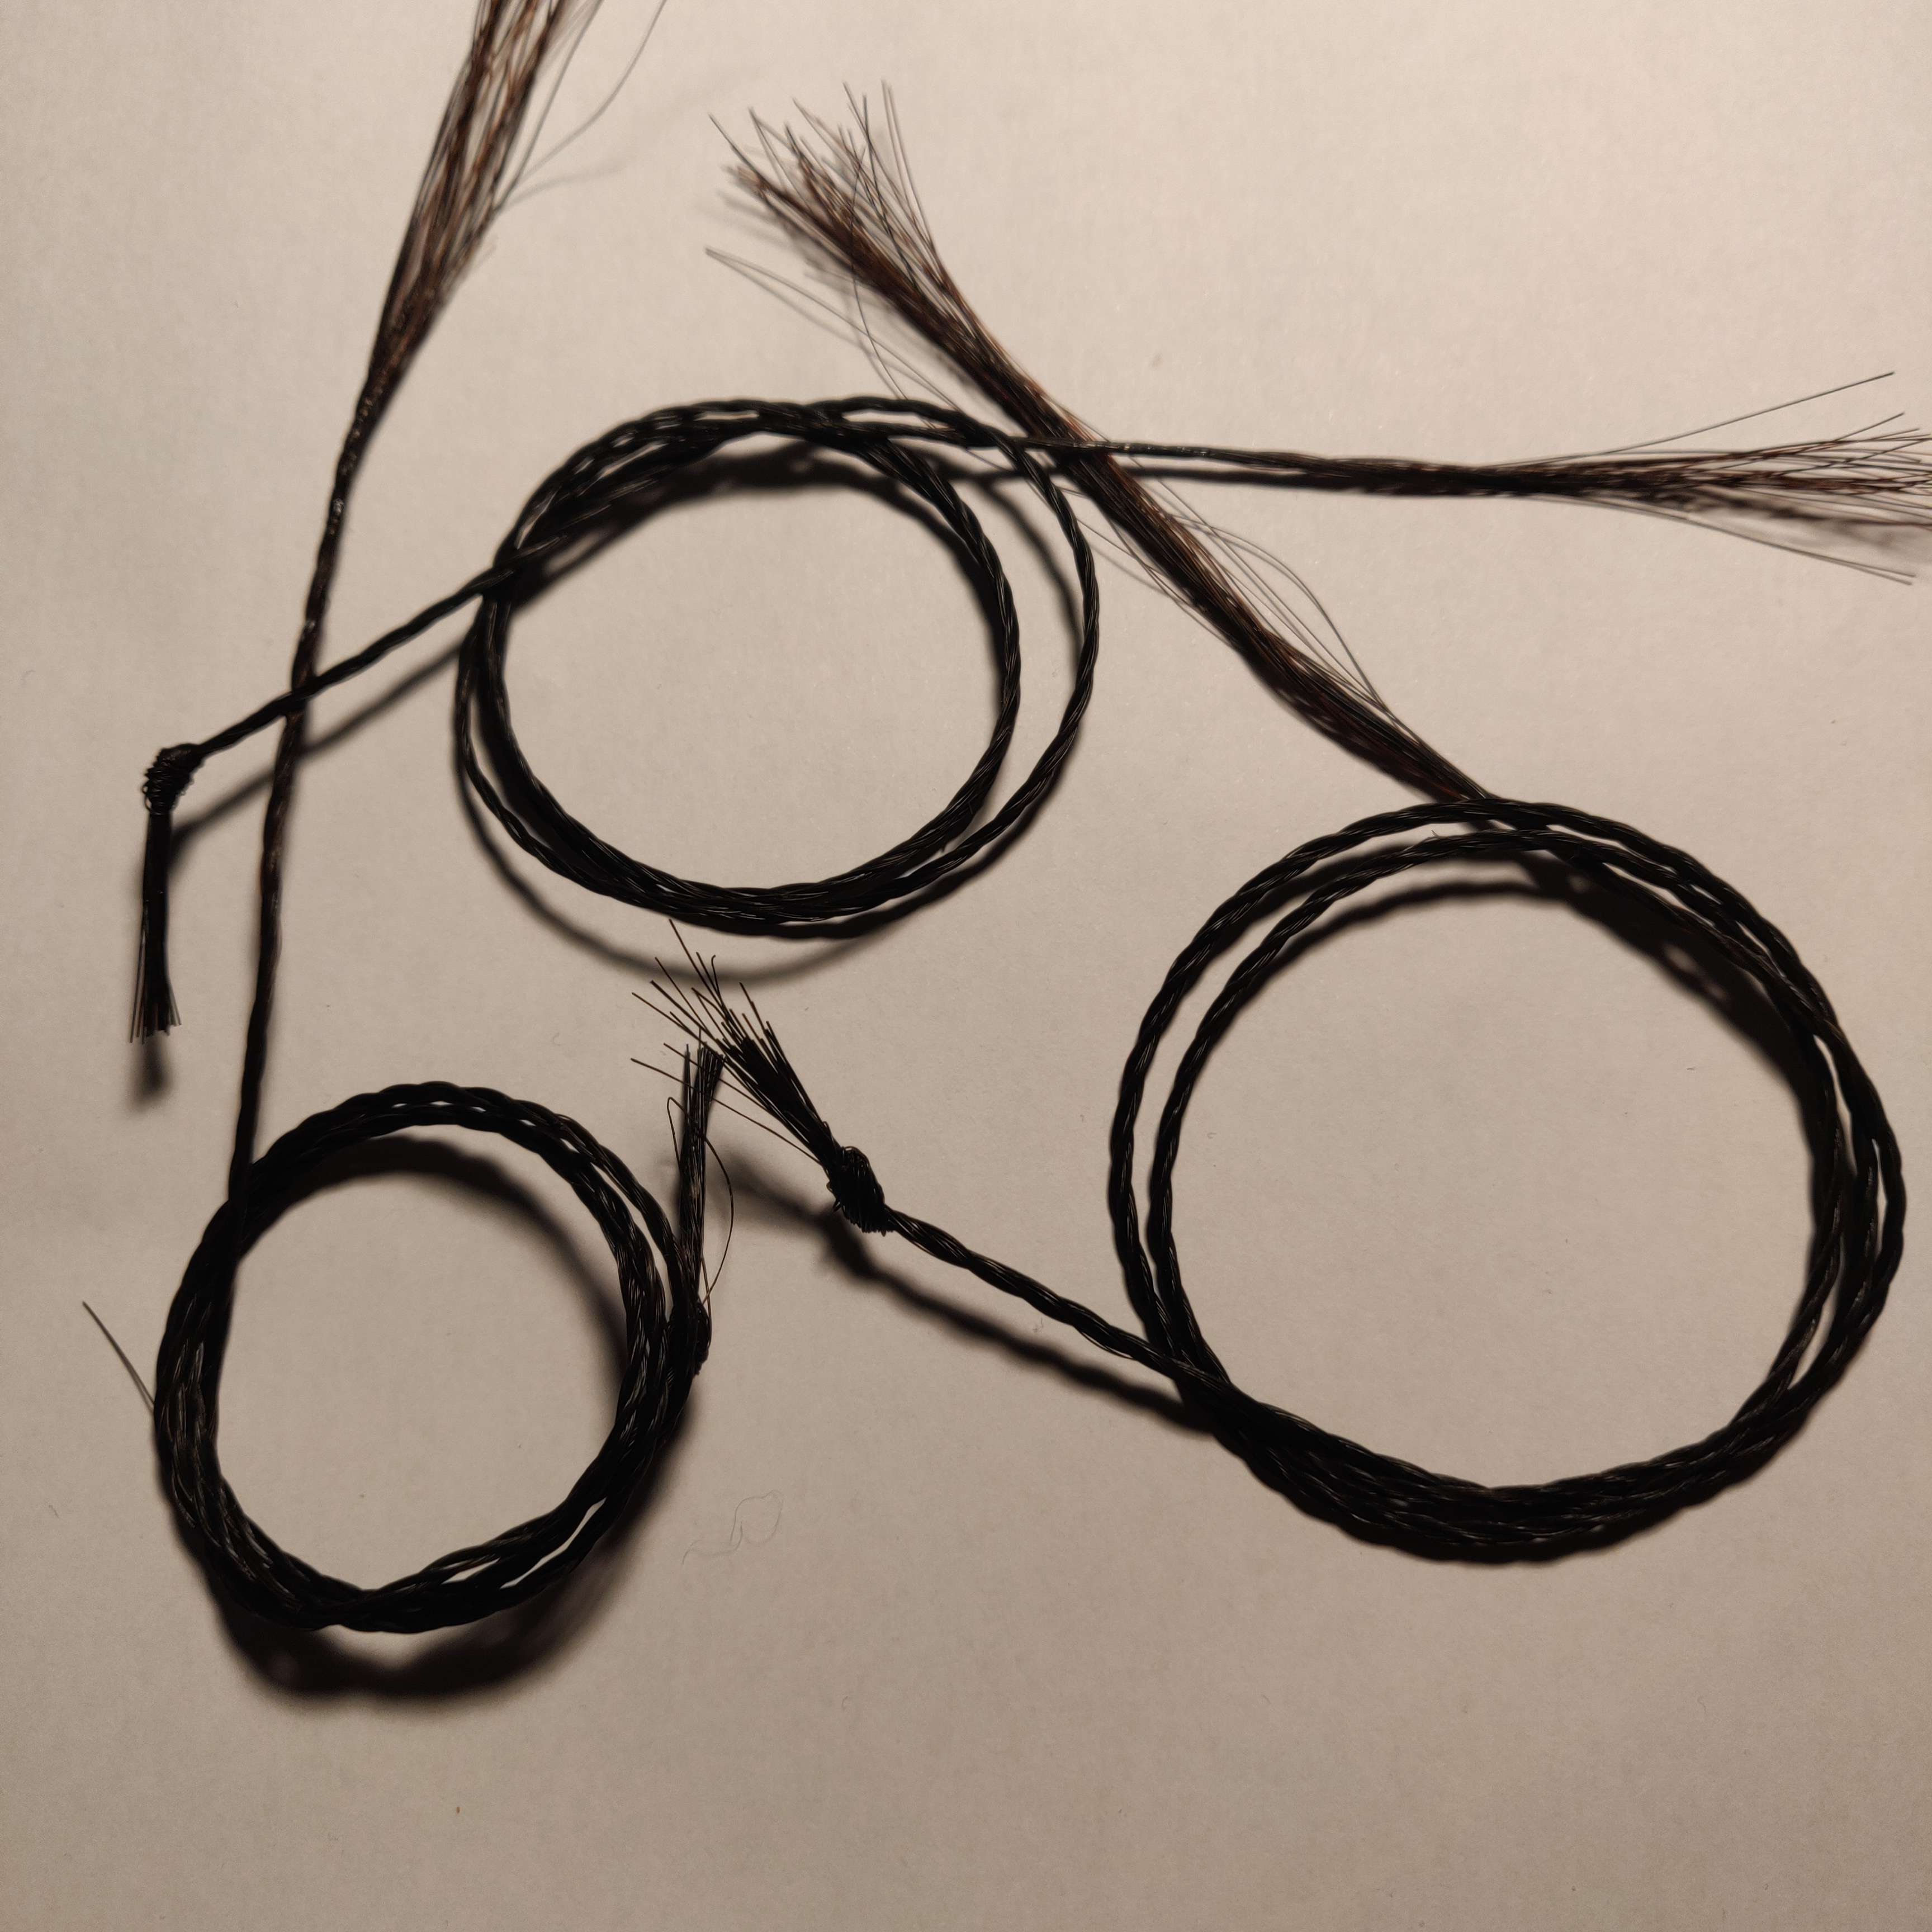
The last piece of the puzzle are the strings. I’ve made two sets of strings, both from horse hair. The first set was made from hair from my girlfriend’s horse’s tail. These hairs were washed as well as I could, gathered into bundles and then twisted. More hairs were used for the lower strings, as they’re thicker. This first set of strings didn’t work very well – just twisting the hairs didn’t add much strength, and the horse they were taken from was a mare. This means that likely the hairs were weaker to begin with, as mares will more often get their tail in the way when urinating.
The second set of strings were made from store bought horse hair, intended for double bass bows. Bow hair comes from male horses, and this bundle in particular was black, meaning that the hairs are slightly thicker and coarser than white hairs. The hairs were again gathered into bundles of various size, but for the second set of strings I opted for a rope braid, essentially making each string three-stranded rope. Doing it this way took a lot longer, but the result is a string that doesn’t break as easily.
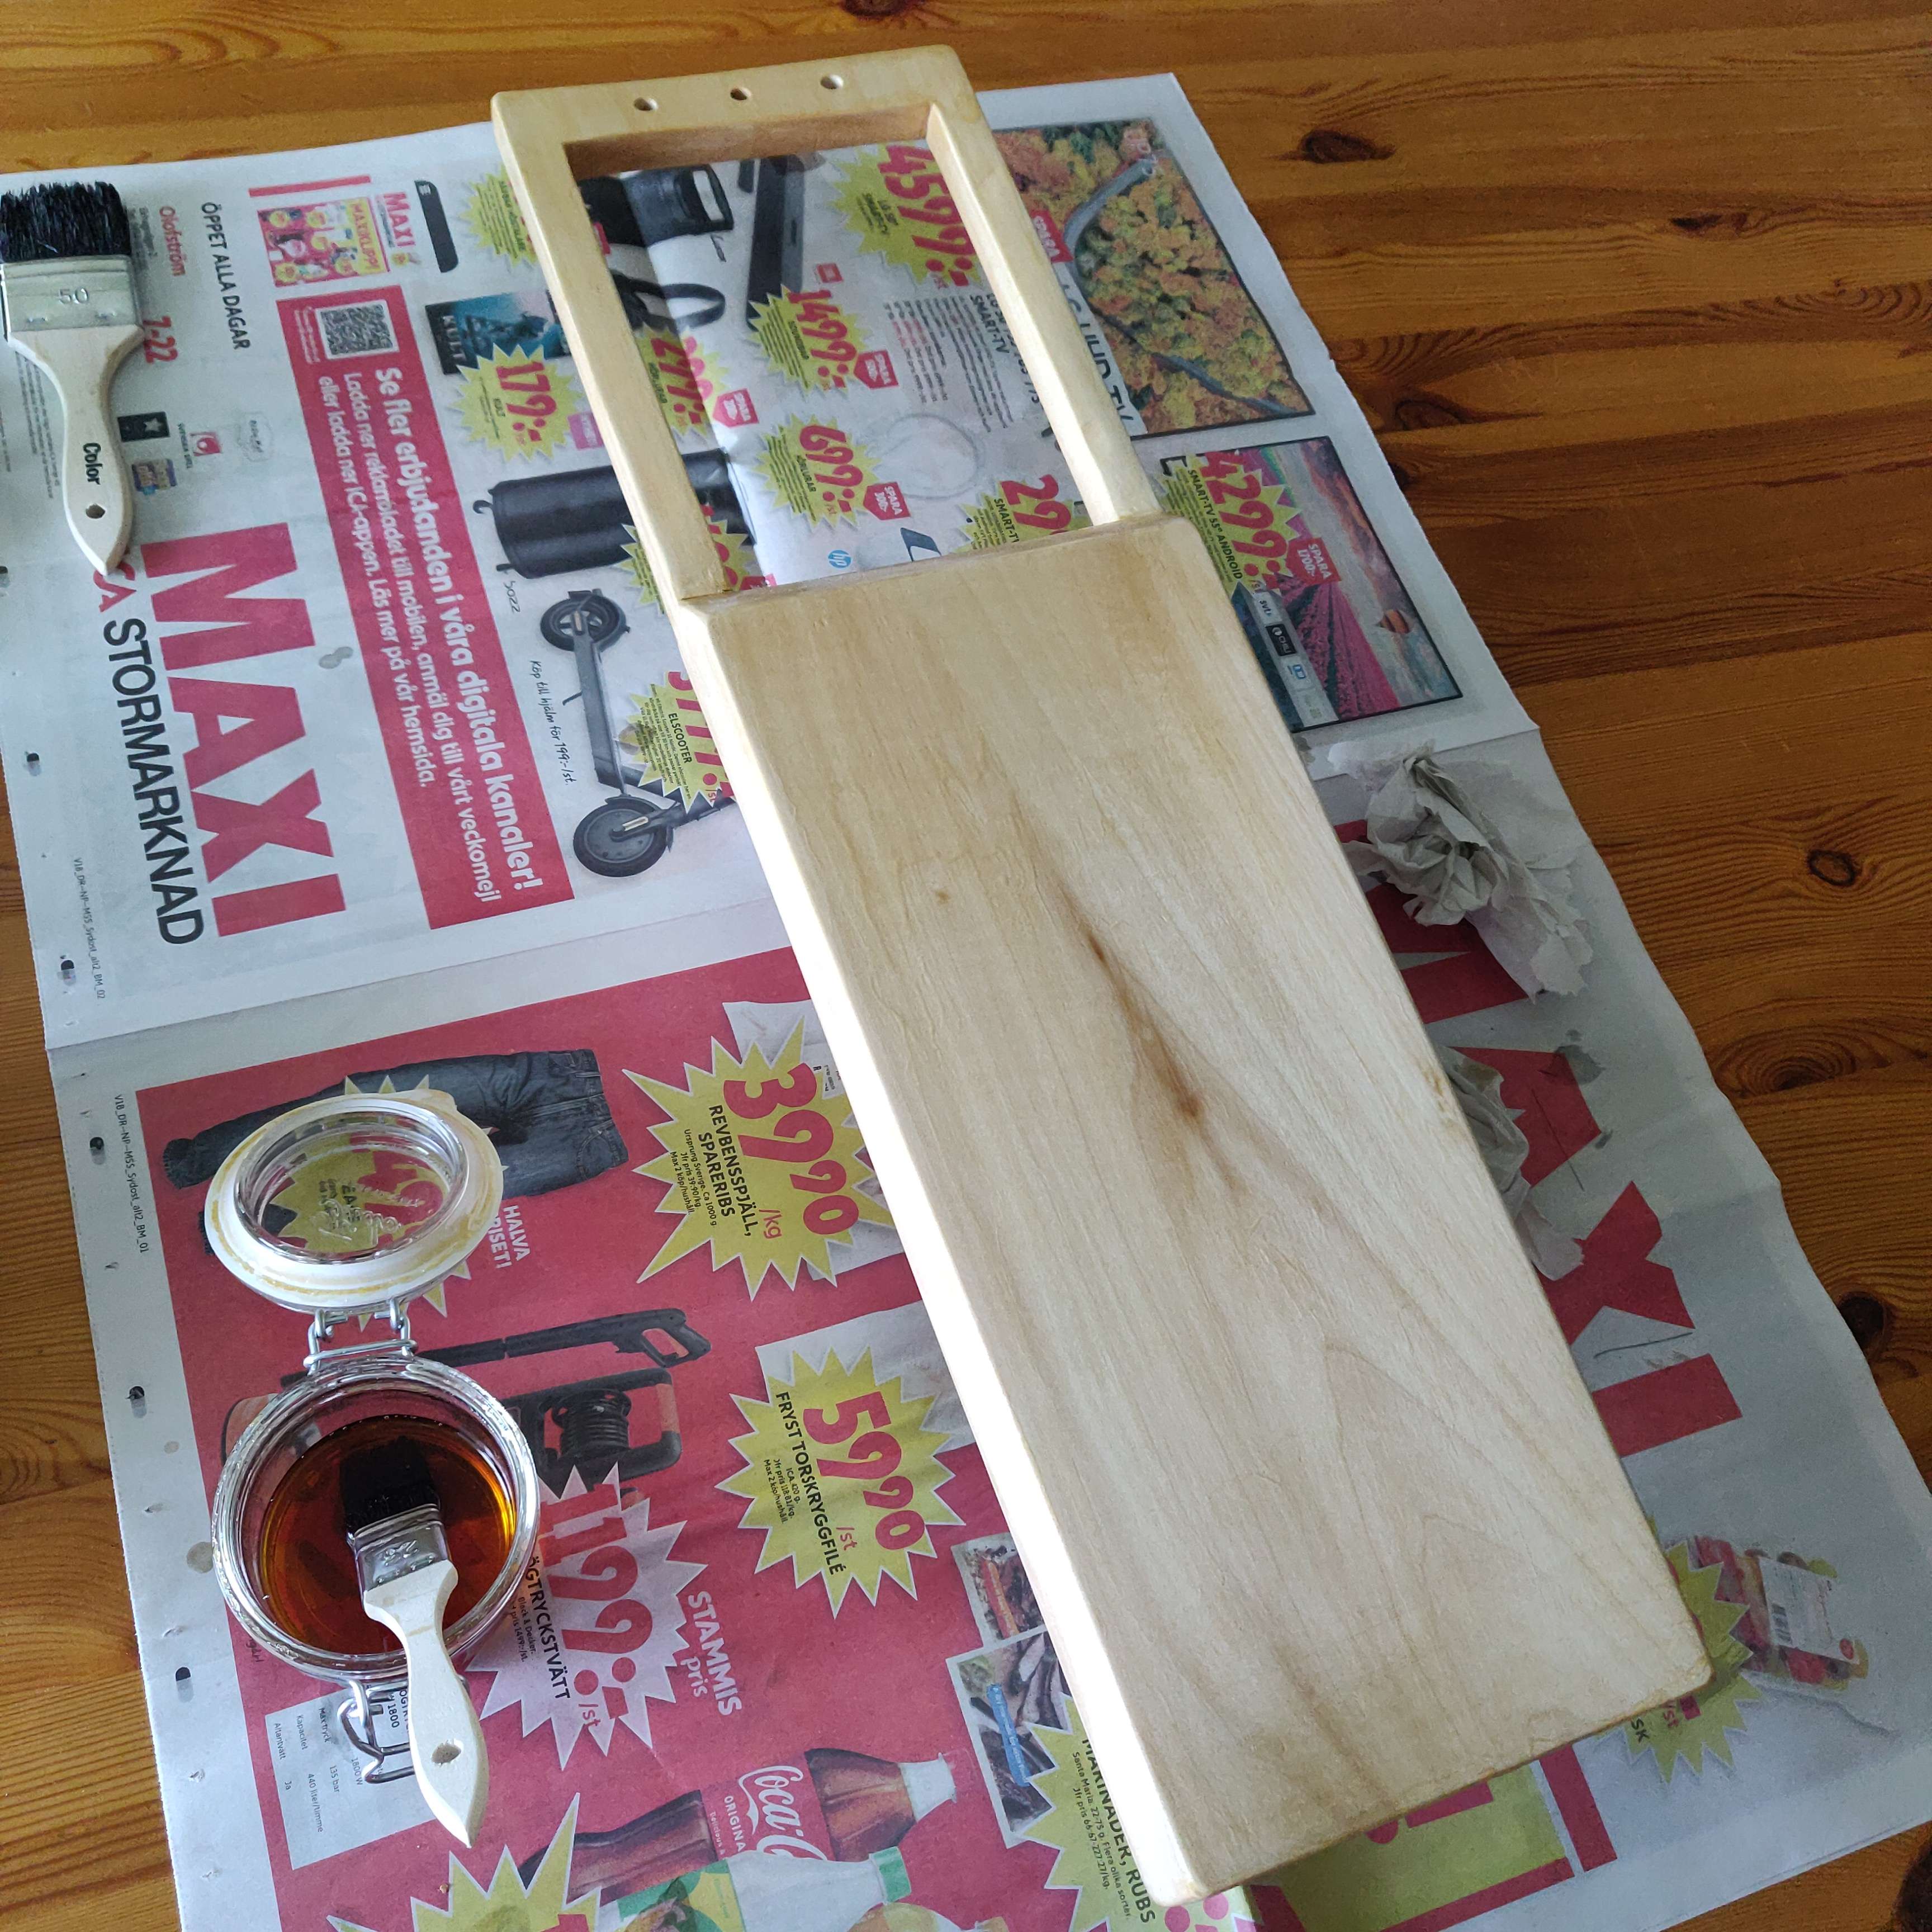
What’s shellac-a-lackin’?
Before putting it all together, the last ting to do is putting a finish on it. For this, I used shellac flakes that I dissolved in alcohol until I had a lacquer with a somewhat loose texture. This was brushed on in three or four (honestly don’t remember) very thin coats. In addition to making the instrument look better, shellac is also used to seal the pores of the wood and protect the instrument from the elements.
Putting it all together
With all that in place, the only thing left to do was putting it all together. The tuning pegs and endpin were put into place, and the tail piece was anchored using some leather. This broke quite quickly though, and was replaced with some jute string. Finally, a sound post was installed roughly under the treble end of the bridge. This is also supposed to increase the volume of the instrument, but I mostly put it in there to protect the lid from collapsing. Finally, the strings were loosely strung and the bridge was raised.
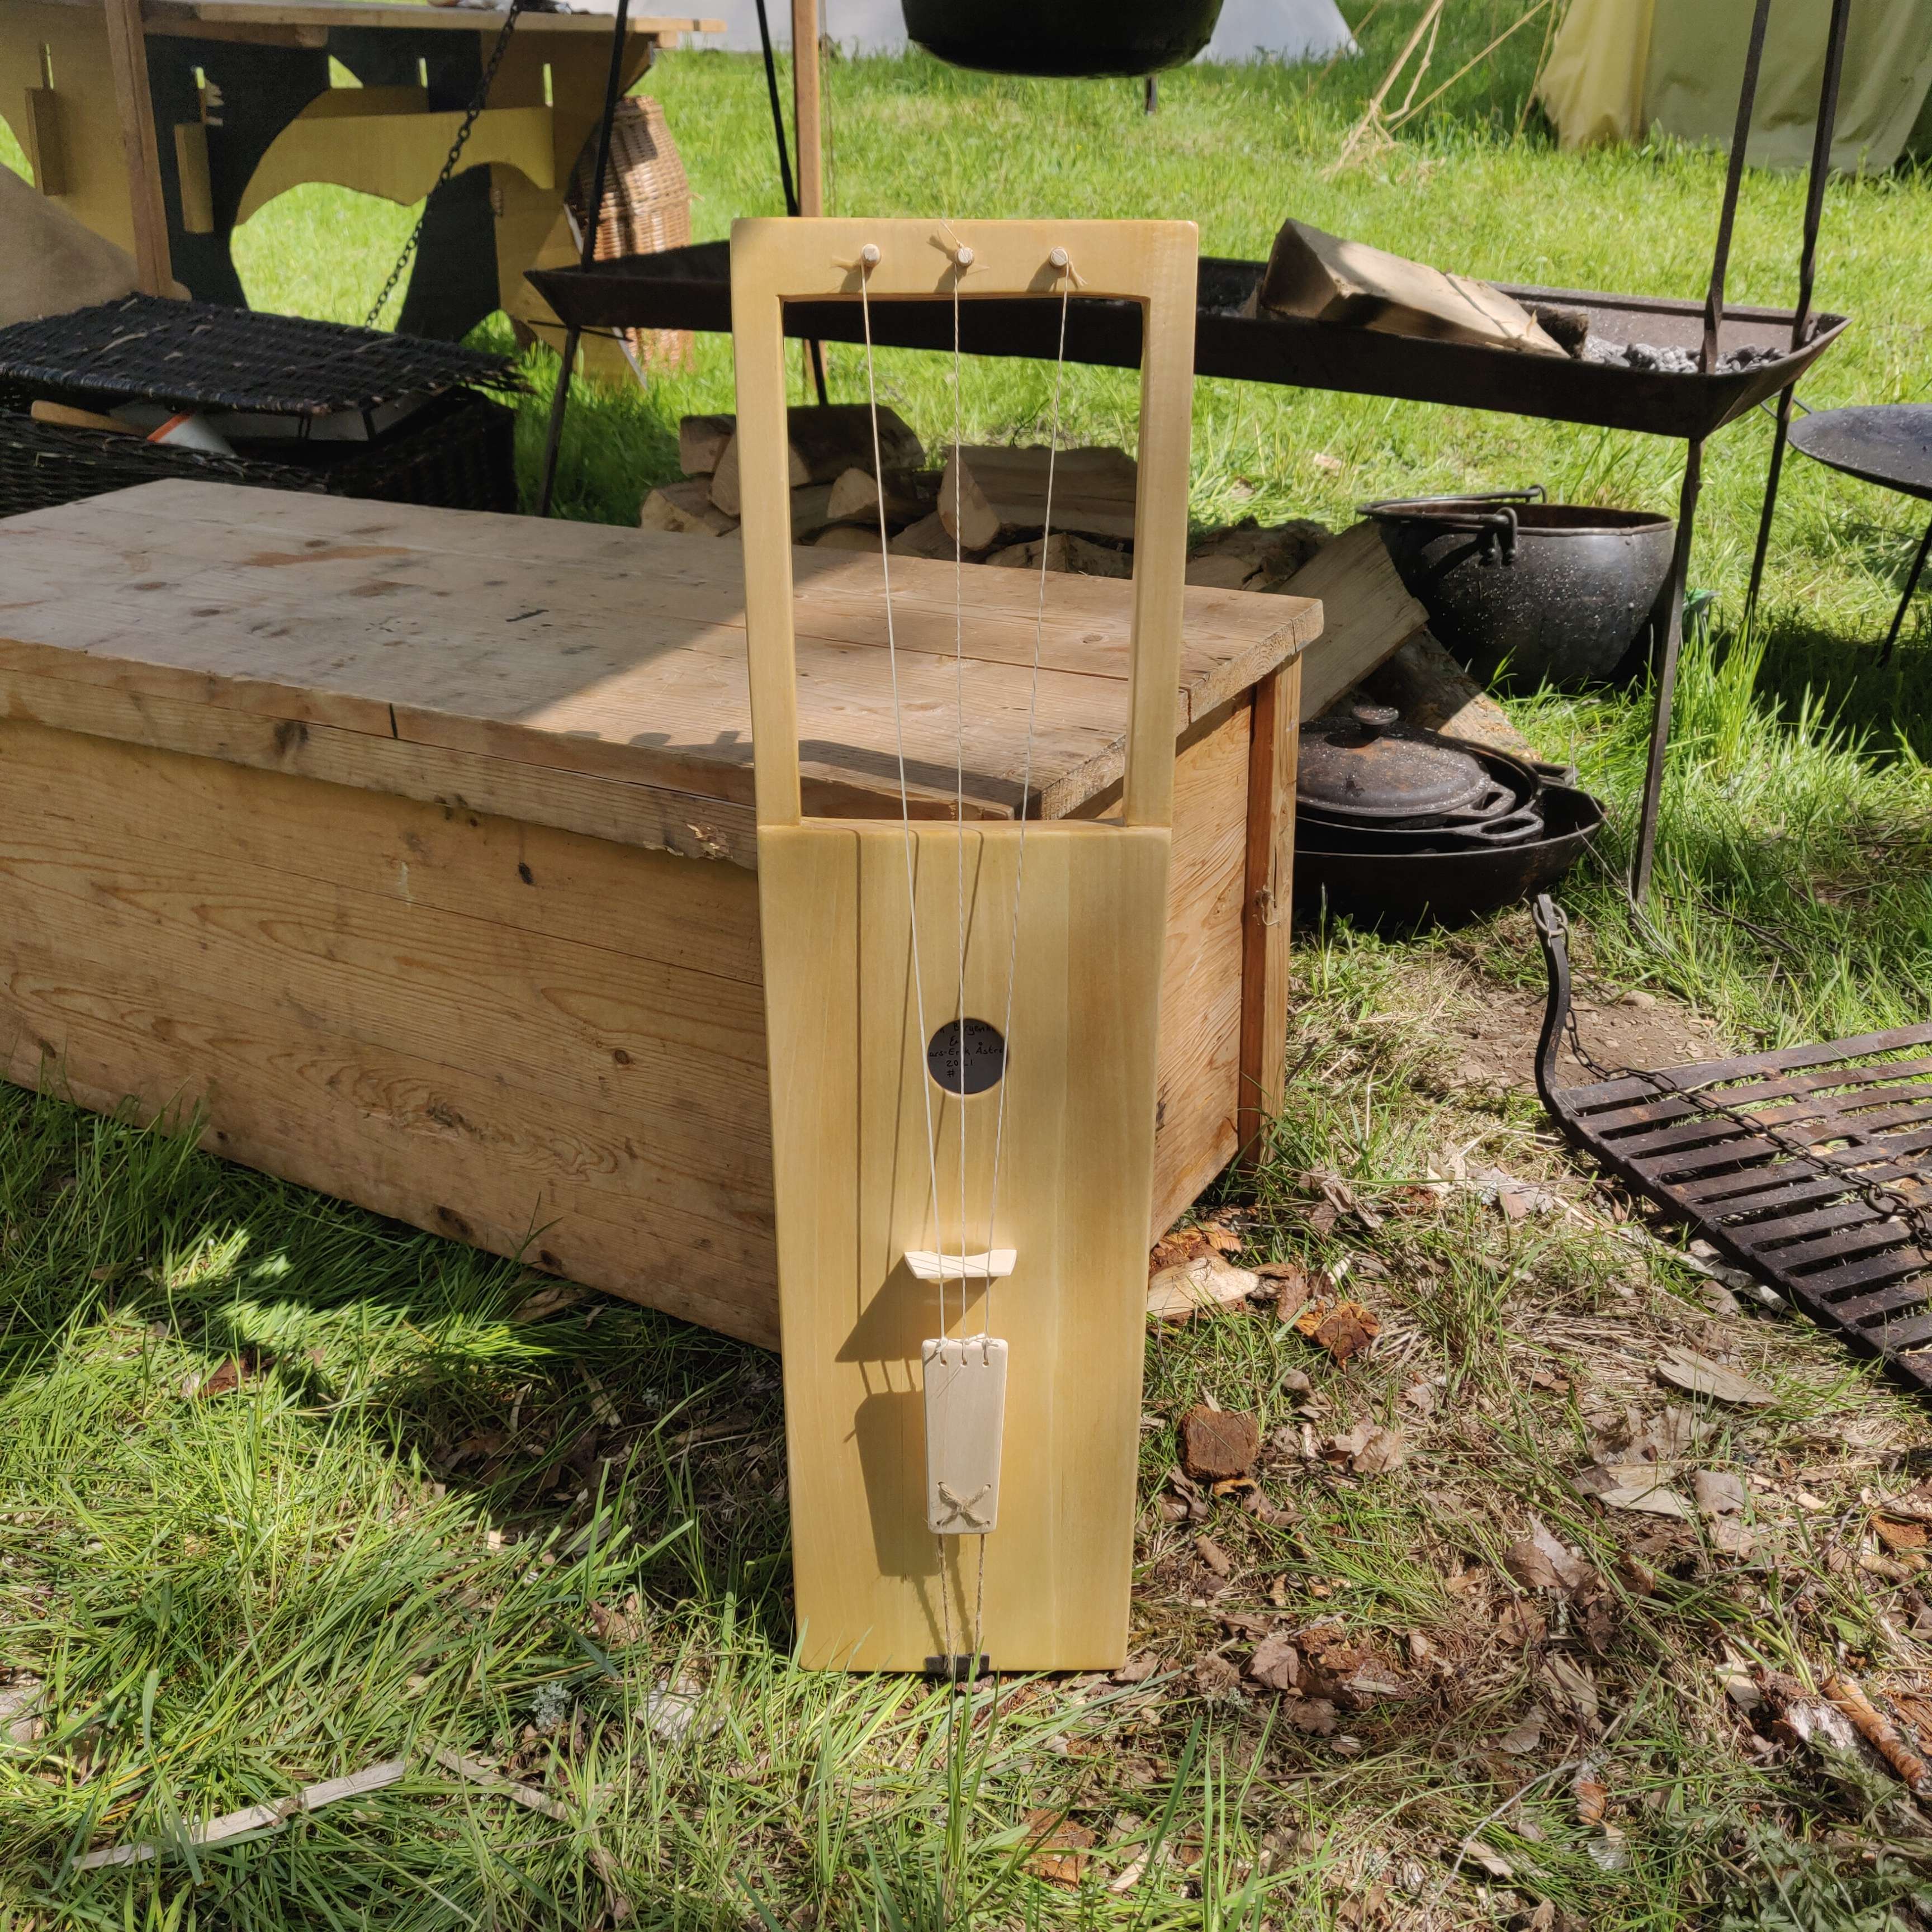
All in all, I’m very happy with it. It’s the first time I’ve done something like this, and there are definitely things I’d change, but it doesn’t sound half-bad. I’ve seen a lot worse attempts at building a talharpa.
Playing it takes some getting used to, but not terribly difficult. What I find most difficult is the fact that it is traditionally tuned quite low, with the highest string being about equivalent of the second lowest of a violin. This limits the songs I know that I am able to play on it. The instrument is still played in e.g. Estonia, so I’m going to look into that tradition for inspiration SomeTime(TM).
As for stuff I’d change, I think the major thing is the thickness of the walls, the lid and the back. The sides are all about 10mm thick, and both the lid and back are somewhere around 3-4mm. Having this much material means that the sound box vibrates less, which in turn makes for a quieter instrument.
Another thing that I’d change (and might change) are the tuning pegs. I made them from maple since I had that on hand, but maple is too soft to do well as a tuning peg. Especially when you cut a slit for the strings, instead of drilling a hole (which wasn’t really an option here, as the strings are a bundle of hair). The result was that the tuning pegs compressed somewhat under the pressure, which isn’t ideal. Changing these is a pretty easily done though.
Conclusion
So, that’s a rough description of how I went around building my first instrument. It was a fun project, and since we used power tools it only took about a week start to finish not counting the year it took for me to get around to lacquering it. I learned a lot, and doing this really gave me the confidence to try more advanced instrument builds. Like building a fyddle. From scratch. Using only hand tools.
I am only slightly crazy, I promise.
![[Valid RSS]](/assets/common/valid-rss-rogers.png "Validate my RSS feed")