
Makings of a Tarsoly belt bag from Birka Grave BJ 904 - The Bag
Posted on 2025-04-291762 words
This is the third post about my reconstruction of a tarsoly belt bag found in Birka grave 904. The first post discussed the background and planning of the project, while the previous post detailed the reconstruction of the bronze fittings. In this post, I will go through the construction of the bag itself.
One of the more interesting features of the BJ 904 bag is that it is likely that only the lid and strap where made from leather, with the bag itself made from coarse wool. Arbman mentions the fabric found with the fittings very briefly in his description of the grave (Arbman, 1943):
[…] zusammen mit den Beschlägen lagen wollene Stoffreste, siehe Birka III, S.70;
[…] There were scraps of woolen fabric along with the fittings, see Birka III, p.70;
As stated in the excerpt above, this is elaborated on by Geijer (Geijer, 1938):
W2. GRAB 904. Taf. 7:3. Zweibindiges Gewebe. Ebenmässig und dicht, aus grobem Garn, das für Kette und Schuss ungefähr gleich fest gesponnen ist. Das eine Fadensystem, wahrscheinlich die Kette, linksgesponnen, 5 Fäden per cm. Das andere rechtsgesponnen, 4-5 Fäden per cm. Farbe rotbraun. Auf der einen Seite deutliche Webetextur, auf der anderen Seite fleckenweise Verfilzung, wahrscheinlich nachträglich entstanden.
W2. Grave 904. Fig. 7:3. Two-binding fabric. Even and dense, made of coarse yarn that is spun with about the same strength for warp and weft. One thread system, probably the warp, is left-spun with 5 threads per cm. The other system is right-spun, 4-5 threads per cm. Reddish brown colour. Clear weave texture on one side, patchy felting on the other side, probably created later.
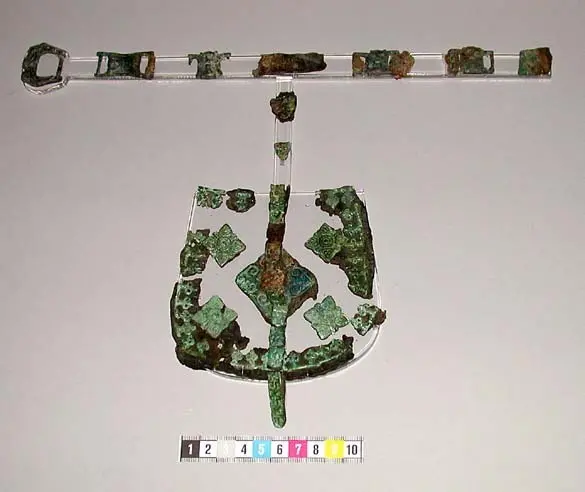
Finally, Gräslund states that this wool fragment is likely from the bag itself, and draws the parallel to the bag found in Rösta in Ås, Jämtland (Gräslund, 1986):
Die Tasche bestand wenigstens bei Bj 731 und wahrscheinlich auch bei 904 aus Stoff. […] Es ist interessant, dass es in Bj 904 Reste eines groben Wollstoffs gab, die von der eigentlichen Tasche herstammen können. […] so könnten etwa die Fuchsköpfe aus Bj 904 den Bärenköpfen am Riemen der Tasche von Rösta entsprechen.
The pocket was made of fabric at least in BJ 731 and probably also in 904. […] It is interesting that in Bj 904 there were remains of a coarse woolen fabric that could have come from the actual bag. […] For example, the fox heads from Bj 904 could correspond to the bear heads on the strap of the Rösta bag.
Wanting to make as good a reconstruction as possible, I decided to make the bag out of wool in my bag, naturally.
I dyed 💀
I shopped around for suitable fabric for quite a while. As Geijer states, the fabric was reddish brown and quite coarse with only 4-5 threads per centimeter in both the warp and the weft (Geijer, 1938). This tells me that the fabric was most likely dyed with madder, and so I looked for a coarse fabric with a color resembling that of madder. However, I never found fabric that fit these criteria, and decided to “simply” buy undyed fabric that fit my needs and dye it myself. I was already going to cast bronze fittings for the project, so one more layer of insanity only seemed fitting. Being reasonable has never been my strong suit anyway.
After a while I had found two woollen fabrics to dye - one white and coarse fabric with a cotton warp and woollen weft, and one “natural gray” fabric that was much less coarse (probably closer to 10 threads per centimeter). As I needed quite small amounts of fabric, I ended up dyeing only 260g in total. For this, I used 53g of alum dissolved into 13L of cold water for mordant. The fabric was put into the solution, all air was squeezed out of the fabric, and it was the heated to 90C and kept at that temperature for 1h. The solution was then left to cool overnight, with the fabric still in it.
The next day, I prepared the dye vat with 230g of powdered madder mixed into I think 15L of water (I forgot to write this down). Once mixed in properly, the madder soup was heated to just under 70C, the fabric was squeezed as dry as I could get it, and added to the soup. It was then held at just shy of 70C for two hours, after which I removed the fabric and rinsed it to get rid of any excess dye.
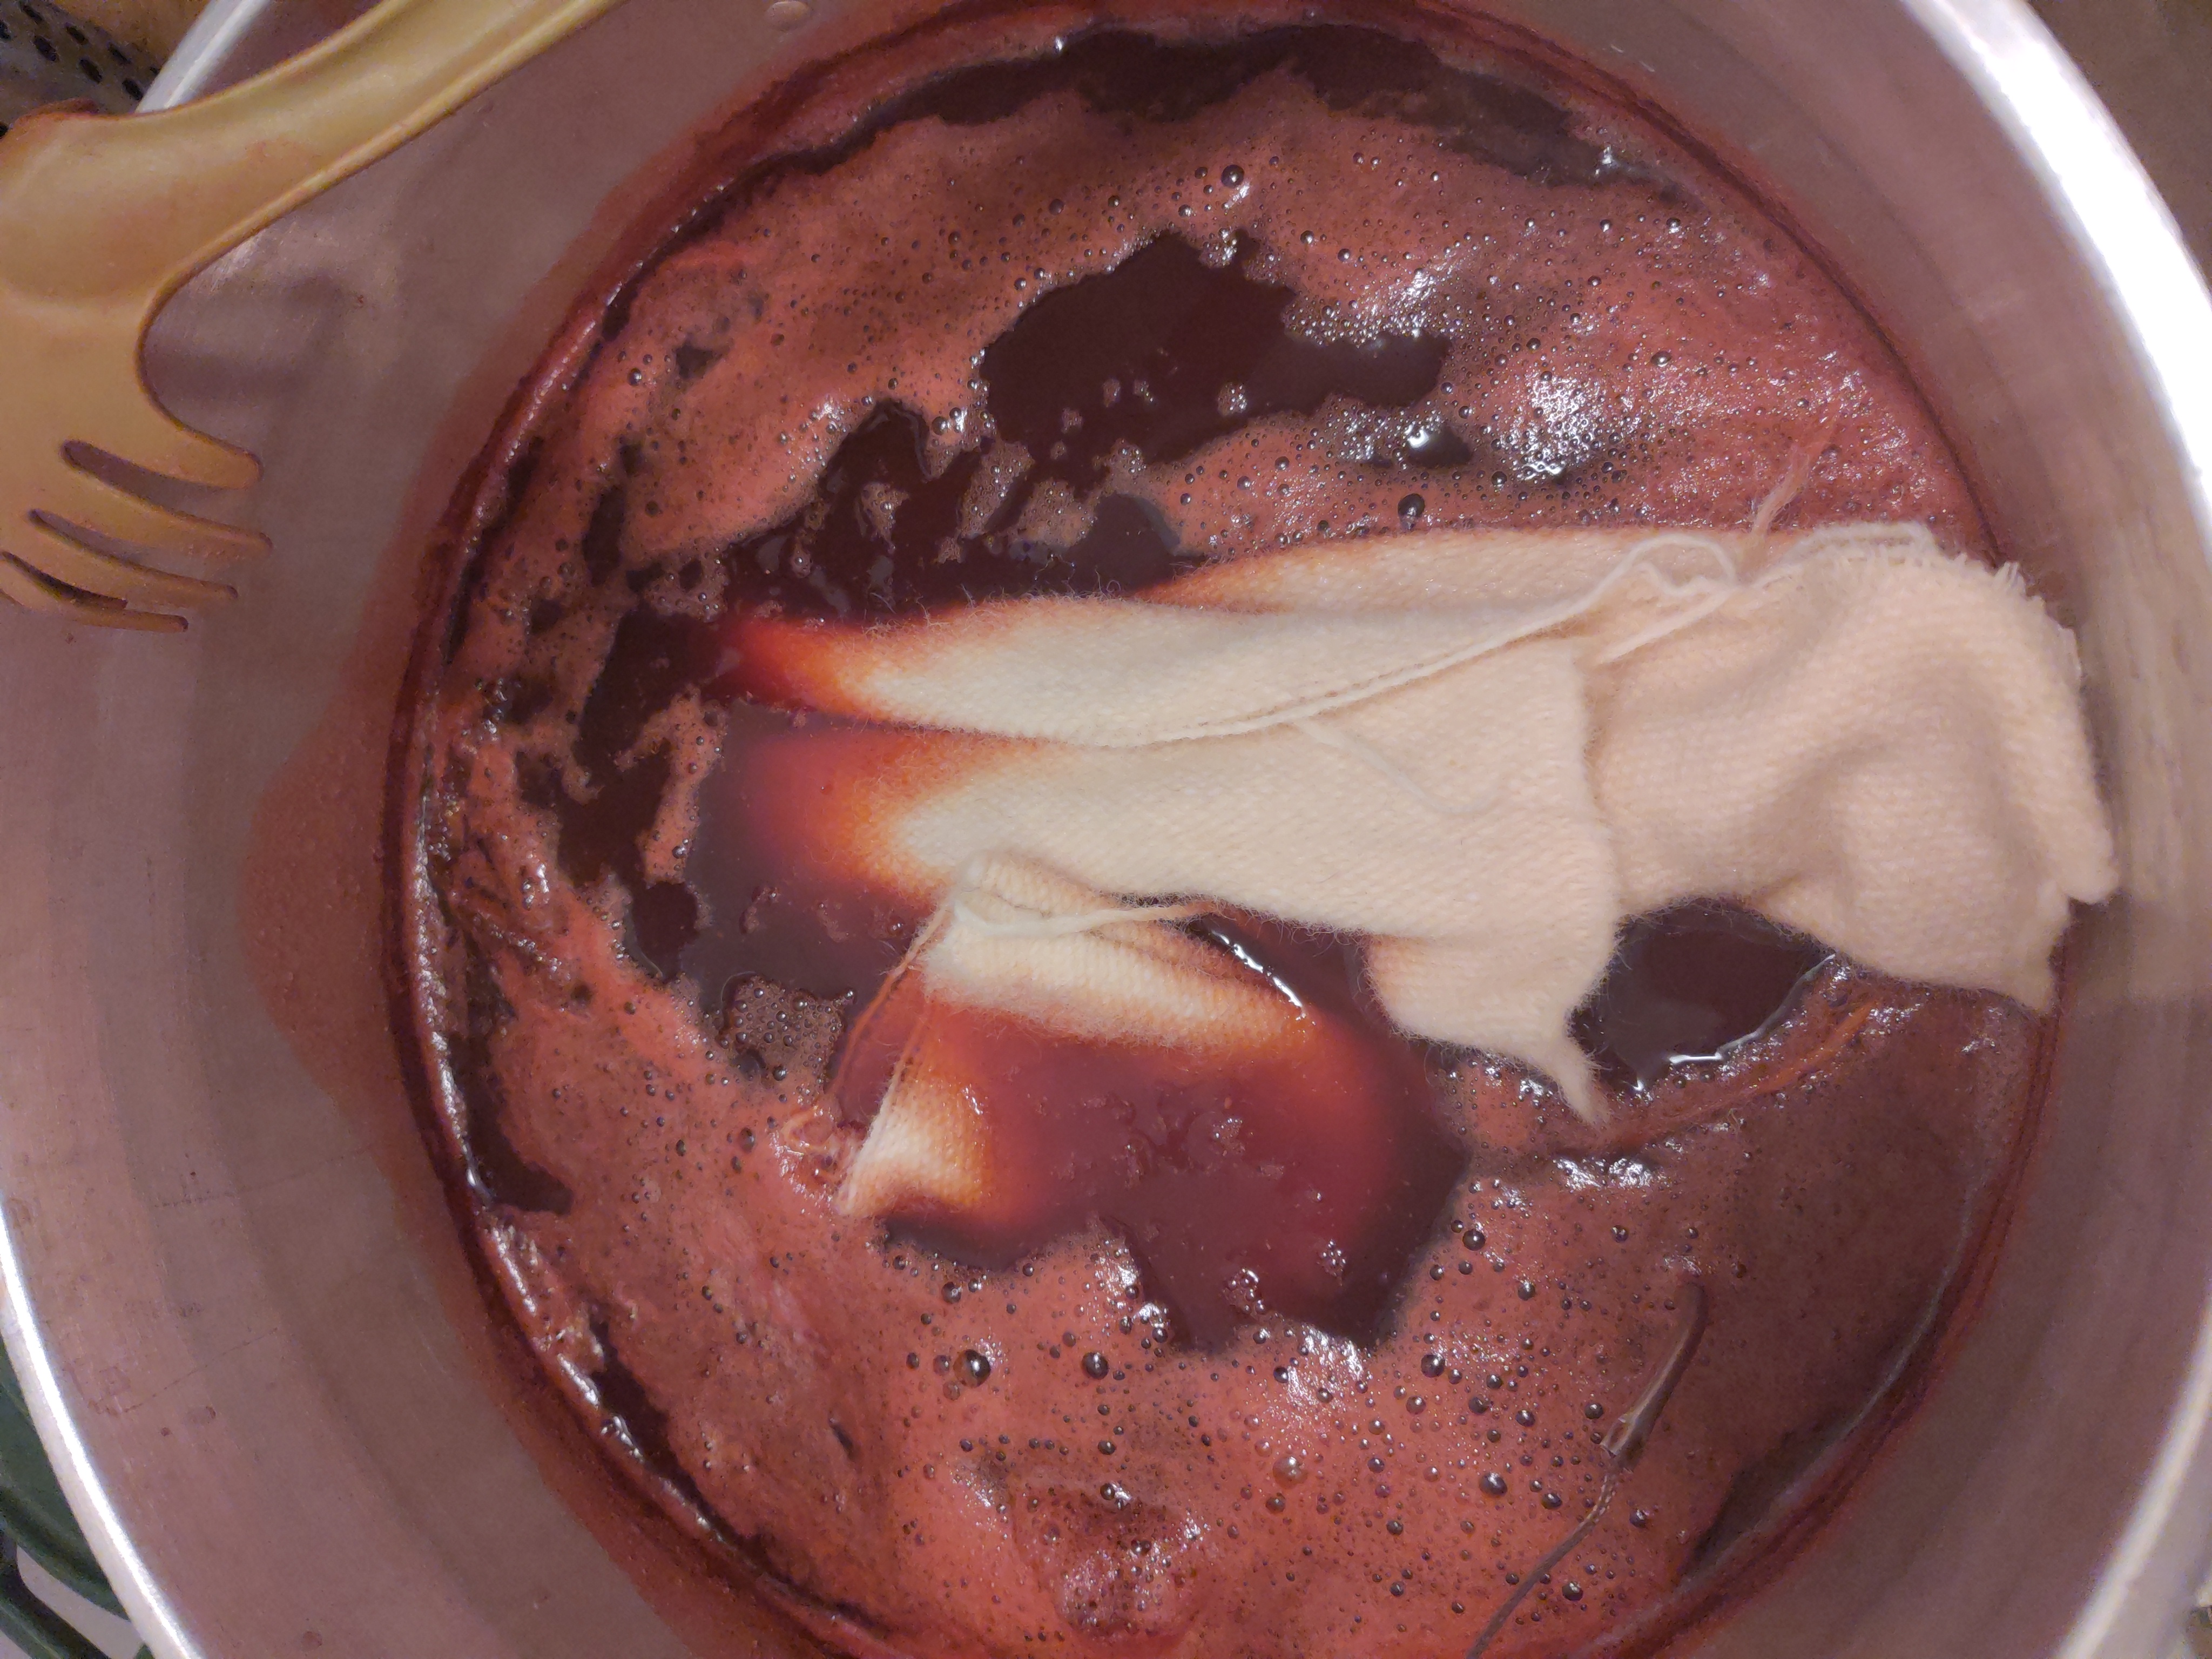
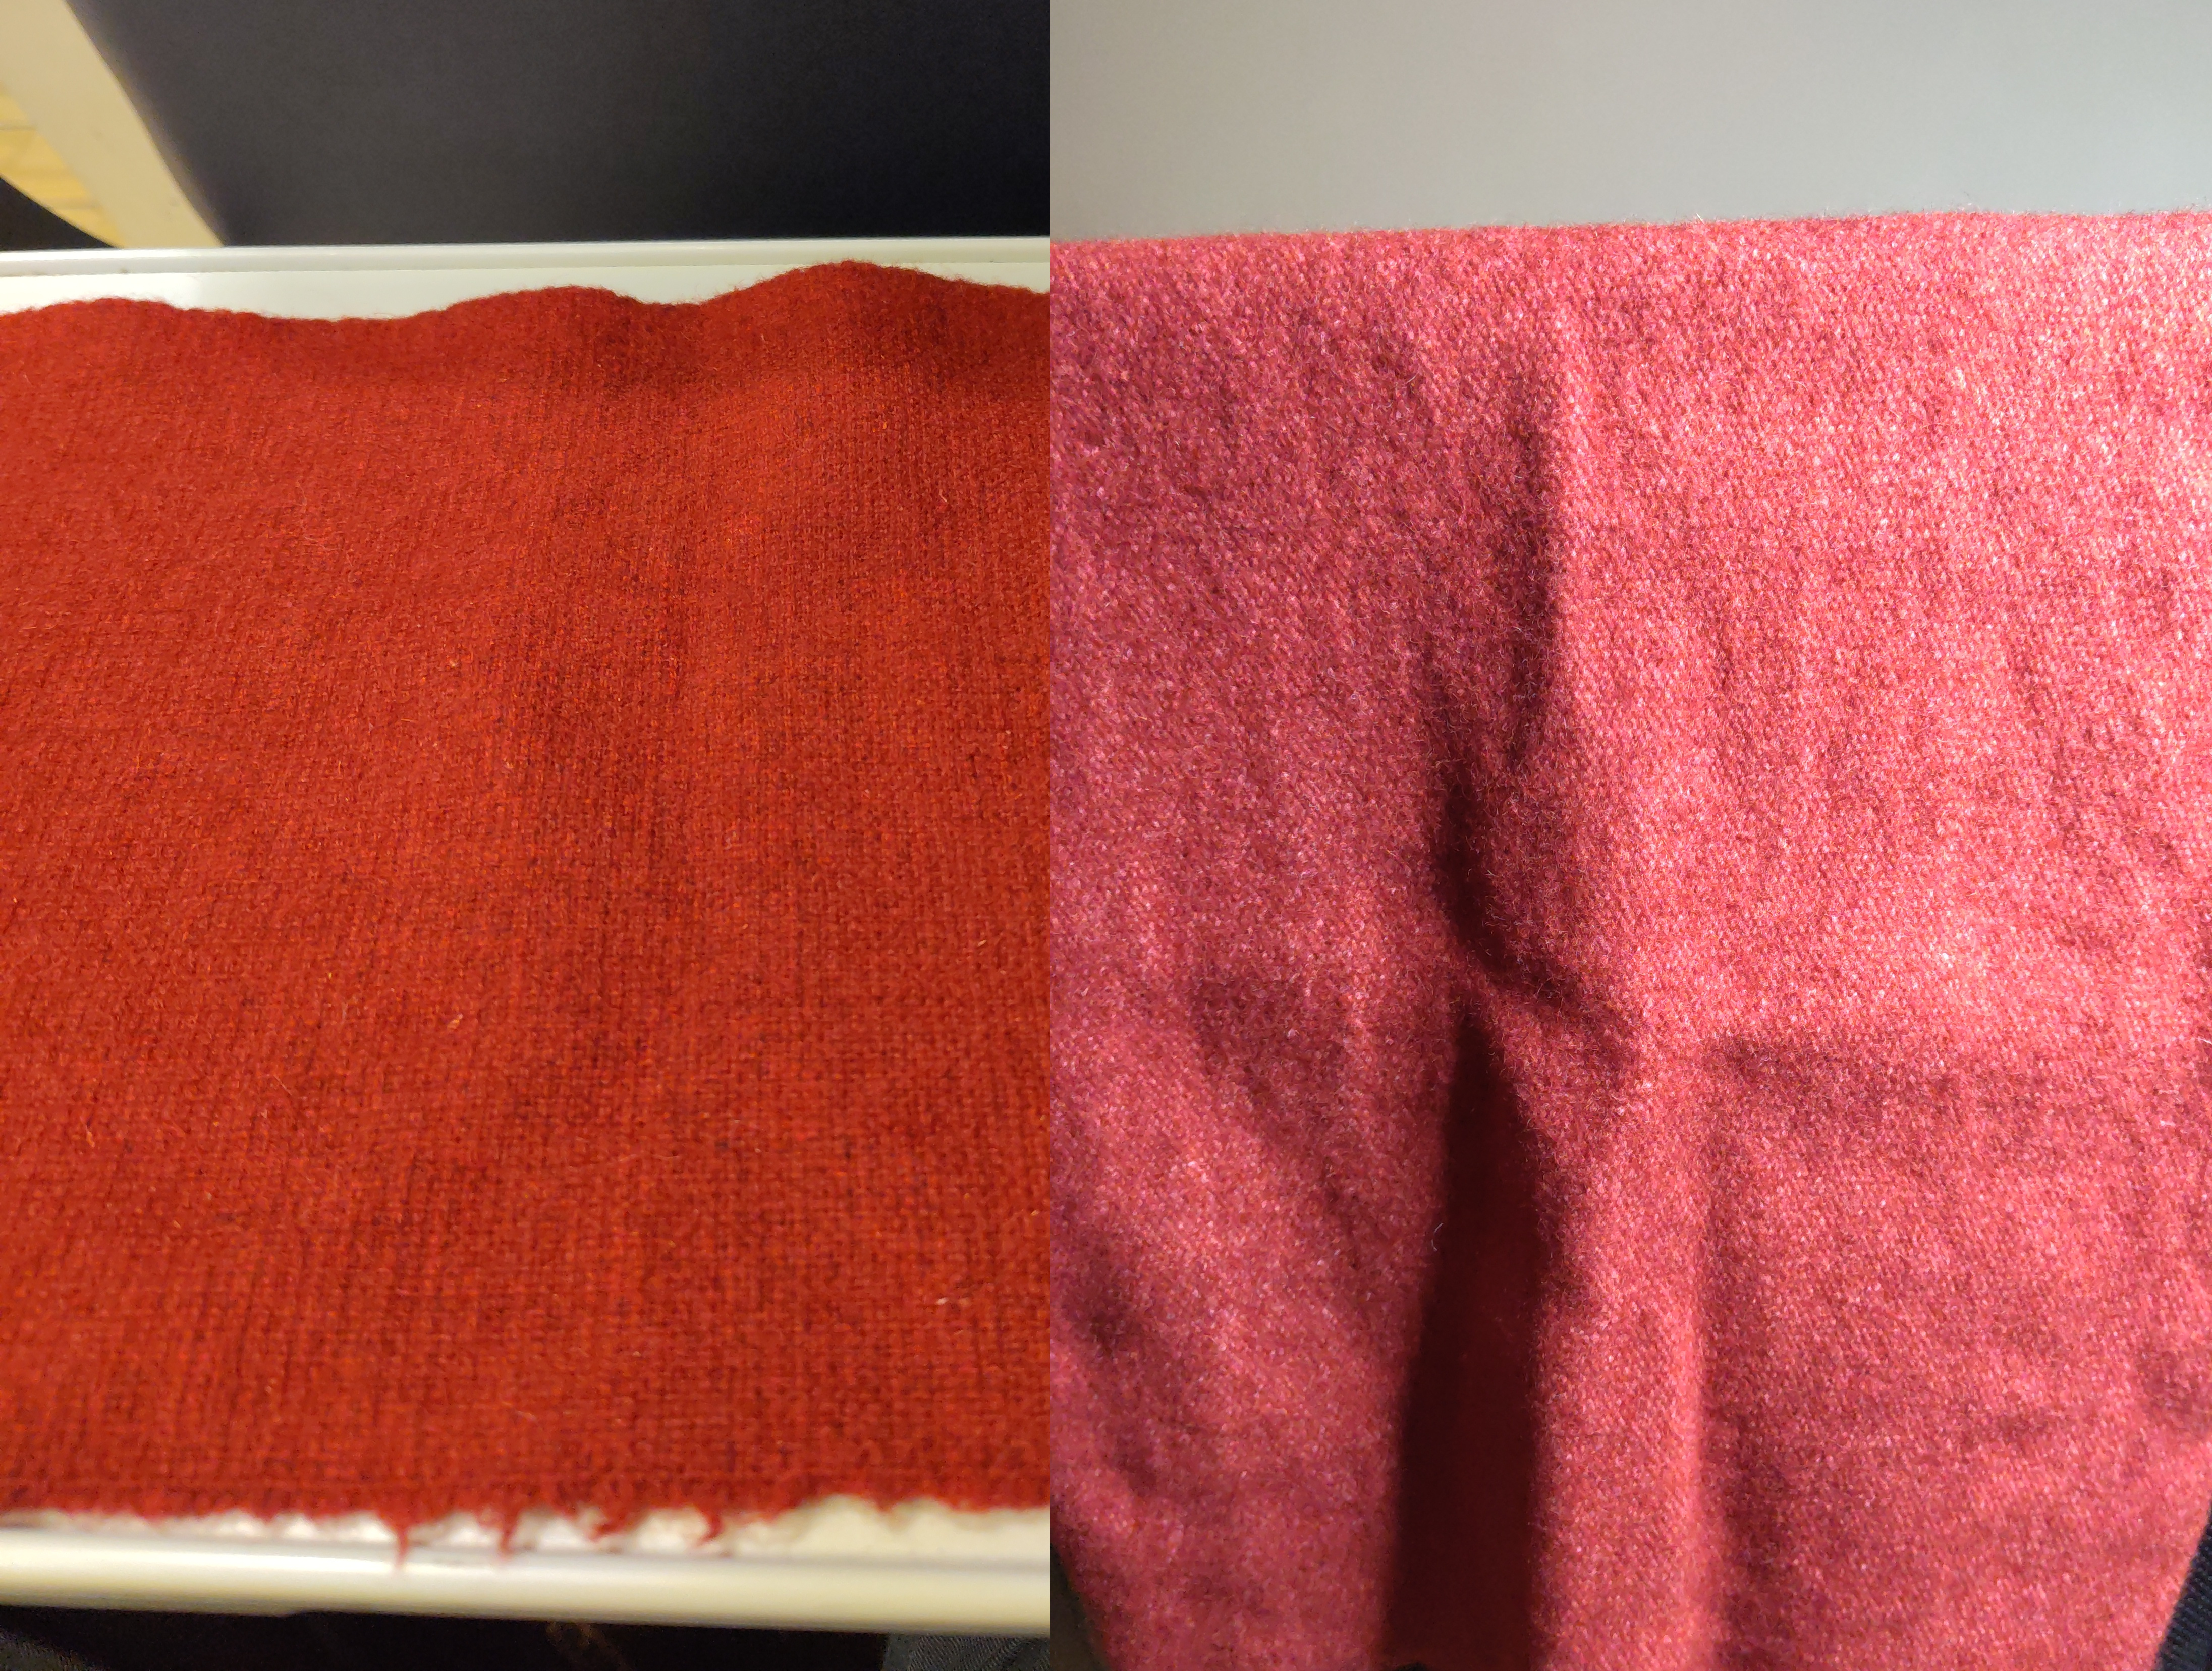
Both fabrics turned out really well, with even and clear coloring. After much deliberation, I decided to use the less coarse fabric for the bag, as I preferred the color of that fabric. If I change my mind later, I can always just replace the fabric in the finished bag, it’s not really a big issue.
Downsizing
In my first post about this project, I discussed the size of the bag, stating that I was going to make it about 16x16x5cm in size. I based this measurement on mainly two things - it being enough to carry around e.g. my phone when at an event, and the size of commercially available bags of the same type. However, I have since revised this decision.
Type 3A bags are quite common among viking age reenactors, and most that I’ve seen in use are the commercially available ones. Frankly, I find that they look a bit ridiculous, because they’re really big. The few I have seen that are made to scale are significantly smaller, and they look a lot better as a direct result. This wasn’t the major factor in why I decided to revise the size of my bag, however.
The main factor for me was the fittings. When I made the wax originals that I was going to cast the fittings from, I made them to scale to within 1mm from the original finds. Once done, I started putting the bag itself together, and I realize that if I make the lid of the bag 16x16cm, that’s approximately twice the area compared to what the original bag would likely have had. With my fittings being to scale, this would likely make the bag look “barren”. Having poured probably around 40 hours just on the wax originals for the fittings, I wanted the bag to look as good as it possibly could, and so I decided to sacrifice practicality in favour of making the whole bag to scale.
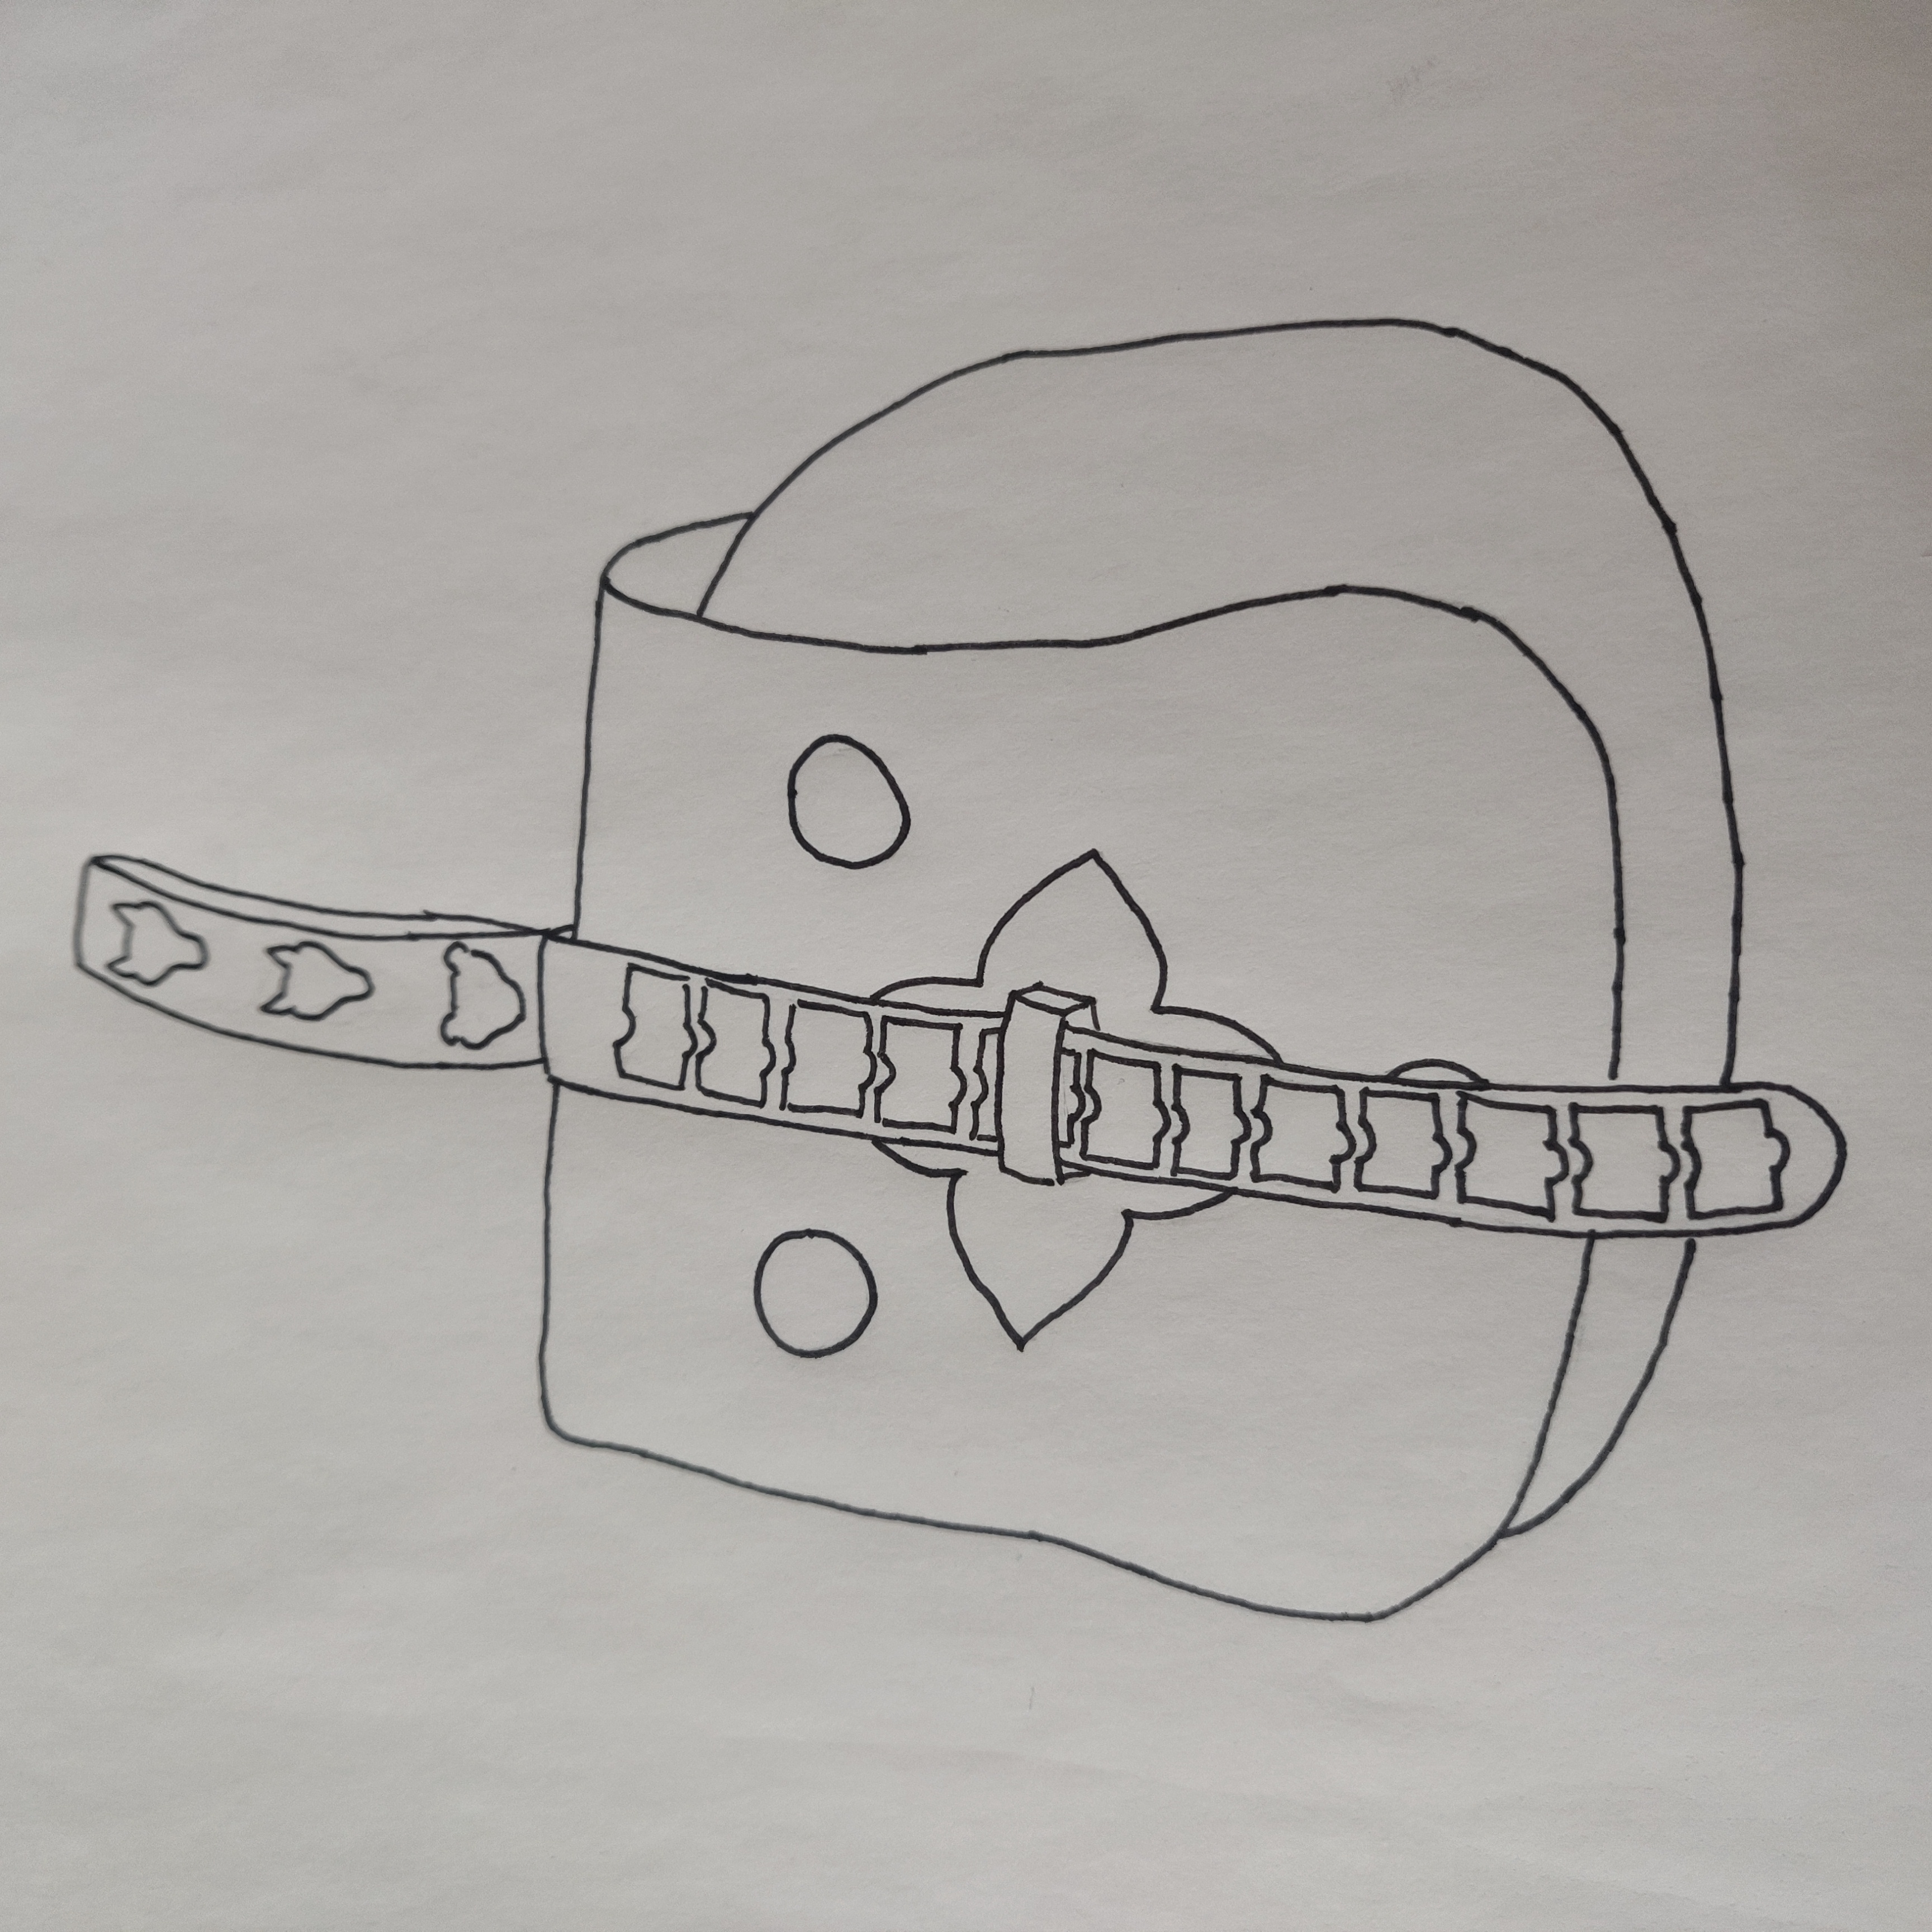
That begs the question of “what is to scale?” To answer that, I looked to the bag that already has many parallels to the BJ 904 bag - the tarsoly found in Rösta, in Ås, seen below.

I’m using this bag as reference not only because it has many other parallels to “my” bag, but also because we have a fair idea of its size due to the fittings along the edge of the lid. Using the scale in the picture above, I determined that the lid of the Rösta bag was estimated to be roughly 10.5x11.5cm, and so this is the new measurement of the bag I’m reconstructing. Having already created the lid based on my original measurements, I opted to not waste the leather and simply cut the new lid out from the old one.
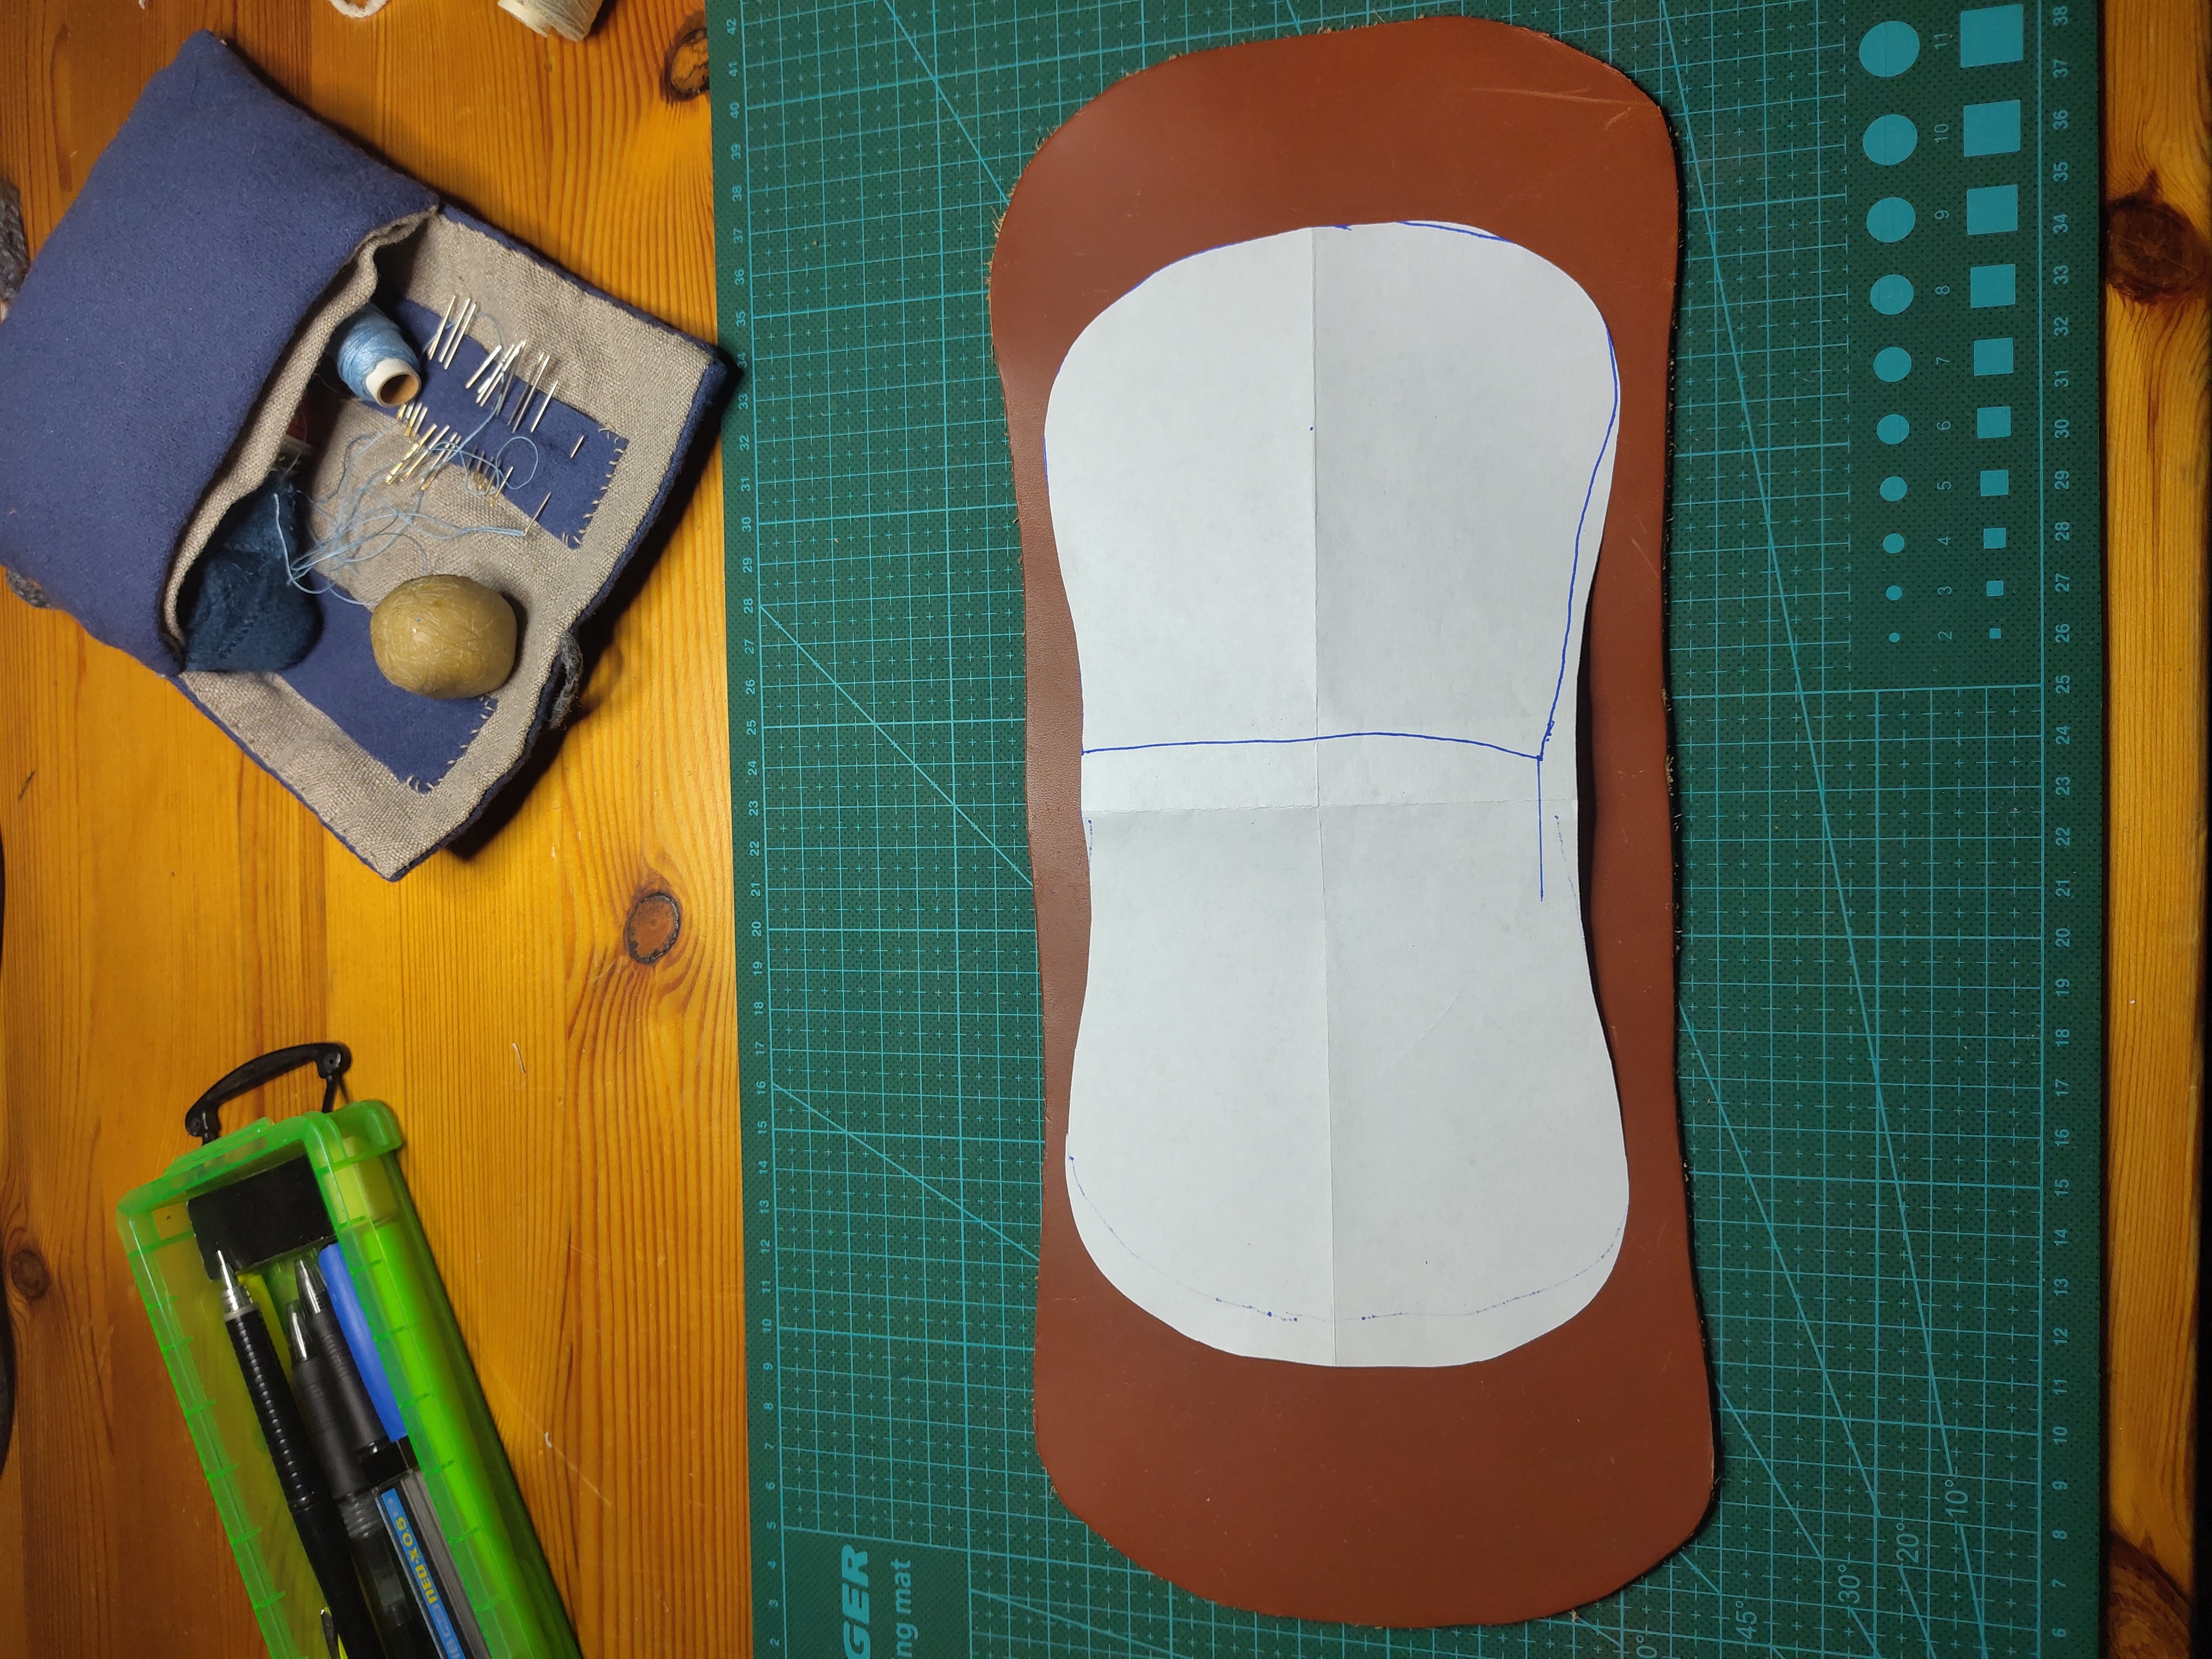
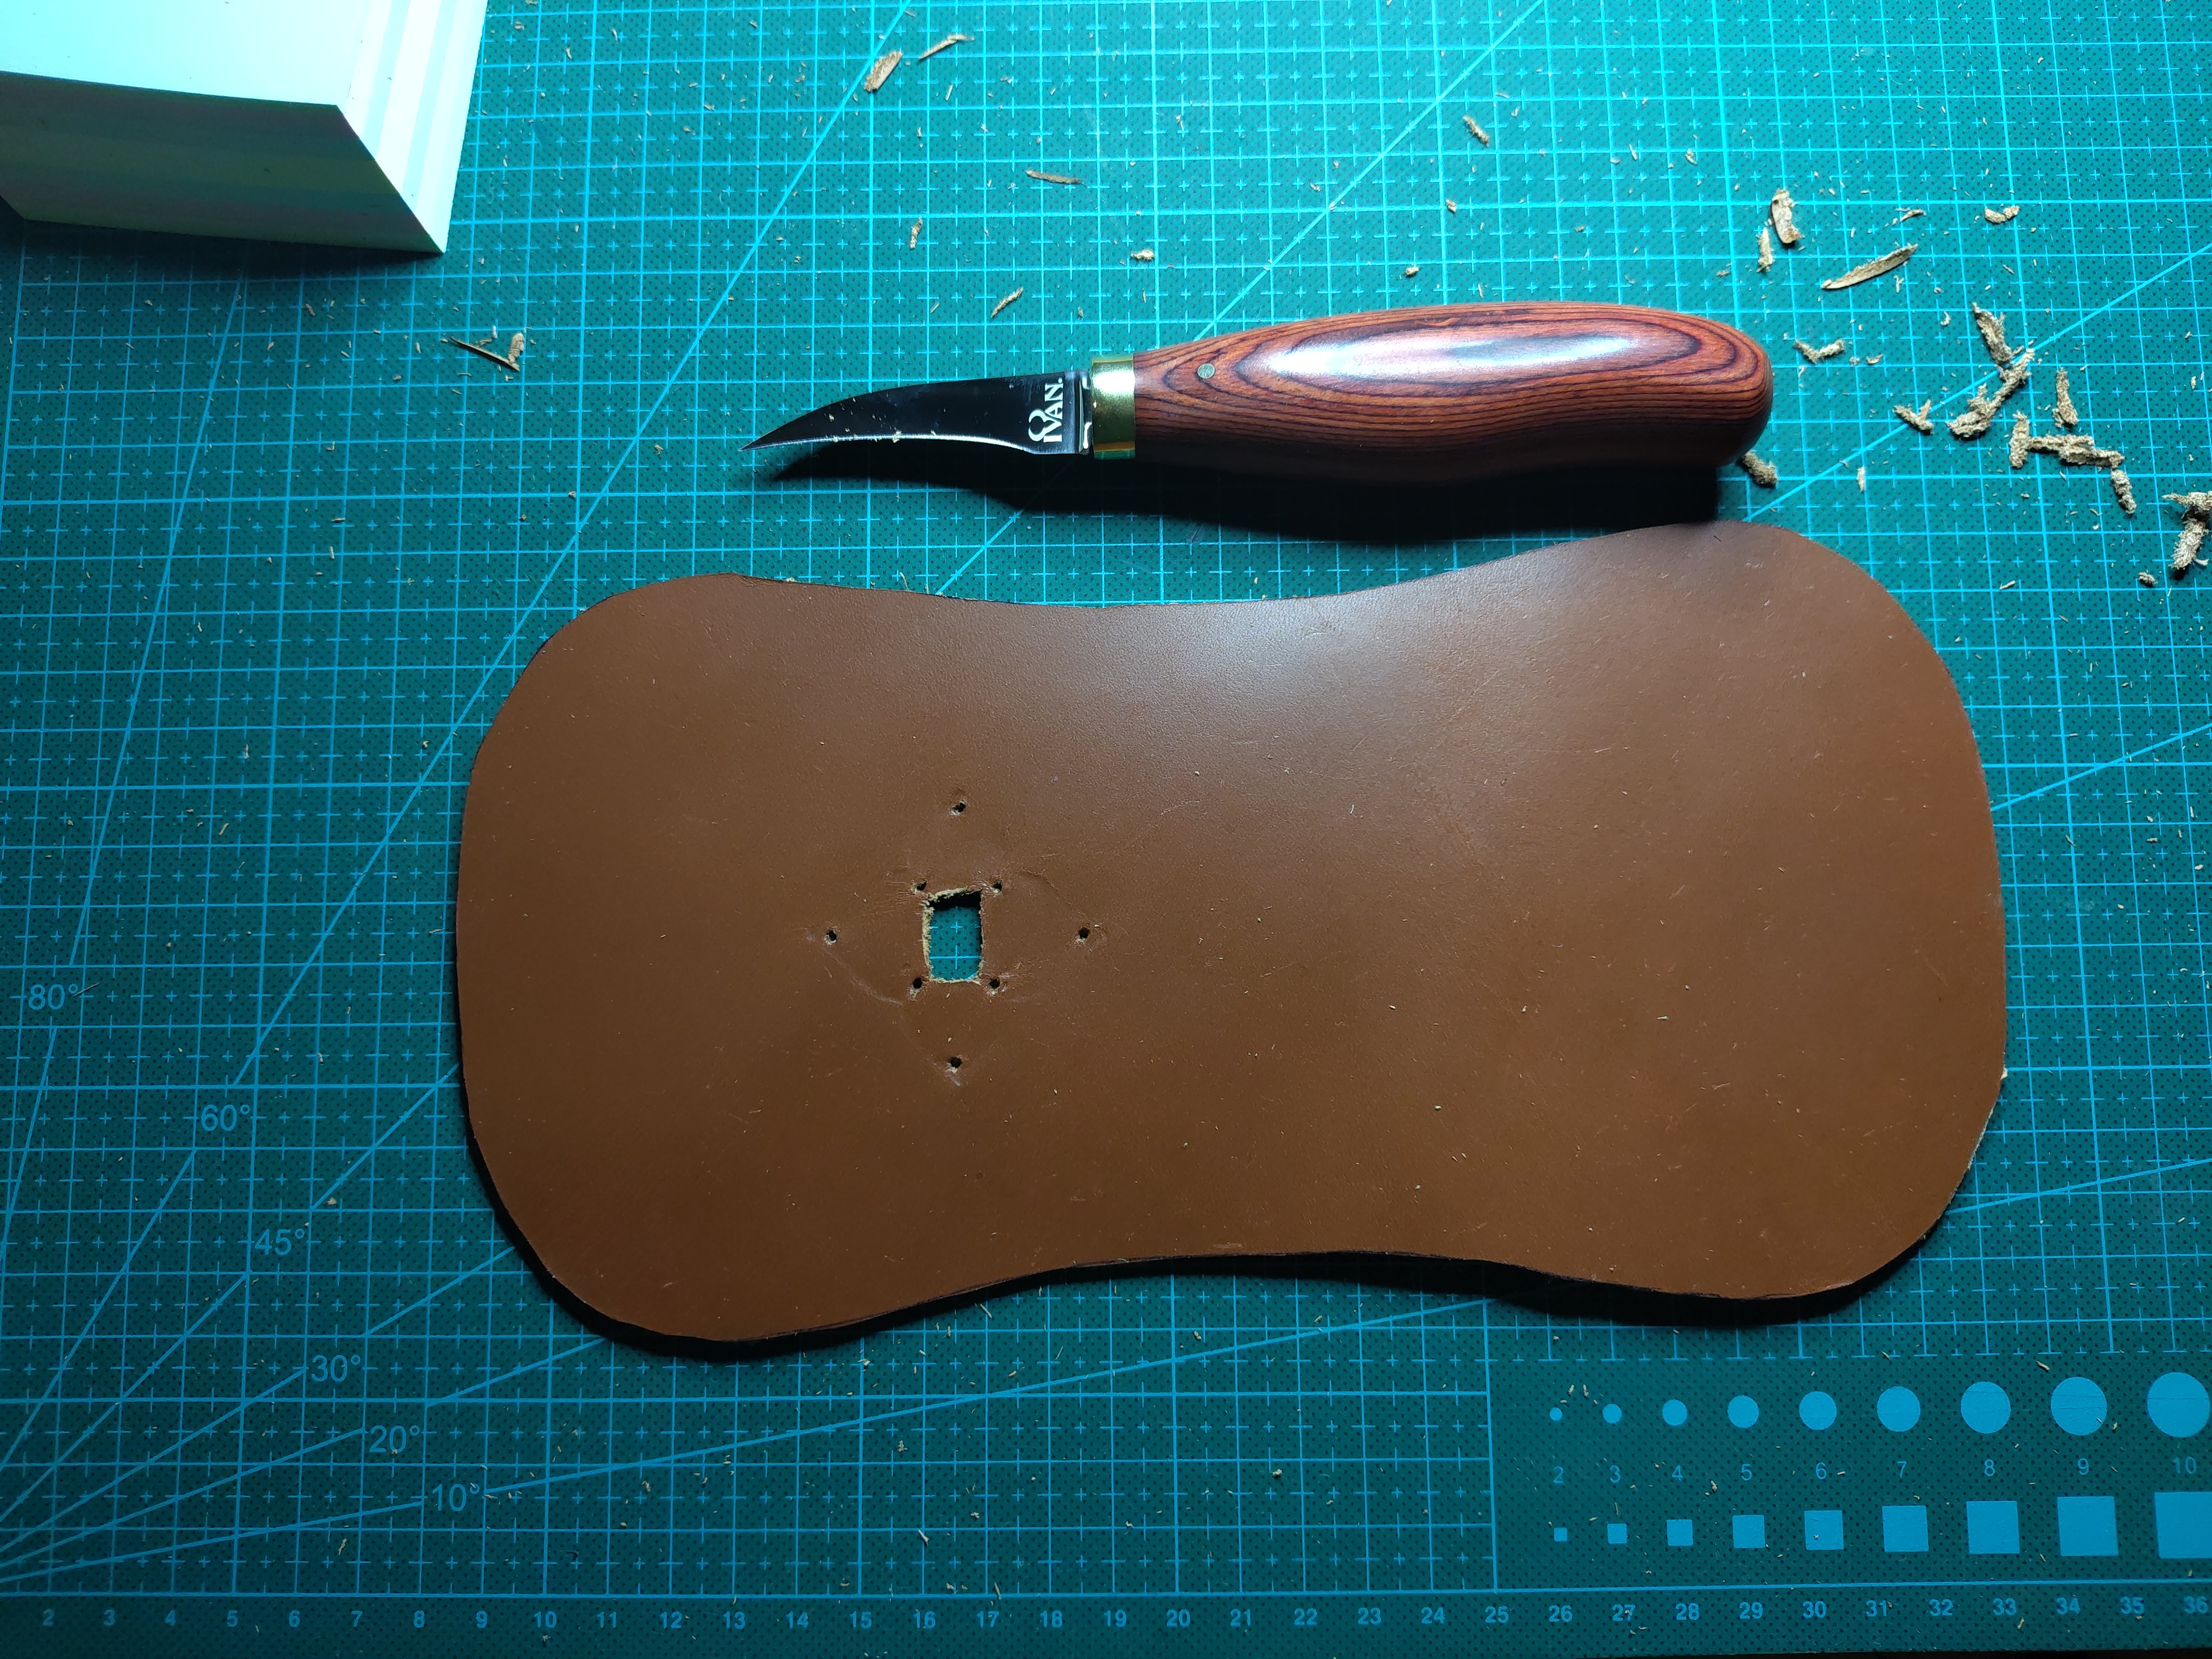
Unfortunately, there were some marks on the front from fitting some commercial fittings on the “old front”, so I opted to turn what used to be the font into the back of the new bag. I cut the new shape out with my new leather knife, which cut the leather like butter. Good tools truly do make crafts an absolute joy!
Construction
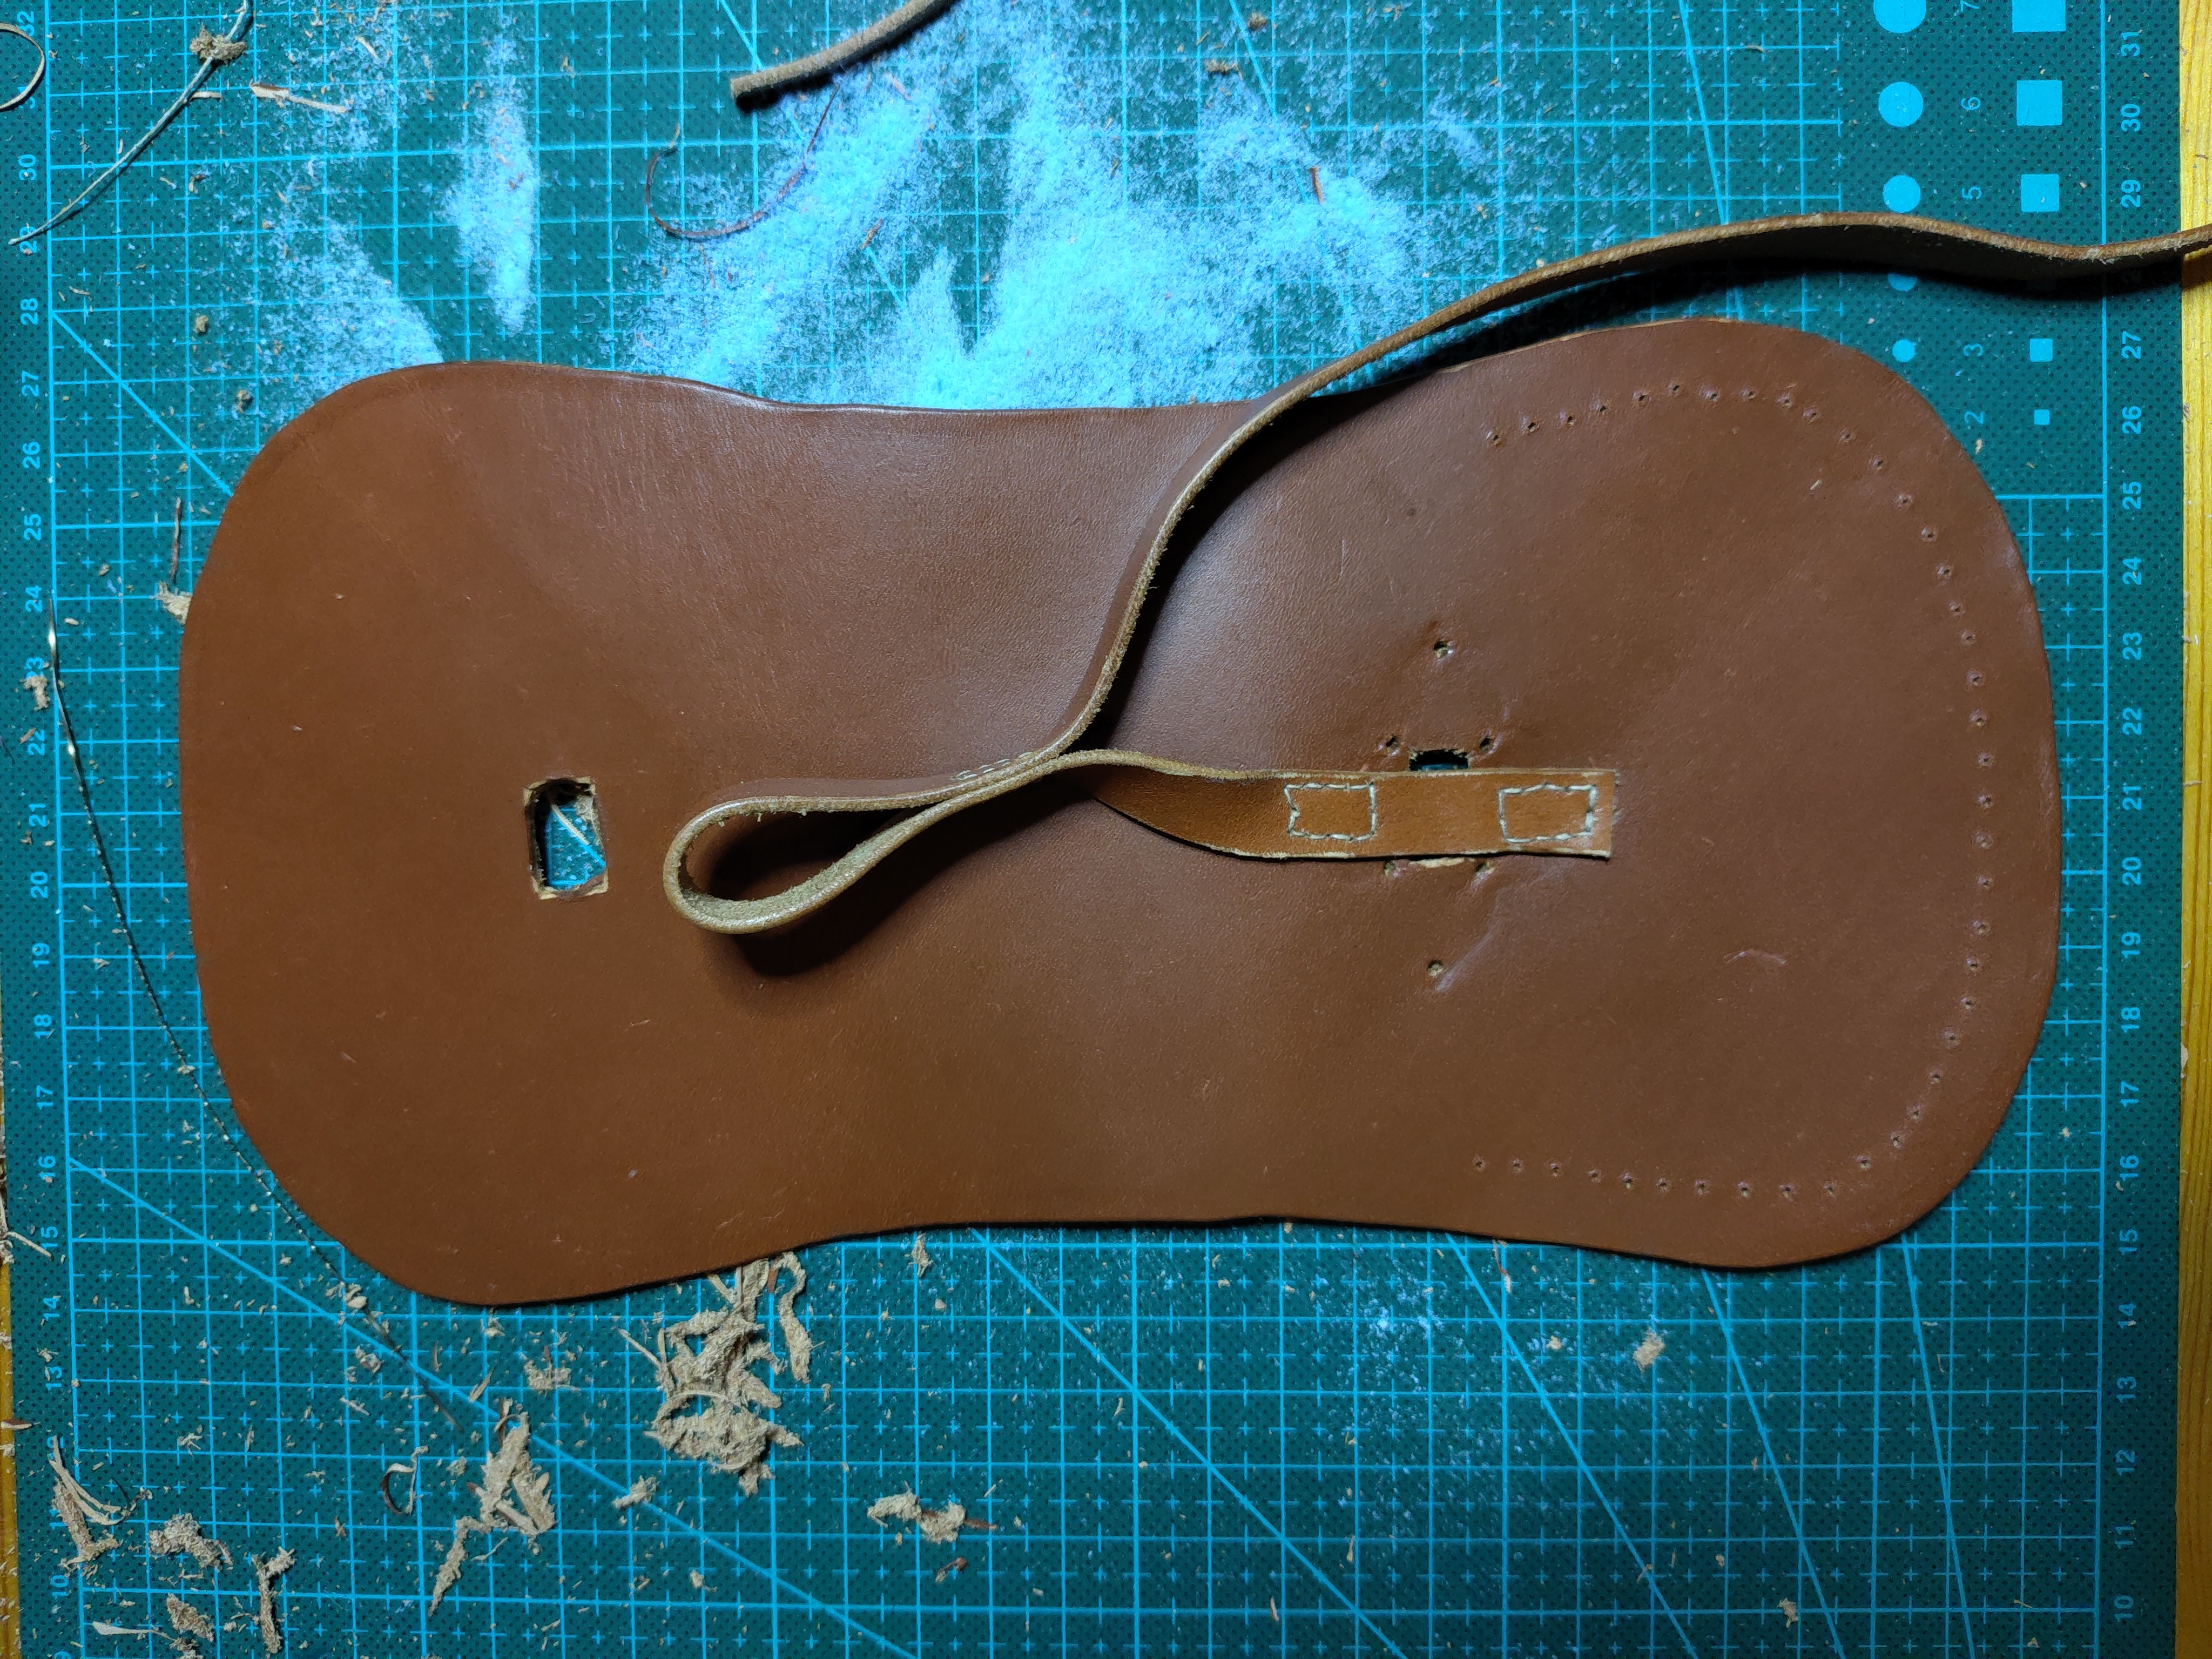
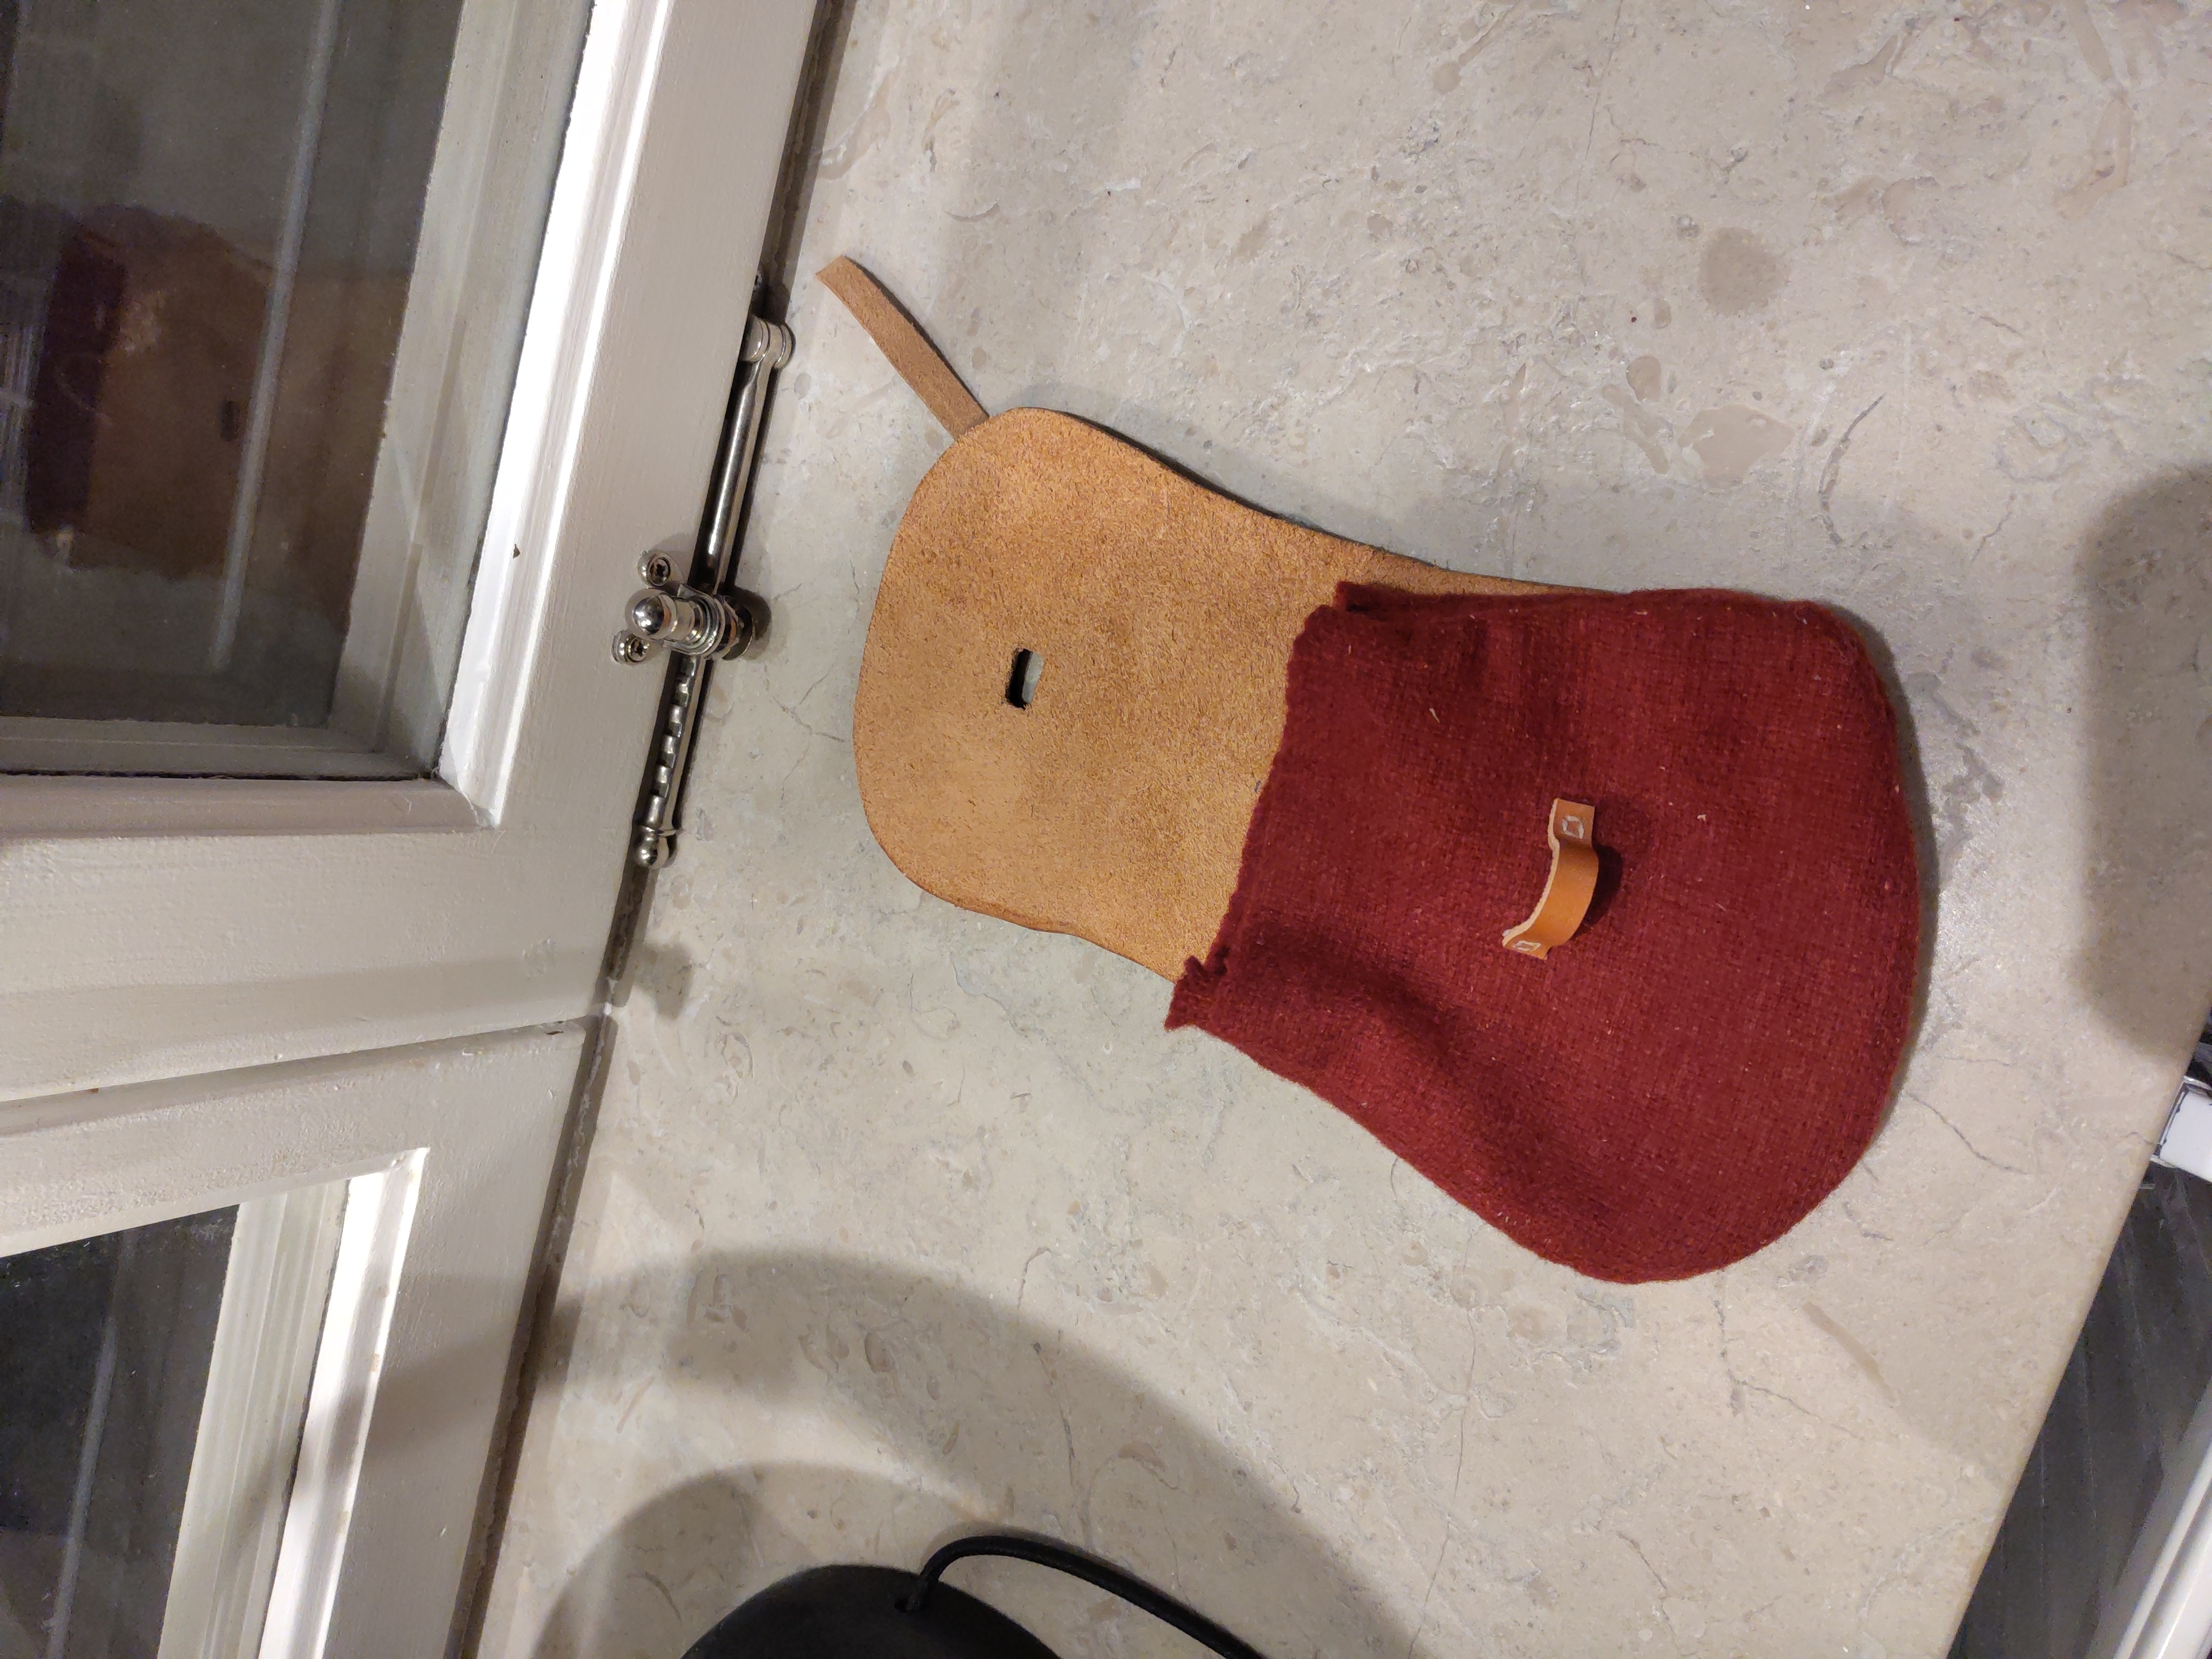
With the fabric dyed and the lid cut down to size, all that was left was constructing the bag. This means sewing the bag itself, adding a strap, burnishing the edges of the leather, and finally attaching the bag to the lid. The strap was cut from the same leather as the lid, and attached to the back of the bag. After that, I sewed a loop into the top of the strap, so I could hang the bag from a belt. I also made holes in the back of the lid to attach the fabric bag to.
Once that was done, I quickly sewed the fabric bag. It’s nothing fancy really, just two pieces of fabric with roughly the same shape as the “front” of the leather lid, with a strap of fabric in-between. The bag was sewed and attached to the leather on the ferry going to the Styringheim Lucia feast in 2024, and turned out quite well.
Conclusion
That’s it for the construction of the bag itself. All in all, I’m quite happy with how it turned out! There are definitely things I would improve, for instance the burnishing could be better. I think one of the main issues (apart from my lack of experience working with leather) is that I tried bevelling the leather with my leather knife, rather than with a bevelling tool, which made it quite uneven. Why didn’t I use a beveller? Well, I didn’t have one and I was too cheap to buy one (I am from Snålland, after all). If at some point I buy one and feel like reconstructing the bag, I will do so - I am viewing all parts except for the fittings as replaceable.
But for now, that’s all. In my next post of the series, I will file, polish and attach the fittings!
Until then!
References
Arbman, H. (1943). Birka: Untersuchungen und studien. 1, die gräber: Text. Vitterhets-, historie-och antikvitetsakad.
Geijer, A. (1938). Birka iii: Die textilfunde aus den gräbern. Almquist Wiksells Bokthyckeri.
Gräslund, A.-S. (1986). Birka ii:1 systematische analysen der graberfunde (G. Arwidsson, Ed.). Almqvist & Wiksell.